Mantua, New Jersey
Original Site:
September 2004
E-mail: usav8or@yahoo.com
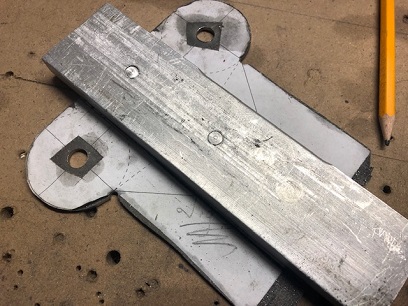
Making the mount...
July 15, 2016 Two more done...
one to go.
Glad I worked from home today... Needed to pick up a tank of oxygen for the welding set-up. Did that during lunch. And... that kept me running full steam ahead with the motor mounts.
Two hours... two more motor mounts welded up. These welds almost look as unpleasent as yesterdays... like WTH ??? Maybe it's the number seven torch... TOO MUCH heat ? So... I tried the number three which took some time but the welds look better. Wished that number five was putting out a nice flame... maybe I'll try cleaning the tip with the right size drill bit ???
Ready, but not pretty... to tack into position. Get these puppies tacked on and I can then figure out the position of the holes for the firewall. Get that... and I can then get started on the sheet metal work.
July 16, 2016 All done...
Time for a Pub run.
A morning session on the biplane... wanted to get the last motor mount welded up. Took about an hour... and it's finished.
Planned on another session but got a text from Mr. White and headed out on a pub tour, VIA bikes, instead. All said and done from my house back to my house... 19 miles. Met up with Chris about two miles from my place; Barnsboror Inn. From there we headed into the country to a placed called "Carolina Blues". Did a run to "The Landmark Inn" but didn't stop... passed the "PB Dinner" as well.
Our next brew stop was at "Kelly Green Brewery", a nice little brew-pub in the dry town of Pitman, NJ. After a few #99's there we headed to Chris' place for a few then a ride over to Bean's place in Glassboro. Met up with him and his wife; his cousin from Canada was there and his brother had stopped down from central Jersey. After a few brews and dinner... back through Pitman where Chris peeled off for his place and I for another 5 miles back to mine.
Temps were in the high 90's all day, but the brew kept us cooled off the entire ride.
July 18, 2016 It's on...
They're on.
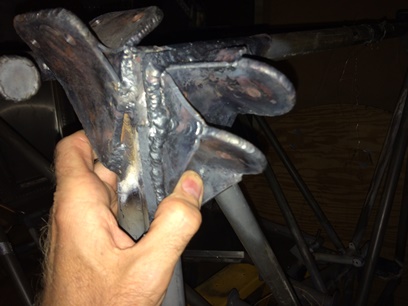
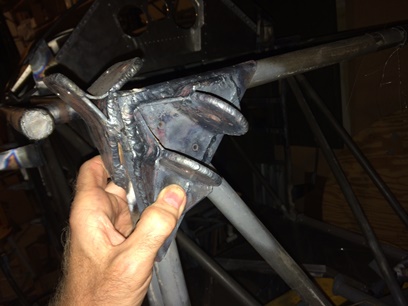
All welded up but I wasn't happy with the look on two little sections; one section of two fittings. So... I tried making them look nice. Didn't work. The more heat I put to them the more metal I added... didn't do a damn thing for them. Finally gave it up...
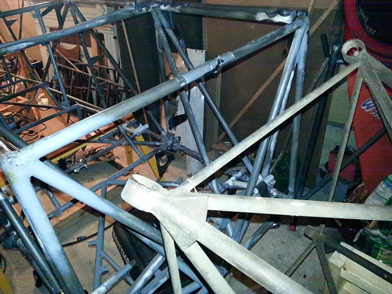
Tacked the first two on and after the other two cooled off enough I tacked those on as well NOW I can offically say... the motor mount fittings are on the fuselage; tacked, but on the fuselage...
If you've been following along, it's been a long road to travel getting these made and tacked onto the fuselage. Whereas must builders are welding on bushings to their fuselage, I was lucky enough to go on a year and a half search for the plans and then make the fittings. One heck of a lot of learning...
October 29, 2016 It's on...
They're on.
While I wait to make a few bends on those side formers (for attaching the sheet metal)... I'm keeping busy. Not just sitting around waiting for that to happen so that I can continue what I WAS doing.
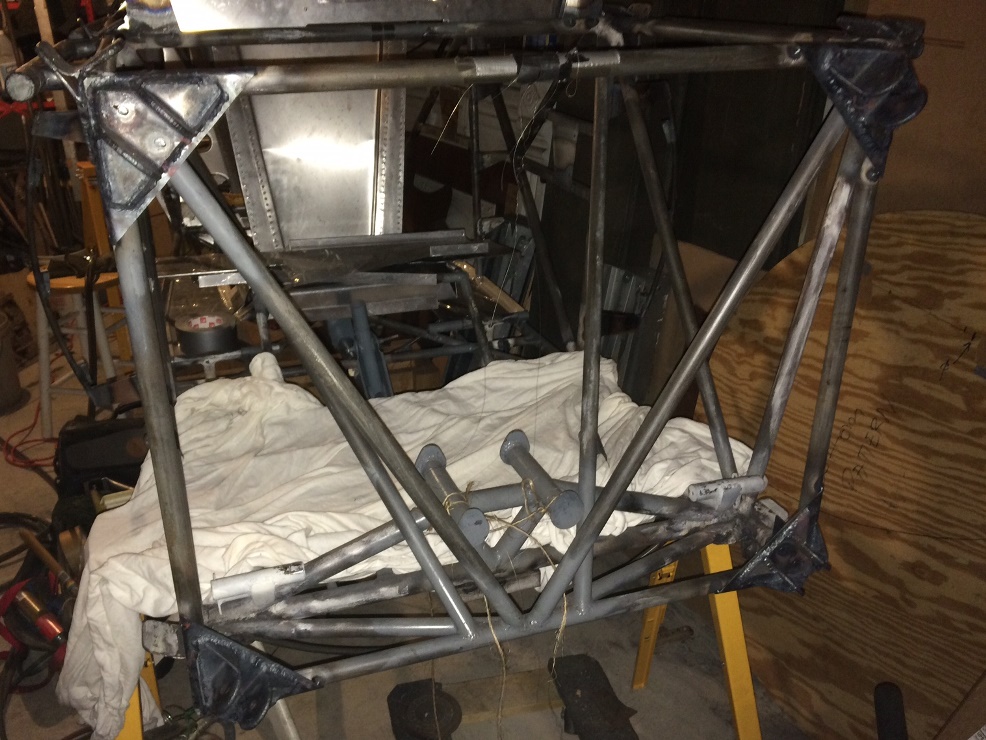
The motor mounts are tacked but not finished welded. Decided that I'd dive into that today. In a little over two hours I was able to weld six of the eight sides. Need to flip the fuselage to get at the remaining two.
December 21, 2016 Cutting...
Then the grinding...
Hello, Winter...
First day of winter; the shortest day of the year. Got some work done on the motor mount.
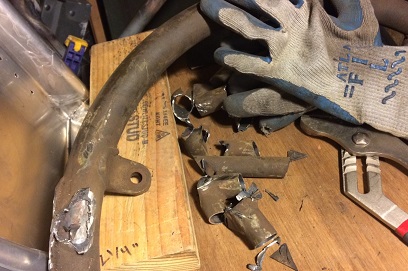
As written above, the motor mounts are, um, mounted/welded onto station zero-zero. The engine ring is freed from its original mounting tubes but the tubing left from the cut still needs to be removed. Spent over an hour tonight removing most of it using a cut-off wheel.
Next thing I need to do is grind off most of the remaining tubing then begin making the jig and then the tube structure for the new engine mount.
December 22, 2016 Grinding...
Then the filing...
More work on the engine ring. Needed to grind down the left-over tubing from when I took the cut-off wheel to it.
It's close to being ready for aligning, fitting up of tubes and welding... to make the motor mount. Looking back in a few notes I made... Dale has his 16.5inches from station 0-0. I belive Trevor's father has it at 15inches. I've got to find what Miki did. That'll be the closest thing for me to do... I think.
Looking for the bushings for the UC-78 motor mount brackets/fittings. Just emailed Terry Sullivan and asked. I just thought of posting this to a page on Facebook; "Antique Aircraft Parts Exchange".
December 23, 2016 Did the filing...
now some sanding...
It's taking a lot of work to get this engine ring to the point of being able to start building back up on it. I can only imagine some of the builders out there with airframes they purhased thinking they'll save some time, only to find out that there's a multitude of wrongs that need to be righted before they can really start moving forward. (whew!)
If you've been following along you can see that I've been working on this engine ring for several days; back about a year ago I cut the ring off the rest of the structure, just recently I used a cut-off tool to cut most of that excess tubing off, I then ground most of what was left from using the cut-off tool, and just now I used a file to get it real close to the shape of the ring itself. Tomorrow I'll be sanding those areas smooth.
Yesterday it was a steady hour of working the grinding tool. Today it was a little over an hour of filing filing and more filing. I'm getting there...
Side note: Before I can start building the mount I need to buy the bushings so that I can align the mounting tubes correctly. I've been busy using several of the social media in addition to the old email mething. I'll let you know what I find.
December 26, 2016 The search for...
the elusive motor mount bushing.
Spent many an hour yesterday AND today trying to find the bushings for the UC-78/Radial Skybolt motor mount.
Still getting good suggestions from the biplane forum. Ben had a good lead for Air Repair; he actually restored a UC-78 and got those rubber mounts from there. Got hold of Pete from Air Repair and he said "they were probably the last ones we had that we sold to Ben, probably won't be restocking them again." Thanks...
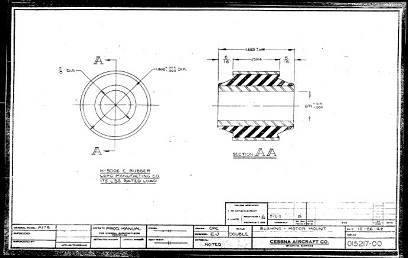
A lead from Kris from the forum... try Radial Engines in OK. He said he was there a few weeks ago and could have sworn he saw a box of them on the counter. When I tracked down the blue print and posted in that thread he KNOWS that those were the rubber bushing he saw. Said that I had emailed them a few days ago... and waiting on a reply.
December 27-28, 2016 JACKPOT !!!...
Back and forth with Eric from Radial Engines in OK.
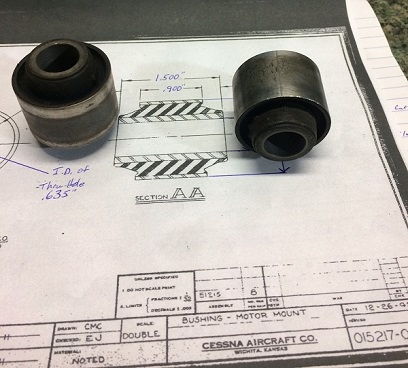
Turns out that the box that they had were for the UC-78 Jake mount... but different than the drawings from the micro film, pdf drawings of the UC-78. Somewhere along the lines it changed... maybe there is an update in the file and I just didn't look past the initial find.
Anyways, I asked Eric if he could confirm with Caleb, and also send me over a photo and the dims. I received both today, the 28th of December. Waiting to hear the final costs on them.
July 28 - Aug 15, 2020 The art of...
reverse engineering.
Wow. WOW!
It's been a heck of a month... a lot of head scratching and not much "hand-on" work on Big Ass Bird! I like writing about the build... but it would be boring reading the same crap over and over again.
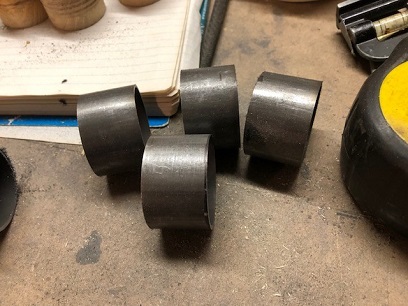
Back on the engine mount. I was going to originally use the four tubes that would hold the rubber bushings... Then decided against it. A good thing too! When I measured them... they were all 1 3/8inch except for the one, which had a 1 1/2inch ID. The 1 1/2inch ID is what I need for the rubber bushings. That's pretty frickin' odd that three were one size and one was another size. And... the three were incorrect! That's the military for you? A change of plans 3/4 of the way through producing this engine mount?
So, I needed to figure out the size tubing I needed to order to make all four. I also needed to figure out the thickness of the metal strapping that I would be shaping and welding to those tubes to secure them to the framework of the engine mount tubing.
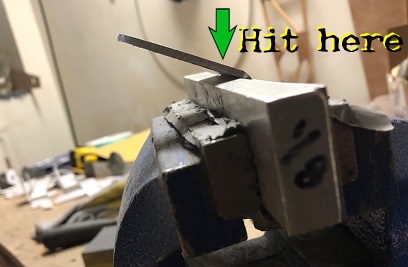
Survey Says!: 1 5/8inch x .058 tubing allowing for .009 clearance, and .070 thickness for the strapping. That strapping will take a little heating and hitting to get it to form around the tubing.
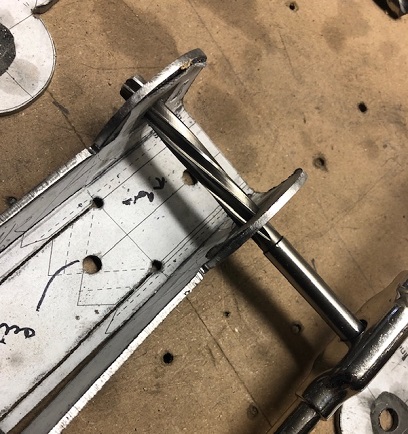
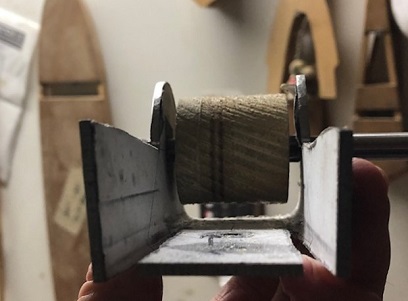
Looking at the rear of the engine case again yesterday... I saw that there are different engine mounts... only three. These three are bolted into the same bolt pattern that is on the engine ring that I have. Which... I'm thinking now... I should make a mock-up of the mount I'll be making to make sure that it will clear all that accessories that are on the back of the engine instead of pressig on regardless and hoping that it will all work out
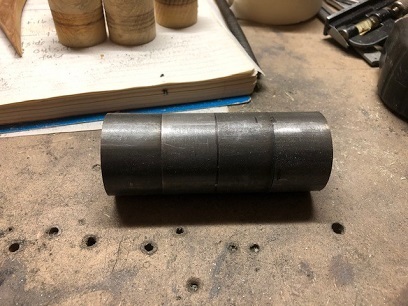
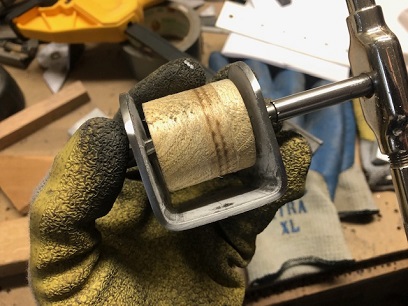
Ordered the tubing the other day and spent three hours cutting it into four 1 inch pieces. My micro lathe isn't large enough to chuck the tubing into it to square them up so I needed to do it on my circular sander. First three pieces... easy peasy. The forth and last piece... what a pain in the ass squaring it up, for some reason.
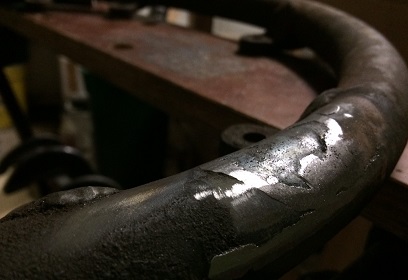
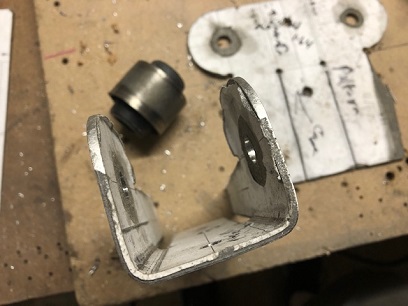
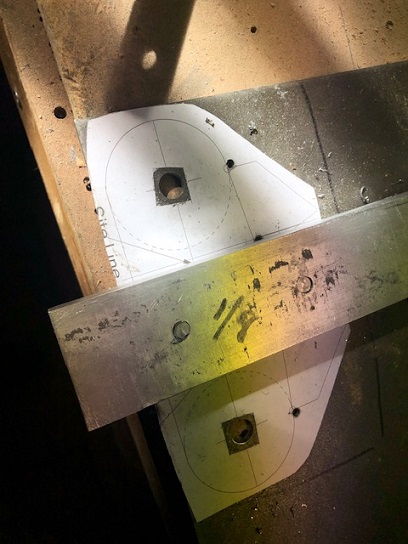
Old mount... needed reverse engineering.
Next thing... to make the wood engine mount test piece? That... or take a few measurements...
September 9, 2020 (screeching brakes!!!)
Wait a minute!
Wow. WOW!
DAMN!
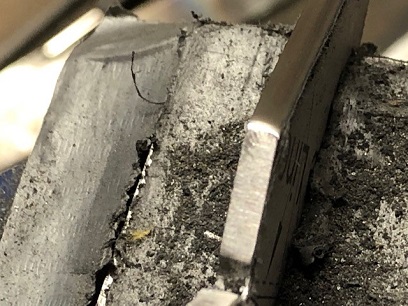
Well, at first things were going smooth. Drilling out the pseudo rubber bushings to be used in locating the bushings for the motor mount. Went to test them out on the motor mount bushings and discovered that the 3/8inch holes were only 1/4inch. DAMN! And since then it's been a hell of a month for building the biplane... To drill/ream them out when they are welded on the biplane from a 1/4inch... impossible.
Did the first one, and apparently what I thought were squared up, opposite holes, weren't. One down. Tried a second one... and the drill practically JUMPED out of my hands! Screwing up the hole. Two down... and I'm not going to go down this road any further. Decision made... just a matter of implementing it!
It took about a week of agonzing before I ordered up the .100 and .071 4130 material. Just thinking of the work ahead of me was painful. Wow... I never thought I'd be making four-piece motor mount brackets again. Never think never...
My lack of correspondence... I haven't written anything up until now because I've written about this all before; the entire process of making these multi-piece engine mount brackets. Wow! WOW!
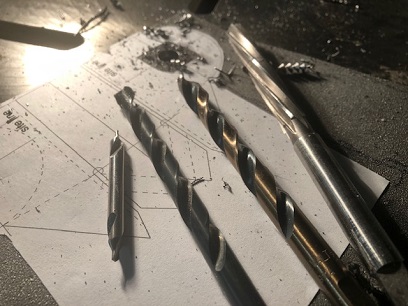
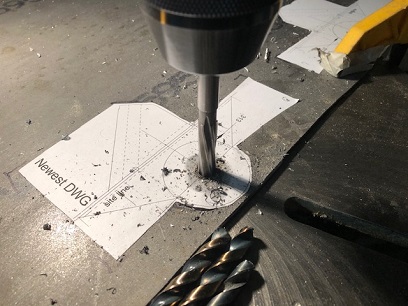
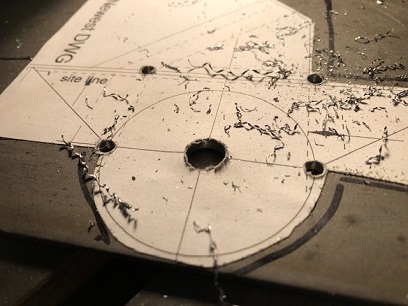
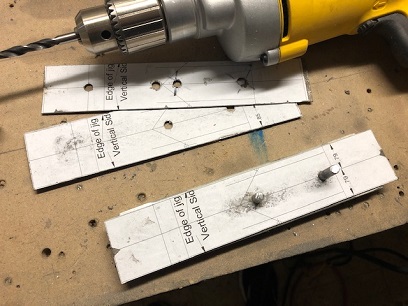
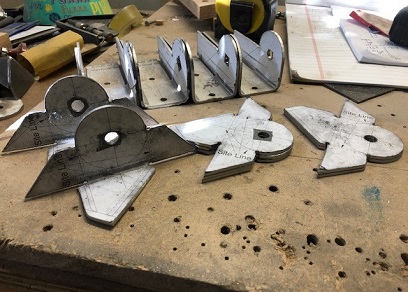
I'll post a few new photos of my brackets, maybe show the process of how I've drilled, reamed, rough cut, grind, file, and finally weld these puppies up. In re-making these pieces I've realized that each of the 3/8inch holes takes me 12 - 15 minutes to make; starting with the center bit, then drilling with a 9/64inch bit, then with an 11/32inch bit, then hand turning (while the reamer is chucked in the drill press) the reamer to ream a 3/8inch hole. I need to make 12 of those holes, plus a multitude of smaller holes. It's all good... it has to be, right!
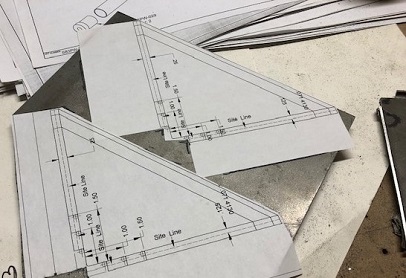
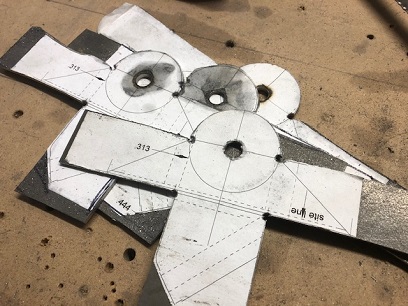
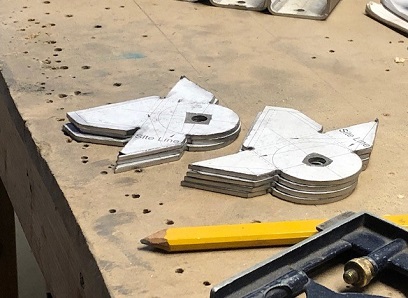
A few photos of the mounting plates:
Some of the other sixteen pieces that needed to be drilled, reamed, cut, etc.
Centering bit, 9/64" drill bit, 11/32" drill bit
and reamer.
December 23, 2020 (easing off the brakes)
Ready to start this thing up again!
Wow. WOW!
DAMN!
It hasn't changed... me hitting a HUGE wall and then taking forever to get back on building BIG ASS BIRD!
I'm not quite sure why. Maybe it's the "blow" to my forward momentum... ? Maybe it's needing to think it all the way through again to figure out the best way to achive the desired results without having another set back? It's not like I haven't been "working" on it. I just haven't put any actual time cutting, drilling, filing, or banging over a piece of metal.
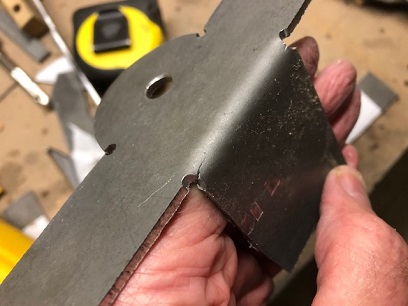
With all that said, I've been working on it very little since September 9th. I finally came up with a game plan... the best solution for making the ears on the center piece, of the three-piece bracket, squared.
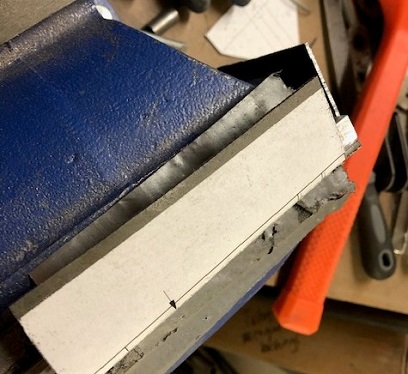
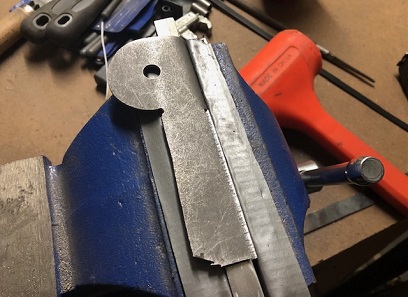
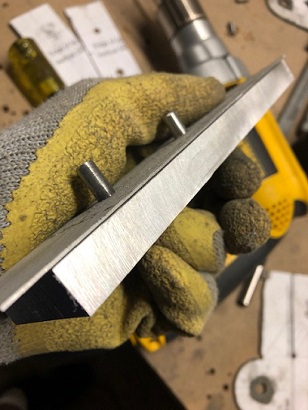
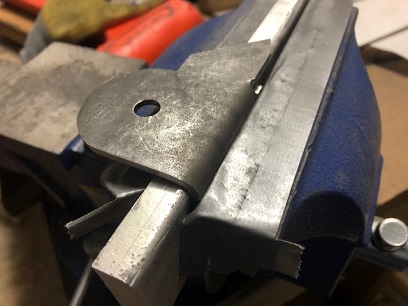
Made a simple jig out of a chunk of aluminum, rounded the corners with 1/8inch readius and will be using it for a fixed bending block by securing the piece in the jig with 1/4inch pins that will hold it centered on the bending jig.
The first test piece made... was a success in keeping things square, BUT, the bend of the .100 metal isn't as close to the bend on the jig as it would have been if it was made mechanically... so, I need to adjust the width of the jig. I'll be cutting it down 1/8inch. I'm about ready to do that now.
Took a little while to make a jig to cut down the jig. I used a piece of .032 4130... drilled the pin holes... then pasted and cut out the piece. Secured it to the existing bending block and started filing it down. Said "crap!" this is taking forever... and it may not be as square as I want it. So I took it over to the sanding wheel and spent about 15 minutes sanding down both sides. I then clamped it on the table and routed the 1/8inch bends on two of the edges. It's now ready to Report For Duty!
A few photos from the process of making the first one too wide... and the second one being "just right."
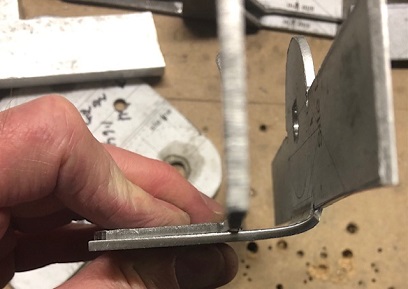
Original bending block ready to go to work!
Close... but not as close as doing mechanically.
Nice...
Blanks (jigs) to cut down the width of the bending block.
Sanded down edges.
Test piece from updated bending block.
December 31 - January
1, 2021 It's time!
to acknowledge and release.
Wow. WOW!
DAMN! DAMN!!
Feeling good about all this re-doing of the brackets. Not
sure why... why the heck should I feel good about re-doing
all of that work, a repeat of all those hours? The learning?
Learning of what? To make sure that the 1/4inch now is actually
a 3/8inch hole, or maybe understanding how to enlarge those
1/4inch holes to 3/8inch holes? Or...??? I'll get back to you on that...
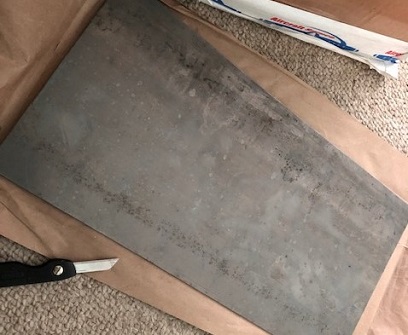
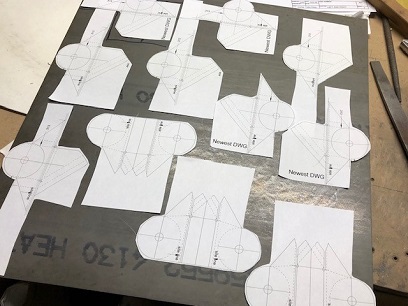
More work on the parts and pieces of the brackets.. The 23rd I glued up and drilled the holes for the 1/8inch relief holes in the new blanks. The new year I started off by drilling the 3/8inch holes in the blanks... then cutting out the shapes for the 3-piece brackets.
All four parts have been cut out of the single sheet of 4130 .100 metal. I've ground down the edges close to the line so that I can now file them a bit smoother. No need to sand these pieces along their edges because I will be welding them. Sure, they'd look pretty before the weld, but a waste of time if I'm only going to be welding over them... melding the two sides with one nice stack of dimes.
I've written this before, and it has been the entire back-thought of my relationship with Big Ass Bird: It is VERY mindful, working on the biplane. VERY grounding working with the metal and the wood. There is just something so primal in working with the metal... a rawness about it. Maybe I did something with metal in one of my past lives. I feel so connected with the process of building the biplane... a creation, a birthing of thought.
A few photos from the past session:
Test of new sized bending jig.
Answering my above statement "I'll get back to you on that...": Maybe some of that learning... is more learning of patience?
The entire build keeps bringing me back to that lesson. And I
know I understand, at least in my mind, the lesson that the World is teaching
me. Time to allow it to pass through and get onto other things... sort of like Meditation, not to repress thoughts, but to acknowledge them and allow them to pass through so that you can be at peace again, until the next thought appears... acknowledge and release acknowledge and release acknowledge and release.
January 4 - February 22, 2021 In and out of...
bad habits.
As with the rest of the parts and pieces of Big Ass Bird... I'm learning over and over again to embrace each and every step, even if that means stepping back one step or two.
I love buildling this biplane... I WANNA FLY TOO! Still LOTS to do...
Still working at re-making the motor mount brackets. I'm getting there!
I'm not sure what makes me think that I can go back to the old way (aka, wrong way) of doing something... but I still do it occasionally. For instance... the bend of the brackets. I'm bending .100 inch 4130 metal. If I wack the top portion of the piece I'm bending over, it will round the base leg of the piece. But... I'll slip into that thinking of "it's easier to bend a piece of metal that thick when you hit it closer to the top." WRONG! I messed up two pieces out of 12 because of that. And then there was the one blank that cracked at one of the relief holes because of ? I'm thinking there might have been a stress crack on the inside of the piece from where the bandsaw nicked it? It was the first time that something like that happened.
So, I've been working on getting these bracket blanks drilled,
rough cut, filed, bent, and sanded... and the task of welding each set of three pieces together to form four motor mount brackets. Then... grinding off the four old brackets and welding on
these four new ones.
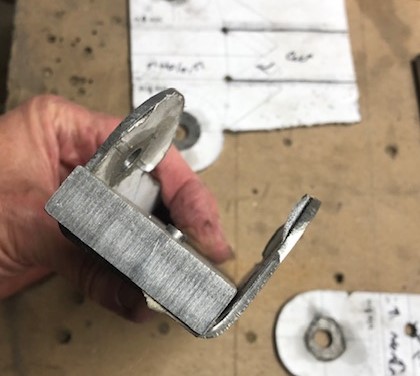
What you don't want to do...
Good bend - left, bad bend - right
The cracks!
Comparing bends: good bend on top, bad bend on bottom
February 23 - March 26, 2021 Re-dos...
of the re-dos
The learning never stops... and that's a good thing!
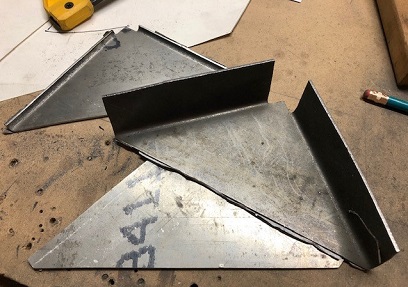
I should have stuck with the long arms on the "wings". Made a decision NOT too... and I'm getting the warped-speed look to the area where there isn't any "meat"; where the angle of the wing meets the back of the piece. I knew this from before, but thought that I could get around it... yeah, right.
The bad thing is that I cut out all of the side pieces with the side arms without the "meat" on them. So... back to a slight re-design and test it firt. Instead of having the wing cut out as a rectangle and then needing to cut it at an angle, I left 1/2inch of meat on the area that is angled near the back of the piece. This was enough to keep that area from twisting. (a little Chubby Checker... singing the twist comes to mind). ah... most of you probably aren't following me on this but that's okay. I may create an image comparing the old to new.
With the concept tested (before cutting all eight out) I planned the next few sessions on Big Ass Bird III to get all these cut and bent. I'm close... but not there yet. One is fully bent, two have the first bend on them. The rest are flat as a door.
With any luck, I'll be welding these all together not far from now.
A few images for your enjoyment.
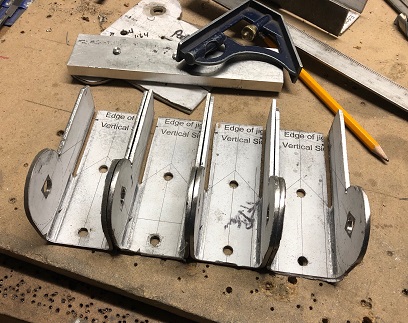
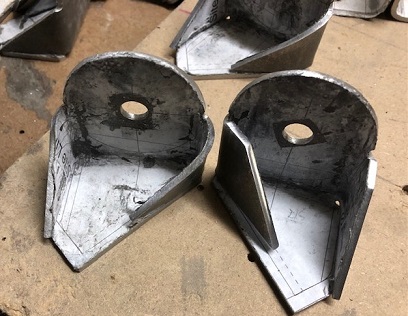
Bad bends on the left bracket (see the curve). Good bends on the right bracket. I added some meat where the wing meets the back of the bracket.
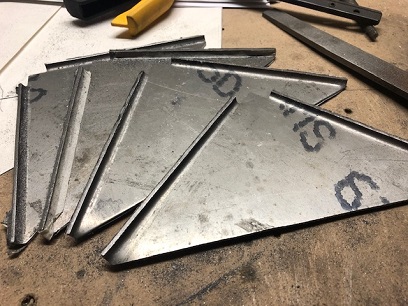
Brackets ready for bending. All un-welded edges sanded to 400 grit.
You can see the difference between 220 grit (on the small edge), and 400 grit on the long edge towards the back of the image.
Just a few more bends and I can weld these all together. Image shows everything to make four motor mount brackets for a 300hp Jake!
March 27 - April 10, 2021 Here we go...
again!
Ha!
I just can't leave things alone... well, actually, I've learned that trying to fix things just adds hours... so, just start over again with the new end result in mind. And... so it is with the center pieces on these motor mounts.
I did a beautiful job in bending these cnter pieces... the bottoms of them. I left the arms on these long so that I could bend them without putting a twist in the upper part of the arm; bend then cut off the excess. Well, after working the side pieces I figured out I don't need that much length on them because you're hitting at the base of the bend not the top. If you hit it at the top of the piece your bend isn't the tight radius it needs to be... basically the radius of the bend is all over the place.
With that information in hand, I added approximately 1/2inch to the length of the arm before cutting it at an angle. One half inch of material is enough to keep the arm from twisting.
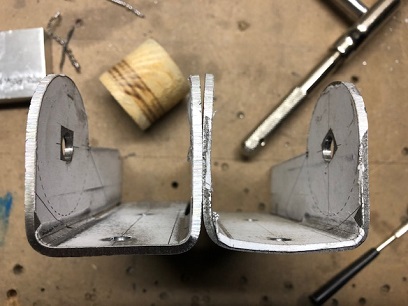
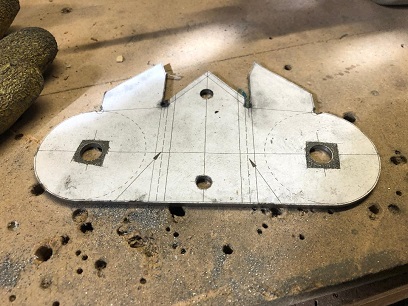
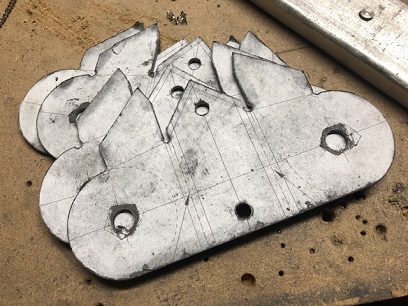
I made the marks on the existing center pieces... and it's been a fight with cutting them down ever since. Sure... they can be cut down by hand, they just don't look good, not even good enough... and we know "good enough isn't good enough." So the hard decision was made to make all new center sections with the modified design... and cut it all before bending. Oh yeah... I made the modification to the base of it so that the bend, when made, would allow the arms to fall over top of the base for a better weld joint.
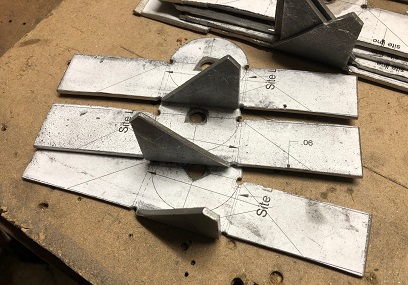
One... drilled and cut to shape. Still need to file, sand, and bend. Then... three more...
New shape
Old shape
Not much of a difference you say... ah, you are wrong my friend.
There is 1/2 inch added to the length of the arm before the angle now... .100 added to the sides of the center "point", and it is fully cut out. No need for cutting after bending.
April 12-17, 2021 Well worth the...
expeience
Hey YO! Yeah, feeling good about these new motor mounts.
With all this knowledge of how to bend these pieces... it's not so much of a crap shoot on the outcome for the bends. It's just a matter of me taking the time to do them right. Much learning in them thar hours leading up to these brackets.
Spent these past few days drilling, cutting out, filing and bending all four center pieces for the motor mounts. I've gone through an ass-load of .100 4130 to get to this point. I can't imagine the amount of weight from all the sheets of metal I've gone through... all the waste from ALL those "practice" pieces leading up to the ones I have now. Striving for my "Excellence"!