Mantua, New Jersey
Original Site:
September 2004
E-mail: usav8or@yahoo.com
Making the mount...
October 11 - 16, 2021 Back to...
mental, er metal working.
The Fall is here and it's feeling GOOOOOD! Nice cool temps... my kind of weather.
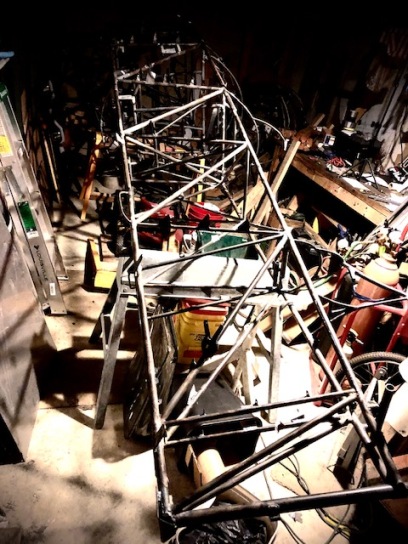
Working steady on Big Ass Bird... All this welding is finally paying off! I'm close to completing the main welds on the engine mount. A few left to do after this past week. I still need to cut and fit the four, I'll call them spacer bars, tubes that keep the rear section of the engine mount supported at the correct distance. (That's all kind of wordy, but the best I can do at the moment.)
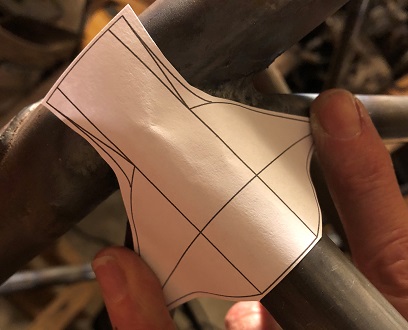
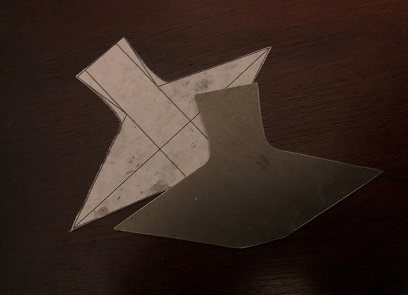
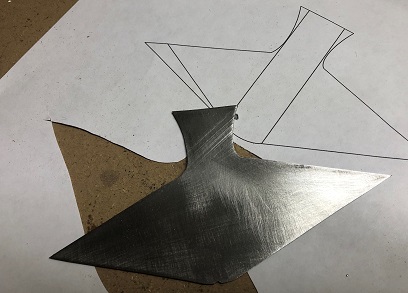
With all of this getting close to being completed I've started thinking again about the reinforcing plates for the mount. There will be a total of eight; four at the rear supporting all four clusters, and four at the front supporting all four of those clusters. They'll be very similar to what I saw on the existing mount. I'll be using .040 4130 metal as the material. I took a few sheets of scrap paper... held them up to the clusters, made a few marks, squared things up... I'll use my trusty Delta CAD program to draw them up and if need be make a few adjustments for the final patterns. Then it's back to metal working... again! (which got me to thinking... mental work! This project is MUCH MORE than fabricating pieces that will eventually end up as a biplane, the larger challenge is the mental part of the project. Whether it's starting over on a piece that has taken you many hours to work on and towards the end of that project... you messed it up, or just pushing past complacency to go out and work on it after a looooong day... it's all a part of your plan.)
On side... ready for more welding.
October 17 - November 5, 2021 Stepping...
into the unknown.
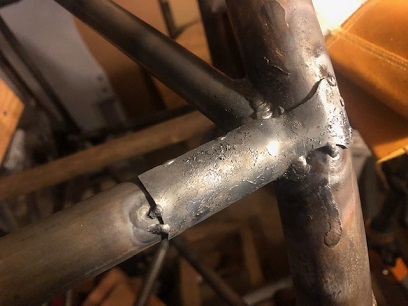
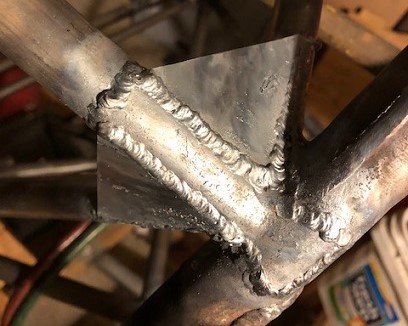
Work progresses on the engine mount. It's taking longer than most weld jobs of this size because I heat an area and then only weld a small part of the cluster weld... then move on to the next then the next then the next... finally back around to the first in the series of weld clusters. Each cluster is taking me at least four heating and partial weld sessions. That's a lot of time for just heating the cluster area.
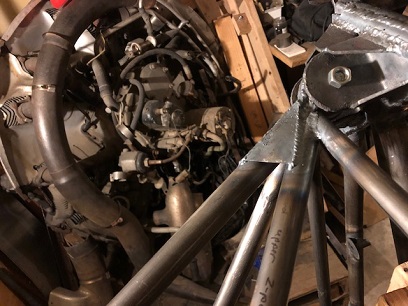
I'm having an issue when flipping the fuselage. I have .032 bent with locknuts for installing the aluminum skins running along the longerons in the forward section of the fuselage. It's difficult to juggle holding the fuselage off of the sawhorse and placing a piece of 2x4 wood to keep the fuselage from resting on the bent .032 metal. I have an existing rotisserie that I made for the fuselage that was connected to the engine mount mounts... that ain't gonna work since I have the engine mount now mounted to it. I spent a few days creating a new rotisserie jig for spinning the fuselage. Not pretty but works great! The two days I spent on it will save me hours of fighting with trying to flip the fuselage and juggling that and the blocks for holding it up, or possibly damaging those bent pieces with the locknuts.
The new rotisserie is working like a champ. The rear of the fuselage isn't mounted to anything, just resting on a sawhorse. To flip, I lift the tail-end of the fuselage, turn to either side or flip so that it's upside down, then rest it back on the sawhorse. I can't get the various degree angles that you can if both the front and back are mounted to a rotisserie jig... but works great for what I am needing it for at the moment.
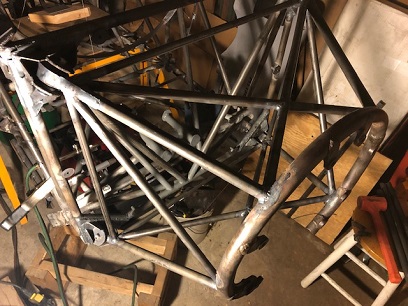
With the last weld run... I took that step into the unknown... did the mount move with all that heating and cooling? and if so... how much? A few quick ballpark measurements before I left the fuselage that night but wasn't happy with just ballparking it... because I wasn't taking the measurements from the same points. The next day... I took a few more precise measurements... it looks like the engine mount moved .0625 of an inch, or about 1/16th of an inch. I'm not sure if I could have done that any better than I did. I'm EXTREMLY!!! happy with that outcome! YES!
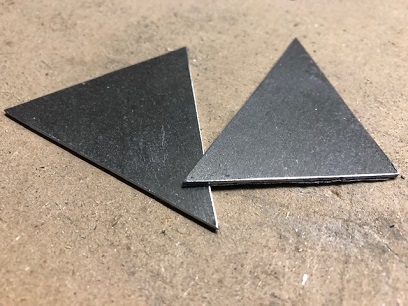
Now to begin making those reinforcing straps... I've created and cut out two of the eight so far. Modified those two to be welded on in three pieces instead of one. And I have partially welded on those first two pieces...
November 6 - 21, 2021 It took some time, but...
they're back.
It took some time, but the birds are finally back feeding at the birdfeeder in the back yard. Love seeing birds fly to and from it... But wait, I'm not on here to write about birdfeeders am I? Or am I?
BIG ASS BIRD... You got it! More time on the engine mount!
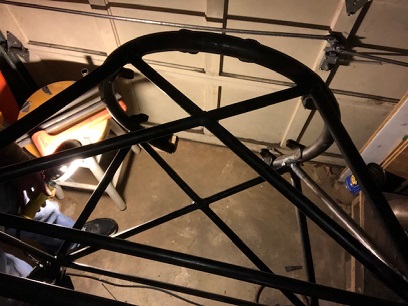
Work on cutting out the reinforcing straps plates... AND Working on getting the four cross piece tubes that for the rear of the engine mount cut and fitted...
The reinforcing straps are odd little guys. What the paper pattern says will work... doesn't translate into real World situations. The first two straps I designed and fitted using paper fit perfectly. After cutting out and starting the aligning and weld... not so much. They're turning this way and that. Not really that bad, but I thought they'd lay down and do their thing without much fuss. I'm having to modify the reinforcing straps by making them in three pieces instead of one solid piece. Once they twist the outer "wings" of the strap aren't aligning correctly with the associated tube that they need to align with.
As with the rest of the challenges on my biplane project, I'm working through them. Remembering what happened for the next time that I need this self-advice.
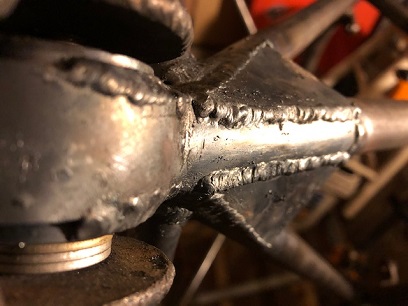
As for the cross piece tubes (these are the ones that keep the rear of the engine mount from springing in when not bolted to the fuselage... cut, aligned and tacked those on. Started welding the clusters and needed better access to a few of the welds and thought "Now is the time to release the beast from the algning tubes." Made the decision to cut the original aligning tubes from the mount ring and the fuselage. After cutting them off... standing back and admiring the view. (Purty...) After a few moments of reflection, back to welding up those clusters.
Tofurkey Day is this week. And I didn't spell that wrong... I've gone Vegetarian slash Vegan with my wife, Fernanda, and I'm attempting to make a Turkey tasting tofu main dish. That, along with cole slaw, carrots with butter and brown sugar, green beans, mashed potatoes with vegan gravy, cranberry sauce, and maybe a pie for dessert. Save the animals!, we're all sentient beings. (photos to come) Happy Thanksgiving, my Friends.
November 23 - December 10, 2021 Thanksgiving???
It feels more like Groundhog Day.
It's been all about the re-inforcing straps this past 1/2 month. Mainly... the first two front re-inforcing straps.
I started working on the front straps to help spread the heat (aka swelling and shrinking of the tubing) to all aread of the engine mount so that it would have minimal movement.
What started out as something simple... turned into a "Bill Murray Groundhog Day".
I designed and tacked, heat bent, tacked... the first design. Not happy with it. The same with the second and third. What I thought was the ticket with the fourth, so I almost fully welded that on, turned out to be the fourth attempt so I needed to spend close three hours grinding then filing and sanding off most of the welds that I did on that strap (mighty fine welds if I do say so myself). What was beginning to tick me off was myself... cutting out two of each of these designs only to discover that I wasn't happy with it. Although, when I tested the paper pattern on the engine mount it looked good... so it wasn't blind faith that I cut out two, just the real world with the metal as opposed to the paper "strap" didn't carry over. Anywho...
I adjusted again... this time making two different patterns only to discover that I still wasn't happy with the paper patterns and how they fit onto the mount, so I modified it still... into what I now think will work. I'll cut ONE of these out and try it on the mount to see if this is the final, or maybe fifth iteration... As with the "winged" re-inforcing strap on the back of the mount, I'm deciding to do it in three pieces instead of one.
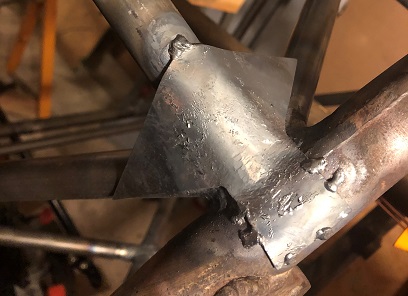
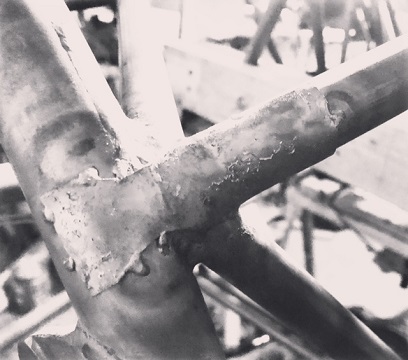
Below is a photo essay of my journey thus far with the front re-inforcing straps. The first iteration through welding on the third iteration to the final iteration, maybe?
December 11 - 18, 2021 In the process of making things.
It's just not all biplane things at the moment.
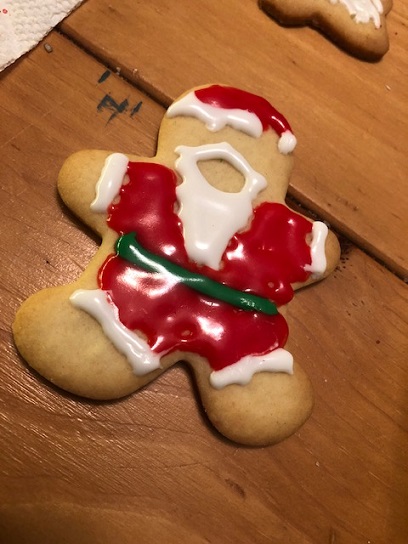
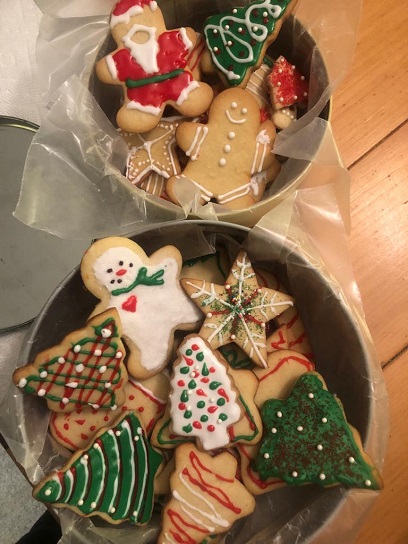
Busy busy busy... with things other than the biplane these past few weeks. Fernanda's mother is here for a few weeks beginning on December 14th... a few last minute things to do, then picking her up at Newark Airport... then doing the holiday experiences together. My traditional cutout cookies beng one of them. Fernanda made the suggestion of using icing in addition to my sugar toppings. GREAT idea!
Big Ass Bird's engine mount is close to being completed. A few more straps and a few more welds... is all it takes. It's just the time to do it. And... a lot of figuring it out; shapes, etc. The shape and size of the wings are puzzling. The paper patterns aren't working in the real world so there is a lot of back and forth with trial fits of the metal shapes. Working on the second center section, forward strap. Still need to weld on the "wings"... then onto the third and forth forward straps. And a few unfinished welds on some of the tubes. THEN this puppy is finished. It looks like I'll be working on the engine cowl, rear cockpit bubble?, and the upper wing center section?
These cookies taste.... great! The grated orange peel does something special to them... and the icing, well, that just makes them GREAT!
MERRY CHRISTMAS and HAPPY HOLIDAYS, MY FRIENDS!!!
December 23 - 30, 2021 Not the ending...
a new beginning.
BusyBusyBusy, but not as many hours as I would have liked to put on the build... this year. Although, quite a bit of time was spent on Big Ass Bird over the past week or so. I hope to put close to 500 hours on the project next year... That's always number one on my wish list for the build... more hours.
End of the year, a time of reflection...
This year it was filled with re-doing the engine mounting brackets and then moving forward with creating the engine mount. A lot of learning, adjusting, and welding. It's often more times than not... that I'm thinking that I should have more accomplished with the amount of time I've put in each year on the build. It's not that I'm slow, but... it's all a part of the learning, AND the limited space I have. I'm not complaining, I'm happy to have the amount of room and tools that I have... but if they could all be in one space, a large work area where I had space to get around the biplane... tools right there within arm's reach. The next place we get... yes. A nice large workshop.
Fernanda and I did a total re-do of the interior of the house this year (ALL new paint, some new carpet, etc.) which took away a lot of time from the build. I hope to be slowing down a bit on the house now that it is pretty much finished... meaning a few more hours on the biplane.
Post Christmas list for Santa: Have the engine trial fitted onto the mount so that I can begin shaping the cowl enclosure. At that point I'll be able to maybe finish up on the final look of the sheet metal skins. A rear cockpit canopy? Finish the upper wing center section? oh yeah... a set of wheels that I can actually mount onto the axles so that I can bolt on the trial fit of the engine!
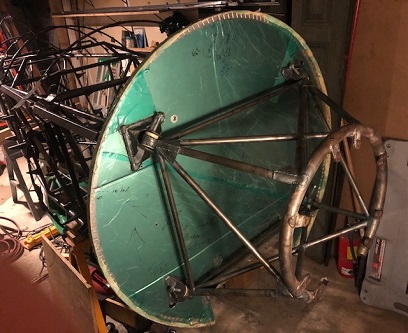
Engine mount with Jake in background
The clock strikes twelve!
HAPPY NEW YEAR!!!
A song we all know... "Auld Lang Syne", which basically translates to "times gone by". Remembering the good from the past year... but also looking forward to times ahead. Time with Loved ones, creating new memories...
December 31, 2021 - January 1, 2022 The first of the year and things are...
looking MIGHTY FINE.
The New Year! A time of reflecting on and releasing the past... or in the case of BIG ASS BIRD, release of the engine mount!
The first of the year I took the bolts out of the engine mount brackets to release the engine mount from its hold on the fuselage. I was to the point of needing to take it off of the fuselage to get it finished. After releasing it, I made the few, final welds that needed to be made to it and BaBAM! It's ready for the Jake!
The engine mount... another milestone in the project. If it wasn't for the re-do of the engine mount mounting brackets this would have been last year's story. It's all good... and so the learning continues with the biplane build.
Now that the engine mount is completed, I will be working on the cowling area around the Jake, which means hanging the Jake with the firewall in place.
The engine mount brackets are a tight fit so I ordered 2.75" 3/8" bolts that I'll grind the ends down on to make it easy for lining up bolts to the mounting bracket holes when the time comes. I also need to put this beast up on a set of wheels so I've been in contact with Matco to get wheels. I should have them by the end of the month?
While waiting for the bolts for the engine mount I adjusted the holes in the firewall to match the new mounting brackets (which were slightly different than the original ones I had on there.) I roughed out those adjustments and attached the firewall to the fusleage and then attached the engine mount to see how it looked. MIGHTY FINE if I do say myself!