Mantua, New Jersey
Original Site:
September 2004
E-mail: usav8or@yahoo.com
Wrapping the engine...
April 24 - 31, 2022
BIG ASS BIRD gets...
a nose job.
Not sure where I started the cowling posts... from the time I picked up the cowling ring to now. When I find it I'll post it to this page (you'll see it under this post as a prior post).
The fuselage is up on it's wheels; brakes and wheels are in place. The engine mount is bolted back on the engine and I'm now working on the shape of the air intake at the bottom of the forward end of the cowling, or more precisely, the bottom of the cowl ring.
Straps and cables (temporary "bungees")
Up on the gear!
I've been spending an excess amount of time on this... not sure if it is worth it at this point. Maybe best to get that engine bolted to the fuselage and start fleshing it out when it's on BIG ASS BIRD. At this point it's all "yeah... that looks good", but not knowing how it will actually need to blend into the sides of the fuselage and not knowing the openings and cut-arounds I need to make for the gear legs. So... after putting quite a number of hours on thinking about the shape, and playing with display board shapes, I decided to work on the engine by taking off the older Cessna 195 motor mount brackets that are on the engine so I can bolt the Jake up to the engine mount that's on the biplane.
Two hours of wrenching and I have one bracket off. haha! Two more to go... I believe.
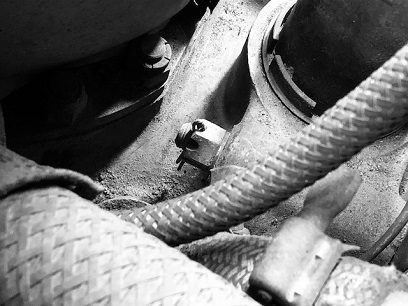
One of those hard to get at bolts.
Over the past week I've been thinking about how I'm going to lift the engine into place. Harbor Freight's engine hoist won't lift it hight enough. Thought about a "Rube Goldberg" type of contraption suspended from the ceiling that would allow me to lift it into place once I've gotten it over to the contraption from where it now sits on a skid. I think I found the soltuion...
Last weekend I rented a high-pressure washer to clean the front walk, driveway, back deck, and fence. When I was driving through their yard I saw a few engine hoists. Later on in the week I went to their site and did a few searches and saw a "material life" and can handle the weight of the Jake... and raise it up 24feet if I needed it to. Rental is $85.00 for the day. This just may be the ticket!
May 2 - 7, 2022
Never thought of...
fiberglass and carbon fiber before.
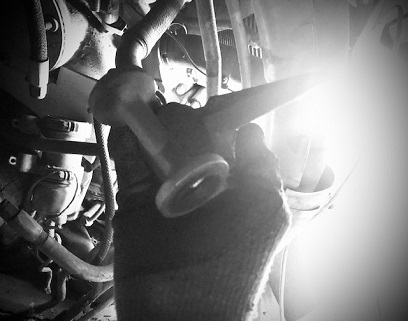
A little bit of wrenching and a lot a bit of learning.
Finished wrenching off the 2nd and 3rd engine mount brackets from BIG ASS BIRD's radial engine (these are the mounts used for attaching the Jacob engine to the Cessna 195 that it was originally hanging on. With the brackets off I could figure out the length of the AN Bolts I needed to use to attach the engine to the engine mount I made. Eight AN6-35 drilled bolts with washers and castle nuts.
With a number of various bolts, washer, nuts and the tube for the engine bushing needing to be ordered... I could safely order the parts to spread the astronomical price for shipping of these parts. Roughly $65.00 of items ordered with a $20.00 shipping bill. Got to Love It!
Now for the more interesting stuff... mounting the engine, and then fabricating the cowling. I believe that I have figured out the hanging of the engine, so it's just a matter of positioning the engine ring and then attaching the rest of the cowl to hold it in place? WAIT!!! Not so fast...
I bought the cowl ring close to two years ago. A few action items needing to be done: 1. I don't want to mess up the ring by cutting (it wrong). and 2. I want to add an air intake to the bottom of it and I don't want it to look like an add-on piece. Sooo... 1. I'll need to design the air intake to be incorporated into the cowl ring. and 2. I'll need to learn a little about fiberglass and carbon fiber lay-up.
A number of hours of reading and looking at videos... I found the best source of learning is by viewing. After asking a question on the biplane forum I was pointed to and watch a few Youtube videos by Mike Patey, and Mike Arnold (The Arnold Company on Youtube). Mike Patey does a heck of a job showing you how to make molds for carbon fiber and easily (at least he makes it seem easy) make parts from them. Mike Arnold... is the guru of fiberglass. He created the AR5 that held the FI World record for the C-1a/0 Class on a 3 KM closed course for 17 years. THIS GUY KNOWS FIBERGLASS!!! I learned lay-up and mold making from both of these guys.
I also did due dilgence by reading Tony B's books about fiberglass and read what I could find on the EAA site (and, as mentioned before... asking a few questions on the biplane forum, of which I found out about the two Mikes). With the new terminology and not knowing anything about this stuff... I was better off at first looking at the videos... then reading. It was a lot easier to understand the written word after seeing an overview of the process.
So here's what I've come up with... I'll finish designing the add-on air intake to incorporate that into the single-piece mold that I will make. I'll create the mold out of fiberglas (which is much cheaper than carbon fiber). AND, right now I plan on making the actual piece out of carbon fiber (this could change to fiberglass... just not at this moment).
I've been playing around with ideas for the look of the air intake, but ultimately will need to have the cowl ring in place on the engine to see what works and what looks "right".
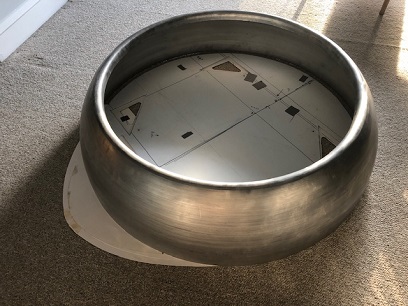
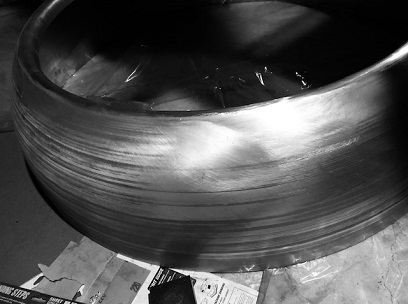
Current status: sanding the ripples off of the spun aluminum cowl ring so those ridges don't transfer into the mold.
Next: Hang the engine. Position the cowl ring in place. Continue designing and then fabricating the cowl ring. But first... back to sanding out those ripples on the cowling. This sanding might take a while...
One of the Cessna 195 engine mounts for the Jake.
Designing it... the cowling ring that is.
The beginnings of sanding the cowl ring.
May 8 - June 3, 2022
Just call me...
the Sandman.
(Sandman... reminds me of a song called Poetry Man by Phoebe Show... for some reason I hear that song when I hear sandman)
More tweaking of the look of the air intake... and a lot of sanding. I'm talking about HOURS of sanding. I'm talking about sanding just to get the existing cowling smooth.
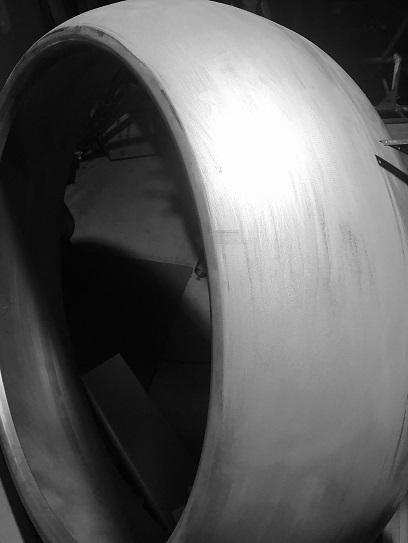
I didn't think it would be that big of a deal to sand the little ridges down on the cowl ring (it was a custom spun aluminum ring I had bought). I was wrong. Let's see... 15.4 hours of sanding to get the little ridges out on the outside of the ring. Started with 60 grit, then 100 then 220 and finished up with a few passes with 320 grit. I should have done this in the winter when it was a little bit cooler out in the garage workshop!
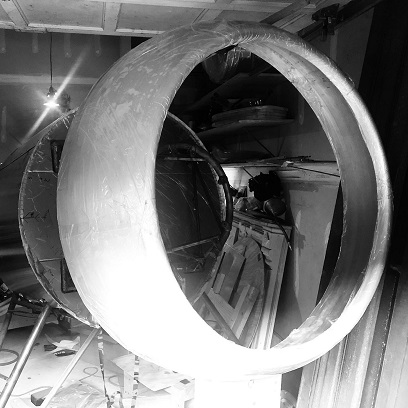
There are still a few waves in the ring, but those are large compared to the smaller "lines" I sanded out. I'll take some spackle and fill those area and then sand it down to a smooth shape before pulling off the plug to make the custom cowl ring.
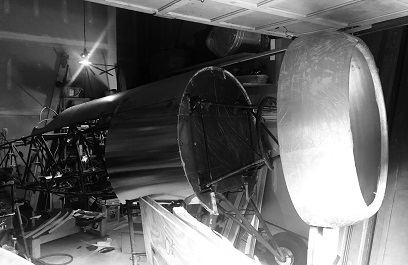
Held the ring up to approximately where it would be in front of the firewall. DAMN! it's big!
The table I want to use to lay it out on in the basement is being occupied by the upper wing center section right now. I need to finish that far enough along so that I lock it into postion before taking it off the table. So... I need to prime and paint the brackets, etc. and then install them. I hope to be back shortly to continue work on the cowling plug.
Start ssanding with 60 grit.
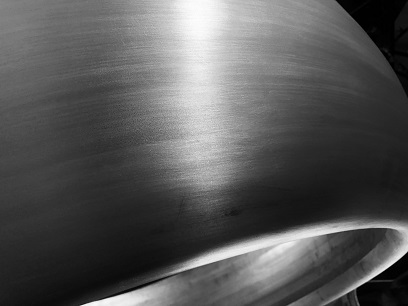
Finished with 320 grit.
August 24 - September 5, 2022
No twisting...
and shouting on my watch.
With my plans of making either a fiberglass or carbon fiber cowling from the aluminum spun cowling I have... I've been reading up on this art of composite craftsmanship. Wow! A lot to learn.
My plan (at the moment) is to make a female plug from the aluminum cowling, then use the female plug to make the final piece. When I pull that piece from the mold I'll have a glossy, finished cowl ring ready for painting.
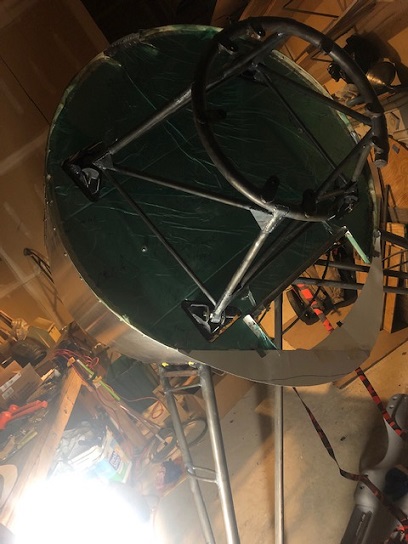
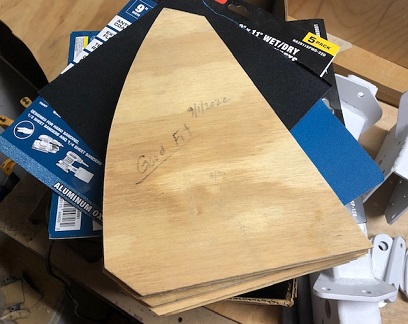
In getting ready to lay up the fiberglass for the female plug... I made eight (8) cowl ring supports. These will be placed and secured on the inside of the cowl ring to keep it from twisting as the fiberglass cures. I have all eight cut and ready for service. It took me a little bit of time to get the shape right. And when I thought I had it right... I still needed to make a slight adjustment to them in order for them to fit properly to the shape of the inside of the ring. They're ready now...
(By the way... the twisting and shouting in the "header" is alluding to a Chubby Checker song... look it up.)
September 22 - October 29, 2022
Smaller is better...
and keeping it light?
A little bit of a hiatus with my month's long trip to Mexico. But back at it hard again...
Working on the cowling air intake shape. Thinking hard about this when in Mexico... hours that I won't put in the log. I think I have it all figured out (again). I'll be making the length of the cowl ring approximately 6inches with the air intake 4-5inches on the bottom side of it.
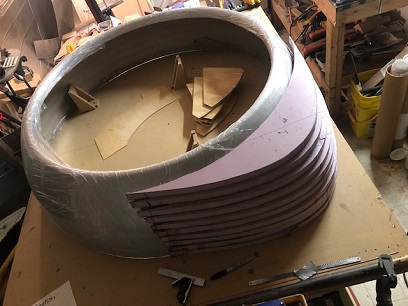
The images below show the concept so far. But! It's still using the full 12inch deep cowl ring. I plan on routing a 44inch hole in a piece of 48inch x 48inch piece of plywood and sitting that over the existing 46inch diameter ring to give me the correct diameter for the final composite cowl ring (I acutally need to figure out the thickness of the piece so that I can add the additional room so that the final piece won't be smaller than the 44inch diameter that I need. Follow that?)
I bought the plywood for making both the afore mentioned cowl ring collar, and the ply to build up the air intake. The foam pieces that you see below aren't doing it for me. I don't like how they can bend at the tips. I may use them between the layers of ply so that the mold doesn't weight a ton.
It will be a few days before I can get back on this. Right now I'm using the table in the basement workshop for the UWCS (Upper Wing Center Section). I'm stepping lightly into this whole fiberglass mold making business. Maybe I should make a test piece first?
What is it that I say at this point? More to come...