July 30, 2007 focused on fittings... Buicks and Tonka Trucks Note:: Update: There is a debate on whether the drawing is correct or not. Best bet is to make a practice piece, in my case one made out of cardboard, and make your own decision. Over the past several days I've been focusing in on drawing the fittings in the CAD program and cutting them out with the bandsaw then grinding them down to their finished size. Below is one of the more complicated fittings to draw up; the rudder horn. There wasn't a lot on the drawings, from Steen, to go by. I managed to have it completed during an hour's lunch break today. Side Note: Jim, from the biplane forum, saw the drawing and made a comment about the location of the bend that Steen gives on the print. He's saying that if you bend it where it's noted on the drawing, there will be a gap between it and the tube large enough to throw a Buick through it. After several re-makes of the same part, he got the size down to one of a Tonka truck. The trick is to bend it closer to the center of the tailpost hole. I'll make a cardboard template before I go ahead and make that bend. No further problems with the bandsaw (fingers crossed.) I've been using the Boelube consistantly, applying it to each side of the blade for each new fitting to be cut. I've been like a machine cranking away at these fittings. Received the set of cobalt drill bits VIA UPS the other day. I need to go back and start drilling holes in the fittings that I have cut. Feels like I'm making quite a bit of progress. A lot of pokers in the fire at one time. What can you take away from this ? When making parts... if possible, make a practice piece of the part first to try what you are attempting to do. Better to learn on a piece that didn't take much of your time than to ruin a piece that you've already worked hours on. August 13, 2007 Finishing the fittings... before finishing the fittings No no no no no... hell no... I'm not finished making my fittings. I've still got some time to go on them. Although... I am moving a lot faster than I thought that I would. When I speak of "finishing the fittings," I'm talking about what I'm going to do with them once I have them ground down to size, 'cause once they are ground down to size, they ain't finished yet. You ought to know by now that building a biplane is a little bit more time intensive than that. It ain't a kit... do I need to keep reminding you of that ? When I say "finishing the fittings" here, I'm not even talking about the finished product. What I'm talking about is what you need to do to the fitting before you even begin to make the bend and drill the holes in it. I'm talking about getting that nice "finished" look to the edges. The look where you don't see any lines, aka areas that could eventually turn into cracks. You may think that the nice "smooth" finish you just put on it when taking it to the "finish" grinding wheel is all you need to do to your fitting before bending, drilling and THEN finishing it. You're mistaken, my good man. You need to get the edge of that fitting you're making down to a fine smooth edge, something along the lines of what you'd see after sanding a piece of wood. I took a few of my fittings over to Gus for him to have a look see at them. Asked him the question of how to finish the edges. He pulled a hand-held grinder out of one of the boxes that he had packed up. Said to attach 60 grit sandpaper to it and then finish it off with about a 200 grit. Nuff said. I was down in the Vineland area dropping off some stuff to Chip, a friend of mine. Just so happens to be close to the mecca of all cheap tools, Harbor Freight. I swung by there and picked myself up a 4 1/2" hand-held grinder and a few attachments. I'm ready to start finishing the edges of the fittings so that I can go on and finish bending and drilling before I am finally finished with the piece. Whew ! Did you follow that ? OK... I'm finished with this thought. Back to work, Jer ! Butter.. it was like cuttin' butter I tell ya Back down to the workshop tonight to knock out the rest of the -057 fittings. I had seven left to do out of the total of 16. This is the little guy that broke a few teeth off the first bandsaw blade I had. Me... unknowingly cutting a "thin" metal with not enough teeth. When I was picking up the hand-held grinder/sander (mentioned above), I picked up a 24 tpi (that's teeth per inch if you didn't know) bandsaw blade. After the teeth broke off the first blade I decided that I'd be hand-cutting these puppies until I got a saw blade with a few more tpi than the 14 my current blade had. That thought didn't last that long. That .050 4130 sheet metal is a lot more work to cut by hand than you would think it would be. That's the main reason I've only cut and filed nine of them so far. Not that I can't take cutting the metal...it's why should I "waste" my time hand cutting them when I can easily pick up a blade with more tpi's and be done with them, quick time. Not as easy as I thought it would be to find a 64 1/2" bandsaw blade. Your local Home Depot just doesn't carry that many blades, let alone and oddball 64 1/2" blade. Well, as you know, I picked up the blade this past weekend from Harbor Freight and it took all of five minutes to install it on the bandsaw when I got home on Saturday. It was just sitting and waiting for me tonight when I went down there. Cut the seven "patterns" from my printout, sprayed the glue on both the sheet metal and the back of the patterns, mated the two of them up, lubed the blade with the Boelube and set about to cut me some .050 4130 chromium-molybdenum steel. I'm use to cutting .190 and .125 metal, which is eaten up by the blade pretty quick, but when I started cutting the .050, it was like budda. The -057 is a very small fitting, and I cut all seven out in no time flat. Took them over to the grinder and had them all ground/filed down to size in an hour and a half, start to finish. Now all I'll need to do is put the finish on the edges before I go to finish drilling the holes into them. (the holes are another story... you just don't drill the size hole you need... there's a whole series of steps you need to go through to get to the final size.) I'll talk about that later. Thought for the day... if you're going to be making your fittings, get the bandsaw and get the right blades... it'll save you time, a lot of time. Click here for Still Even More Fittings.
July 30, 2007 focused on fittings... Buicks and Tonka Trucks Note:: Update: There is a debate on whether the drawing is correct or not. Best bet is to make a practice piece, in my case one made out of cardboard, and make your own decision. Over the past several days I've been focusing in on drawing the fittings in the CAD program and cutting them out with the bandsaw then grinding them down to their finished size. Below is one of the more complicated fittings to draw up; the rudder horn. There wasn't a lot on the drawings, from Steen, to go by. I managed to have it completed during an hour's lunch break today. Side Note: Jim, from the biplane forum, saw the drawing and made a comment about the location of the bend that Steen gives on the print. He's saying that if you bend it where it's noted on the drawing, there will be a gap between it and the tube large enough to throw a Buick through it. After several re-makes of the same part, he got the size down to one of a Tonka truck. The trick is to bend it closer to the center of the tailpost hole. I'll make a cardboard template before I go ahead and make that bend. No further problems with the bandsaw (fingers crossed.) I've been using the Boelube consistantly, applying it to each side of the blade for each new fitting to be cut. I've been like a machine cranking away at these fittings. Received the set of cobalt drill bits VIA UPS the other day. I need to go back and start drilling holes in the fittings that I have cut. Feels like I'm making quite a bit of progress. A lot of pokers in the fire at one time. What can you take away from this ? When making parts... if possible, make a practice piece of the part first to try what you are attempting to do. Better to learn on a piece that didn't take much of your time than to ruin a piece that you've already worked hours on.
August 13, 2007 Finishing the fittings... before finishing the fittings No no no no no... hell no... I'm not finished making my fittings. I've still got some time to go on them. Although... I am moving a lot faster than I thought that I would. When I speak of "finishing the fittings," I'm talking about what I'm going to do with them once I have them ground down to size, 'cause once they are ground down to size, they ain't finished yet. You ought to know by now that building a biplane is a little bit more time intensive than that. It ain't a kit... do I need to keep reminding you of that ? When I say "finishing the fittings" here, I'm not even talking about the finished product. What I'm talking about is what you need to do to the fitting before you even begin to make the bend and drill the holes in it. I'm talking about getting that nice "finished" look to the edges. The look where you don't see any lines, aka areas that could eventually turn into cracks. You may think that the nice "smooth" finish you just put on it when taking it to the "finish" grinding wheel is all you need to do to your fitting before bending, drilling and THEN finishing it. You're mistaken, my good man. You need to get the edge of that fitting you're making down to a fine smooth edge, something along the lines of what you'd see after sanding a piece of wood. I took a few of my fittings over to Gus for him to have a look see at them. Asked him the question of how to finish the edges. He pulled a hand-held grinder out of one of the boxes that he had packed up. Said to attach 60 grit sandpaper to it and then finish it off with about a 200 grit. Nuff said. I was down in the Vineland area dropping off some stuff to Chip, a friend of mine. Just so happens to be close to the mecca of all cheap tools, Harbor Freight. I swung by there and picked myself up a 4 1/2" hand-held grinder and a few attachments. I'm ready to start finishing the edges of the fittings so that I can go on and finish bending and drilling before I am finally finished with the piece. Whew ! Did you follow that ? OK... I'm finished with this thought. Back to work, Jer !
Butter.. it was like cuttin' butter I tell ya Back down to the workshop tonight to knock out the rest of the -057 fittings. I had seven left to do out of the total of 16. This is the little guy that broke a few teeth off the first bandsaw blade I had. Me... unknowingly cutting a "thin" metal with not enough teeth. When I was picking up the hand-held grinder/sander (mentioned above), I picked up a 24 tpi (that's teeth per inch if you didn't know) bandsaw blade. After the teeth broke off the first blade I decided that I'd be hand-cutting these puppies until I got a saw blade with a few more tpi than the 14 my current blade had. That thought didn't last that long. That .050 4130 sheet metal is a lot more work to cut by hand than you would think it would be. That's the main reason I've only cut and filed nine of them so far. Not that I can't take cutting the metal...it's why should I "waste" my time hand cutting them when I can easily pick up a blade with more tpi's and be done with them, quick time. Not as easy as I thought it would be to find a 64 1/2" bandsaw blade. Your local Home Depot just doesn't carry that many blades, let alone and oddball 64 1/2" blade. Well, as you know, I picked up the blade this past weekend from Harbor Freight and it took all of five minutes to install it on the bandsaw when I got home on Saturday. It was just sitting and waiting for me tonight when I went down there. Cut the seven "patterns" from my printout, sprayed the glue on both the sheet metal and the back of the patterns, mated the two of them up, lubed the blade with the Boelube and set about to cut me some .050 4130 chromium-molybdenum steel. I'm use to cutting .190 and .125 metal, which is eaten up by the blade pretty quick, but when I started cutting the .050, it was like budda. The -057 is a very small fitting, and I cut all seven out in no time flat. Took them over to the grinder and had them all ground/filed down to size in an hour and a half, start to finish. Now all I'll need to do is put the finish on the edges before I go to finish drilling the holes into them. (the holes are another story... you just don't drill the size hole you need... there's a whole series of steps you need to go through to get to the final size.) I'll talk about that later. Thought for the day... if you're going to be making your fittings, get the bandsaw and get the right blades... it'll save you time, a lot of time.
Click here for Still Even More Fittings.


 Over the past several days I've been focusing in on drawing
the fittings in the CAD program and cutting them out with
the bandsaw then grinding them down to their finished size.
Over the past several days I've been focusing in on drawing
the fittings in the CAD program and cutting them out with
the bandsaw then grinding them down to their finished size.
 Side
Note: Jim, from the biplane forum, saw the drawing and
made a comment about the location of the bend that Steen gives
on the print. He's saying that if you bend it where it's noted
on the drawing, there will be a gap between it and the tube
large enough to throw a Buick through it. After several re-makes
of the same part, he got the size down to one of a Tonka truck.
The trick is to bend it closer to the center of the tailpost
hole. I'll make a cardboard template before I go ahead and
make that bend.
Side
Note: Jim, from the biplane forum, saw the drawing and
made a comment about the location of the bend that Steen gives
on the print. He's saying that if you bend it where it's noted
on the drawing, there will be a gap between it and the tube
large enough to throw a Buick through it. After several re-makes
of the same part, he got the size down to one of a Tonka truck.
The trick is to bend it closer to the center of the tailpost
hole. I'll make a cardboard template before I go ahead and
make that bend.
 I took a few of my fittings over to Gus for him to have a look see at them. Asked him the question of how to finish the edges. He pulled a hand-held grinder out of one of the boxes that he had packed up. Said to attach 60 grit sandpaper to it and
then finish it off with about a 200 grit. Nuff said.
I took a few of my fittings over to Gus for him to have a look see at them. Asked him the question of how to finish the edges. He pulled a hand-held grinder out of one of the boxes that he had packed up. Said to attach 60 grit sandpaper to it and
then finish it off with about a 200 grit. Nuff said. 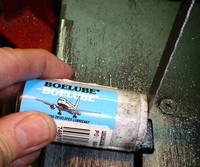 I'm use to cutting .190 and .125 metal, which is eaten up by the blade pretty quick, but when I started cutting the .050, it was like budda. The -057 is a very small fitting, and I cut all seven out in no time flat. Took them over to the
grinder and had them all ground/filed down to size in an hour and a half, start to finish. Now all I'll need to do is put the finish on the edges before I go to finish drilling the holes into them. (the holes are another story... you just don't
drill the size hole you need... there's a whole series of steps you need to go through to get to the final size.) I'll talk about that later.
I'm use to cutting .190 and .125 metal, which is eaten up by the blade pretty quick, but when I started cutting the .050, it was like budda. The -057 is a very small fitting, and I cut all seven out in no time flat. Took them over to the
grinder and had them all ground/filed down to size in an hour and a half, start to finish. Now all I'll need to do is put the finish on the edges before I go to finish drilling the holes into them. (the holes are another story... you just don't
drill the size hole you need... there's a whole series of steps you need to go through to get to the final size.) I'll talk about that later.