Mantua, New Jersey
Original Site:
September 2004
E-mail: usav8or@yahoo.com
The Radical Radial Fuselage.
August 13, 2023 No, to inserts...
Yes, to new tip!
OKAY... a half hour later and I'm ready to start writing in the BLOG... we'll I've been writing, but I've been juggling the pages around. Apparently I made a lot of sheet metal work under the general category "Fuselage". Figured it out and now... back to regularly scheduled show.
You either came here by clicking on the link in the "What's New" page, or clicking on the post I made back in February of 2022.
With all that fuss behind me, not much to look at but a lot has been done. I've been working on the second round of patterns for the upper part of the fuselage.
The cabanes are now made and in place, and the pseudo-sway wires are streched across their spans. So... I'm looking to accomplish two things. Get more accurate hole locations for the screws that attach the skin to the frame and firewall, and to mark and cut out the openings that will allow the cabanes and sway wires to pass through the forward aluminum skin.
With the cabanes and sway wires in place (without the forwad skin attached) I made rough measurements of where the openings would need to be. Used a combination of hole saw bits and dremel tool to cut the openigs out. Made paper patterns of pretty looking openings that I then taped in place to size down those larger rough openings to ones that would just be large enough to allow the cabanes and the sway wires to pass through.
Yup! Back down to the basement workshop to cut another piece of aluminum for the forward skin... transfer the markings for the last pattern to the newer pattern. Cut/drill/file the new pattern. Back out to the garage workshop to figure out how to lift the Upper Wing Center Section without having to take it completely off of the fuselage (I have the plumbs in place and marks on the floor that I wanted to use once the skin was back on the frame.)
What a bitch it was to do that. Finally came up with supporting the rear of the Upper Wing Center Section with a few 2x4's. Undid all the sway wires, then disconnedted the cabanes on the port side. Slide the aluminum skin in place with the starboard side resting high on the starboard cabanes. Re-connected the port cabanes then did the same to the starboard side.
Now to figure out how to mark all the hole locations on the forward sking to match the existing holes in the firewall and the side stringers. The first time I marked the hole locations I used a tool to match rivet holes to overlaying skings. It's used for a number 40 hole and the holes I am (and it the past) are 3/16inch. Last time I wrapped some duct tape around the tip of the tool to make it close to 3/16th. Worked but didn't work. Sloppy fit at best which was okay for the first round of skin patterns but not this time. Thought of making a tip to fit that, that would cover the tip and have a 3/16th inch OD. Thought that would be a pain in the ass... so
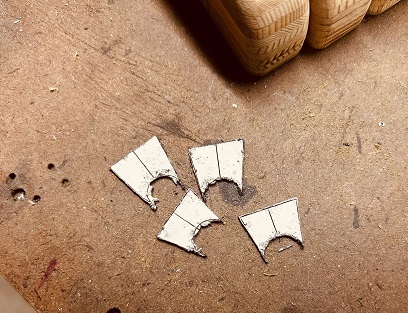
I somehow came up with the idea of making small inserts that I would tape in place in each of the holes. Lightly bang on the skin over each of the inserts and it would transfer the mark that I could then drill out with the drill press. In theory it worked... in the work shop. Made the insert. Placed it on the work bench. Took a piece of scrap aluminum. Laid it over the insert and tappped on it and it made a nice round mark. YES!
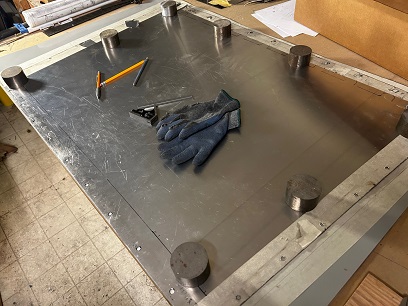
Made 18 of those puppies. Taped them into place on the firewall and the side attach points. Used a block on the top (so I wouldn't hit the aluminum and a backing block behind each anchor nut I would be working on and... nuthin'. Tapped a little harder and nuthin' still. Didn't want to hit on it too hard as I didn't want to damage the new skin pattern and above all else... the firewall. Damn!
Without thinking about it very long I decided to go back to my original idea to make a 3/16th inch tip for the rivet tool locator I originally thought of... tip is made at this point wihtout much trouble I might add. I'm ready to try this puppy out!
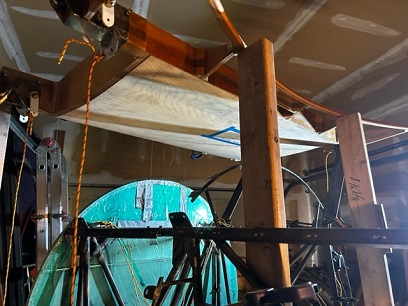
Cabanes and sway wire (actually cords for now) in place.
Forward skin with paper patterns over rough hole openings. Tweaking it.
New skin pattern with tweaked hole locations.
Combination hole saw cuts and dremel tool to cut out openings.
How I accomplished sliding the new pattern in place without having to remove the Upper Wing Center Section.
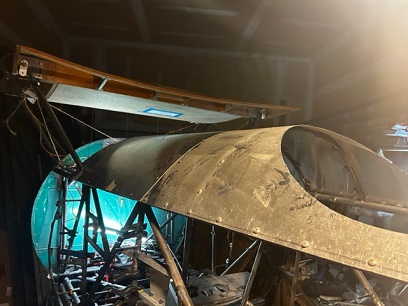
New forward skin pattern in place. Now for the screw holes.
Inserts... not so much.
Micro lathe and making the tip for the hole locator tool.
Ahhhh... the tip on the tool. Still need to try.
August 13 - October 22, 2023 Five weeks off...
and back for another 51 !!!
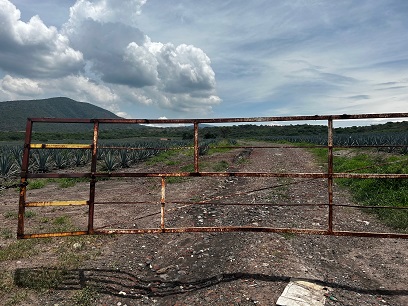
OKAY... can you say Hiatus??? A trip to Mexico with Fernanda for five weeks. Had a great time!
Now back to work...
Started back up on fitting the upper skins on the fuselage. That tip that I lathed down... works GREAT! Pinpoint accuracy.
WOW! Not a whole lot to writ about for all this time. A lot of on and off with the FWD skin... and then the second skin.
It's not a pain, but a lot of time putting on and taking off the FWD skin... having to unbolt then bolt then unbolt then... each time I fit the FWD upper skin onto the fuselage.
oh... make sure that you mark the hole locations with ALL the skins in place. I didn't have the second skin on while marking the first (aka FWD skin) and the holes were 1/8inch off. I didn't think it would have such an affect on the hole locations by not having a piece of aluminum .032 under it.
Go figure...
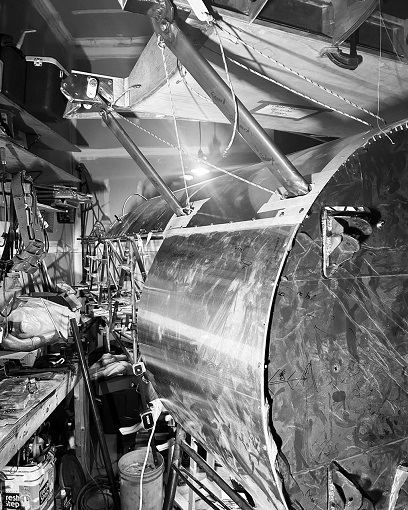
Second forward skin pattern in place.
Ditto
Work on the second upper skin.
October 24 - November 7, 2023 A few weeks of...
wrenching bolts!
Starting off with the last thing I did during this post's time of labor. Made these brackets for the pilot's rudder peddals. Didn't like how the first ones looked. Not gonna make an entire entry on the right page just for these. I'll allude back to this post on my next update.
okay... back to your orignally scheduled program:
Fitting up the 2nd round of patterns for the upper skin sections... three in total.
The very forward upper skin... ooof!!! I can count how many times that I had to unbolt the cabanes from the upper center section in order to fit and make adjustments to it. VERY time consuming to say the least. Sections two and three were a breeze after that... Still, a lot of on and off with the skin patterns, but not near the time to take off and put on like the most forward skin section.
Finished up with the second round of patterns and tried the faceted windsheild on for size... again. Lookin' pretty damn sweet!!!
Snazzy, eh?
Love it!!!
Pilot's view... okay, parrot sitting on pilot's shoulder view.