Mantua, New Jersey
Original Site:
September 2004
E-mail: usav8or@yahoo.com
The Radical Radial Firewall.
November 4, 2015 Another step closer...
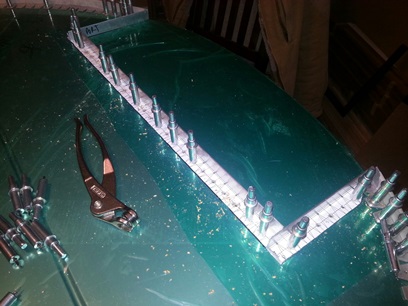
Finished up attaching the flanges to the firewall. Well, actually... they're not permanently attached, but I've got the flanges match-drilled to the firewall. Just need riveting now...
Next on the agenda is to drill the holes in the sides of the outer flanges for the anchor nuts; 10-32 screws (which, by the way, are 3/16inch machine screws). Clecoed the outer flanges on the firewall. Took some measurements. Turned on the computer and drew up the patterns in CAD. Just need to print them out...
November 5, 2015 Taking that extra step...
to get things right.
Sometimes you just go along thinking... that's the way it is, or in this case... that's the way the spacing worked out to be.
Tell me it ain't so... It's only that way because you allow it to be that way. If you take a closer look, there's probably a reason why it's not falling out to be the correct spacing. So I did... take a closer look.
Kind of confusing (I won't get into a long explanation of it... but it's sort of like cutting crown molding. In your mind you're flipping the piece all kinds of ways.) But, I got it figured out and marked out. Now all I need to do is drill them up.
Sidebar:
another by the way... Could I have left it as it was and gotten away with it? Sure, but it would have been one of those things nagging at me. Or at least I think it would be nagging at me from that moment on. Also, you let one thing slip by and you let other little things slip by. Before you know it you have built a biplane full of little "slip bys".
Back on track:
by the way... You don't need a tight fit when drilling the hole for an anchor nut. Tony B. suggests a size a few sizes larger. And what he means is... for instance; if you are drilling for a 3/16inch bolt you normally use a number 12 bit. He suggests using a number 10 or number 8 when drilling the hole for the anchor nut.
Photo unavailable 'cause I didn't take one.
November 6, 2015 Following Tony's advice...
holes for the anchor nuts.
There's a lot of steps to each part of this biplane. The flanges for this firewall are taking a looooong time to finish.
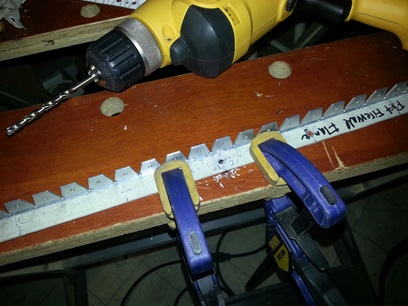
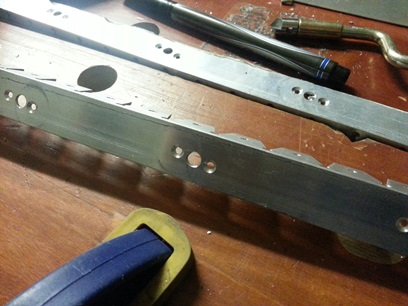
Tonight I worked on them again. Needed to put the holes (#8 drill bit) for the 3/16inch bolts that attach using anchor nuts. Did a few test holes and they were triangular again ??? Started to drill by hand (which was a faster drill bit speed) and they were coming out fine; nice and round. Took a look at the drill speed needed for aluninum and it's like 2720rpm... not the 600-800rpm I had for 4130 steel.
Once I made the change to the rpm's the holes were turning out fine. With the fast speed I wanted to clamp the piece down each time I moved it... it was quicker, and just as nice of holes, using the hand drill so I went back to using it.
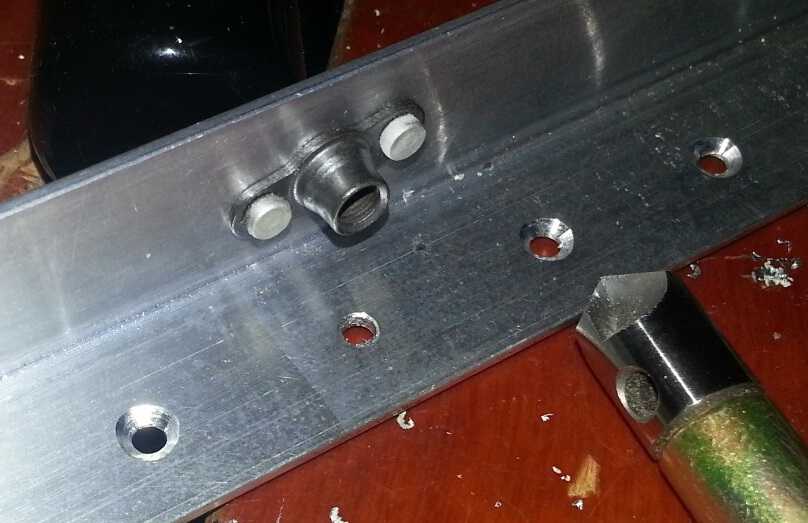
Broke for dinner came back to drill the holes for the rivets that hold the anchor nuts in place. Followed Tony B's instructions for drilling the holes for the anchor rivets. Worked like a charm. Still need to drill the recessed areas for the flush rivet heads tomorrow and I'll have the first half of the firewall flange done. Or should I say... ready for me to rivet on the anchor nuts.
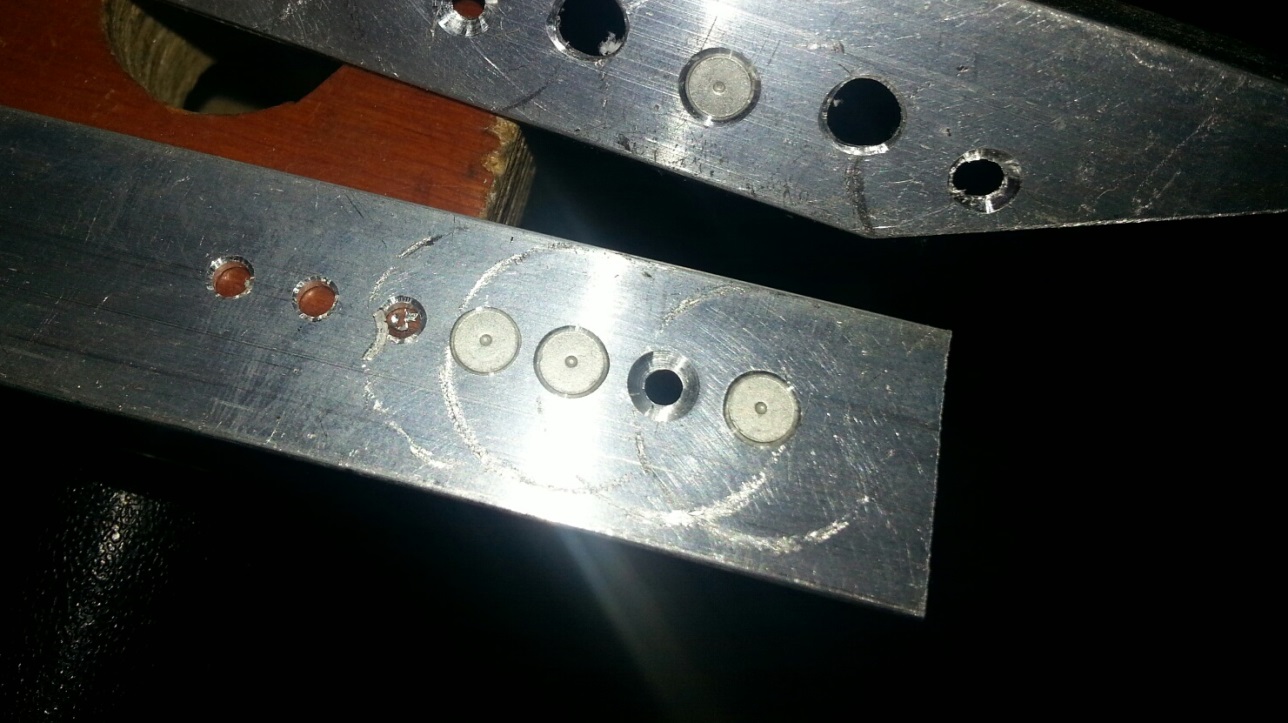
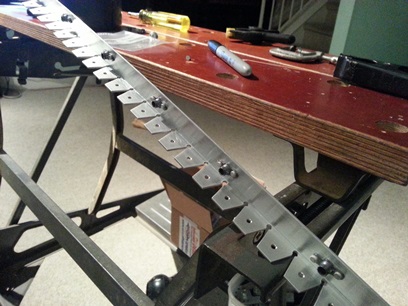
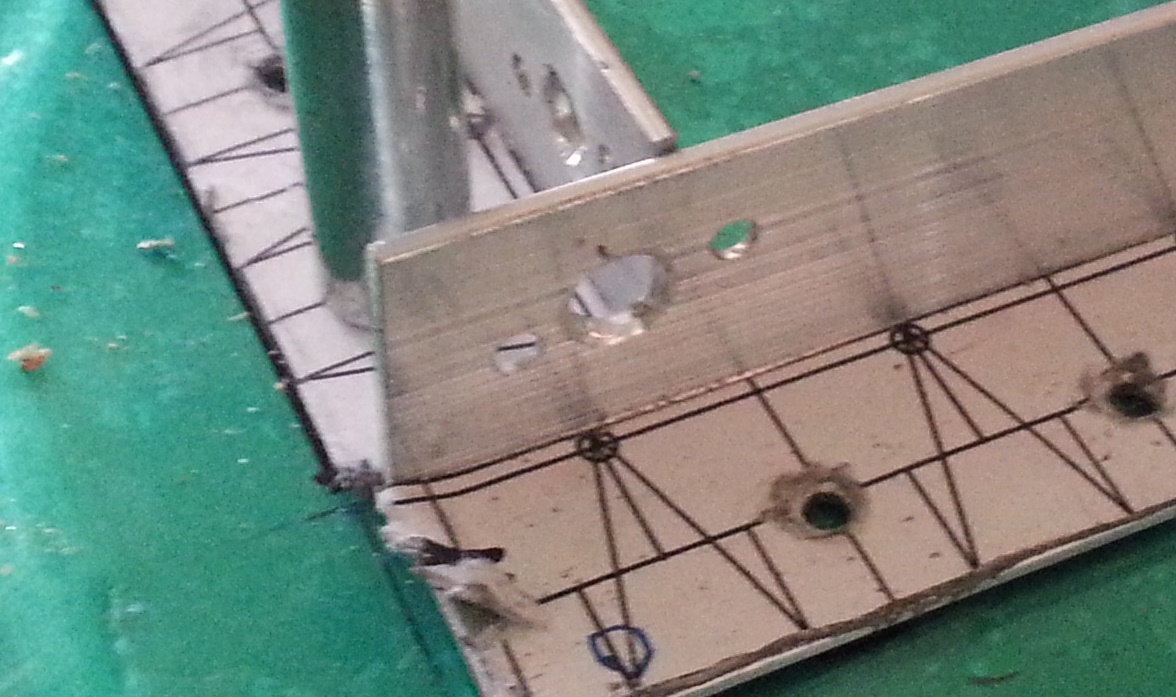
Note: Not how I will rivet on. Shown only for how I
aligned holes for drilling. Click for close up.
November
7, 2015 Dialing things in...
for counter sinking holes.
What to write about when you've written it before ???
After years of updating my blog... at times I'm just recording
the process of what I'm doing. How the hell is that, like
I had mentioned on my first opening page "Blogs generally
represent the personality of the author or the Web site."
I'm missing that "personality" in most of my entries over
the past year or so. Reflecting back on it... I'm putting
as much time I can on the project that when I go to write
my entry it's way too late at night and I'm looking to just
put it down on paper as fast as I can; before falling asleep
???
If for no one else but myself, I'll try a little harder in
adding personality back to the blog.
Made me smile... working on the biplane today. I enjoy this... all this building. I've spent quite a bit of time on this fireall. I can see the end... and at that end I can begin
to fit it to the fuselage then start fitting up the sheet metal; make it look like a biplane.
Spent today drilling the remaining holes for the anchor nut rivets then counter-sink all of those holes. Period.
The only issue I had was figuring out how to adjust the counter-sink tool (and the one I have has nothing on the internet to tell you). Hint.. the thin nut at on the counter-sink tool turns clock-wise to unscrew. Unscrew the nut enough that will allow you to pull the bottom of the shaft away from the top. There are small teeth on the pieces that will allow you to make small adjustment to the depth. Dial it in and you're ready to go to town.
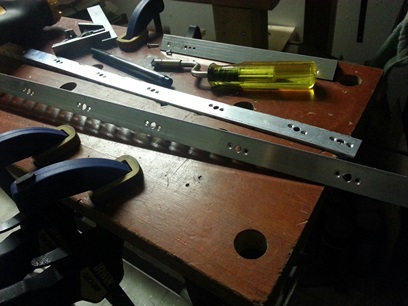
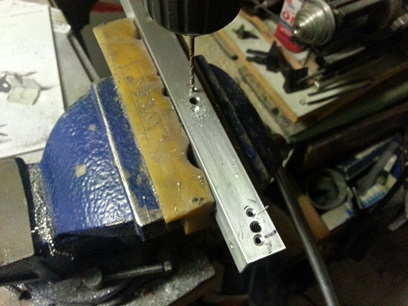
Test piece to adjust depth of counter-sink tool.
Click on for close-up.
November 7, 2015 Putting in time...
At the Crossroads... ya got to put in your time.
Over to the other Whitey's house to watch some of the football games with the guys. A few beers, a cigar, pizza, a few laughs and a few of the world's problems solved. On the way home I had to do some food shopping... it's been about three weeks and, well, I had to do it.
Got home, put away the stuff and just didn't feel like doing anything. Sat down and just relaxed...
Looking at the tv watching "Crossroads"; Eric Clapton's guitar festival to make money for his rehab place. All the while I'm thinking "ya gotta do something on the project... even if it's just a few minutes". A little before 10PM and I'm off the couch walking down to the basement workshop.
Next thing on the todo list is to rivet on the anchor nut plates. Need to set up the rivet squeezer for doing these. They're flush head rivets (something new for me). I'll also need to figure out who I'm going to hold the nut plate against the flange while squeezing the rivets.
Put in two deep/high setting flush rivet sets. Figured out the depth that I needed and dialed it in. Started setting up for the squeeze and... a few issues. Not easy holding the anchor nut in place (I'm now thinking a small clamp). The rivet set needs to be trimmed down to allow the squeezer to center over the rivet barrel. If I can get both of those fixed I'll be in business.
Didn't think of using a small clamp ('cause I thought it would get in the way) until just now. Tried using the rivet set that I had already filed the side off of and it wasn't quite enough filed away PLUS the set wasn't thick enough. When I squeezed down it actually hit the top of the nut plate and crushed it. So... with all that knowledge, I'll filed down a thicker rivet set tonight (writing this the next morning) and I'll use one of the small clamps that I have.
Now if I didn't work on it for an hour last night... I'd be having these things to work through tonight instead of getting started with the riveting... or so I'm thinkin' right now
Photo unavailable 'cause I didn't take one.
November
9, 2015 Putting in time...
At
the Crossroads... ya got to put in your time.
Last night I worked on figuring out the right combination
to use on the rivet squeezer; which sets, depth of squeeze...
and figuring out how to squeeze the rivets for a good lookin'
squeeze. Tried a few test squeezes and called it a night...
it was late.
Tonight I brought everything up from the basement workshop.
I can do all this squeezing up stairs watching some tv. Set
everything up for riveting the flanges and... just... couldn't...
get... the... right... angle... for... getting... at... the
rivet ! First set of squeezed rivets were fine. First on the
second set... not so much. Drilled it out... next few rivets
squeezed pretty nice. The one after... again, not so much.
It was brutal. I just... couldnt't... get... the... right...
angle... for... getting... at... the rivet !
Ended up having to drill out three or four of the dozen rivets
I set tonight. It was brutal ! Not really sure how someone
would get a consistently good squeeze with the amount of area
you had for the head (even cut down) on these rivets.
I'm sure I have it figured out now; the placement of the rivet
set on the rivet barrel. Did about 1/2 of them on the one
flange piece. I hope that it goes a little bit smoother tomorrow.
I understand that not everything will go quick, but this was
brutally slow.
November
10, 2015 Repeat of last night...
with just a few more opportunities for a few re-do.
(Just lost my entire entry to the blog tonight...)
Continued riveting on anchor nut plates to the firewall flanges. Did a real nice job on most of them... others, not so much. I'll need to go back and re-do those; ya know, working towards that Excellence.
Ya know what ? I've said this before... I actually look foward to re-do's; the act of the re-do. Make any sense ? Let me explain... It gives me the opportunity to confirm my commitment to doing the best that I can on the biplane.
by the way... I think another trick to getting a good, flat squish with the squeezer is to make sure that the set on the head of the rivet is flat when you go to initially align the set head (flush rivets seem to be a little harder to do than the rounded). You'll get a flater, more vertical squish. At least that is what I think I'm finding out. You're probably think, "duhhhh... well yeah". But it ain't that easy when you're aligning the stationay part of the set on the barrel... and not thinking to look on the other side at the moving set. Take it for what it's worth... and as I've read other places, "Your mileage may vary."
Tomorrow I plan on re-doing the rivet squishes that I'm not happy with. I also need to drill, deburr, and counter sink the flange pieces that go around the exhaust port opening. I want to make this removeable instead of riveting it on.
No pictures tonight. Would just be a repeat of last night's.
November
11, 2015 An endless list...
of questions to be answered.
A little bit more work on the flanges. As noted above, I was unhappy with some of the rivets. Drilled them out and re-riveted them. Lookin' pretty damn good now. Guess having to work around the clamp (holding the anchor nut plate in place) doesn't allow me to get a good position on the rivet barrel... at least that's what I'm thinking.
Moved onto the smaller flanges that go around the exhaust port. and... As mentioned above, I've decided to attach the shute onto the firewall with screws instead of riveting it on. I'll then run a bead of that 2000 degree caulk where the two pieces of stainless meet.
Saw some show on the tv the other day and it was basically referencing the endless amount of decisions that need to be made on small items that go into the build of the house. I'm thinking: Nothing ! compared to the decisions on building a biplane from scratch; what type of material, how to attached, size and shape, blah blah blah.
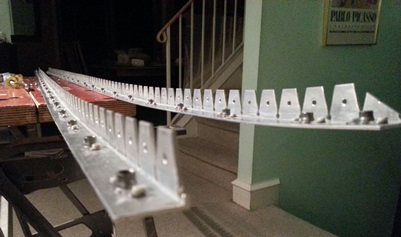
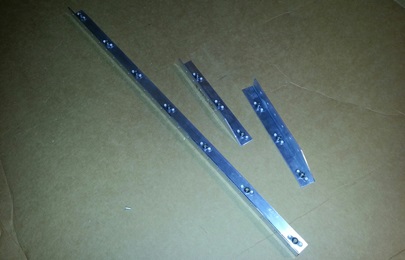
Riveted flanges.
November
12, 2015 Can you tell me...
what the hell happened ???
Moving along tonight... moving right along. and... it's feeling real good.
Working on the three flange pieces that go around the exhaust port; drilling the bolt and rivet holes. Counter-sinking the rivet holes, yeah, moving right along. Well, yeah, I was.
Not sure what the HELL happened. Counter-sinking the last hole in the second piece I was working on (one of the smaller lengths)... took the counter-sink bit out of the hole and DAMN ! One side of the hole had twice as much aluminum taken out of it. HOW THE HELL DID THAT HAPPEN ???! There's a gauge that you set for allowing it to go a certain depth. HOW THE HELL DID THAT HAPPEN ???!
I'm not getting it... Why ? I take my time. Make sure I'm doing everything right and ??? I'm not going to let it get to me... just make another one tomorrow and drill, counter-sink and rivet it.
Tonight's work. Two... not three flanges.
November 13, 2015 Boo boo...
Boo boo fixed
Remaking the small length flange that goes around the exhaut port.
To get the new piece cut to the right size/length I attach all of the flanges on; perimiter, the top exahust port and the still good side exhaust port flanges. Doing this I noticed that the top anchor nut plate on the starboard side's flange around the exhaust port area was located in an area that was useless. Guess I didn't think this through enough. Looks like I'll be re-making that one too. Glad I saw this before plowing ahead with the new one and making that wrong again too!
Note: Image below is only set into postion... not clecoed so it's off a little. This is just to show the boo boo. (ain't it pathetic that I feel the need to write that ???)
Click on image for close-up.
Match-drilling (reverse from what I originally did) side flanges to firewall. A few more minutes and...
Still need to mark and drill for the anchor nut plates. I plan on NOT screwing up the final counter-sink hole this time.
Later that day:
Marked and drilled the holes in both short flanges for... the anchor nut plates and rivets. Managed to counter-sink all the rivet holes without screwing it up this time.
Guess I would have gone through this exercise of making the two flange pieces again because of the upper anchor nut plates being too far up on the vertical flanges as noted above. by the way... have the anchor nut plates in the flanges around the exhaust port will allow me to make any adjustments that I need to for exit air flow (which I just read on the biplane forum... but not understand at the moment).
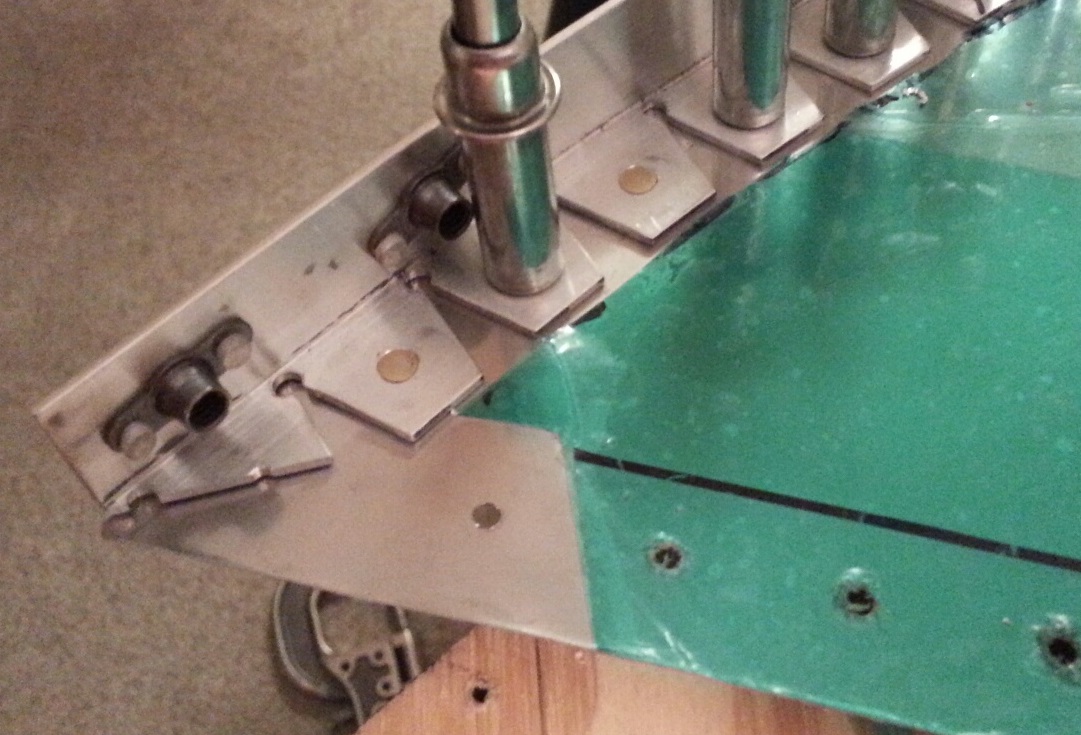
Opening for exhaust (exhaust port).
November 14, 2015 uhhhhh...
Plan B ???
Took a count of the 10-32 anchor nut plates that I have... and... it ain't enough. I'll need to order more to finish up the firewall. Figured I'd order the rivets for riveting on the flanges to the firewall at the same time.
One of the things on my to-do list is to change out that battery tray. Haven't been happy with the look of it: rather, how I welded it onto the hanger. Check it out...
November 18, 2015 Stick to thinking about it...
learn some other time !
Received my re-supply in the mail today; rivets, bolts, anchor nut plates... Tonight, it's back on the firewall flanges. Get these puppies finished so I can rivet the flanges onto the firewall and get going on those pieces of sheet metal that make the shape of this beast !
When it was all said and done, I need to drill out three of the thirteen rivets I did. (Not too happy with them.) I'll do that tomorrow. I didn't get started on the project until late tonight... long drive home... again. These long (two hours tonight) drives home are killing me and my work on the biplane. Although, I do get to think things on the project through.
I've read and have been told that you should make your time in the car productive... listen to an audio book, etc. For me... my mind races from one thing to another. I'd have to keep backing up that CD to hear what I just missed because of thinking of something else. I think I'll stick with the thinking.
Plan A.
November 19, 2015 With all this planning...
some things are just unplanned for.
Ya try and think things all the way through and there are just some things you're not going to know...
Anchor nut plates are all installed so it's on to prepping the rivet holes in the flanges to attach them to the firewall. FIRST one I try and counter-sink (on the horizontal long piece for the exhaust port) the anchor nut plate is in the way. It won't allow me to get the tool into the hole to make a good counter-sink hole. can you give me another DAMN !? I take a look at the holes on the piece and in order to do it I'll need to take the nine anchor nut plates off and then re-rivet them back on. Now for the real scary part of this whole deal... seeing if I need to do it to all of the anchor nut plates.
Take a look at the two shorter flange pieces that go around the exhaust port and they are good... no need to remove the anchor nut plates. It's beginning to look hopeful ? Take a look at the two long flanges for the firewall and... I think I'm in luck. It looks like there is enough room to get the tool into the hole to make good counter-sinks. yeah :/
Hole just below anchor nut plate is the victim. Click on image for close up.
Thinking back on this whole process, I wouldn't have, couldn't have really done anything different. When I caught the need to drill, and attach the anchor nut plates to the sides of the flanges before installing them I thought I was way ahead of the game. Not sure if you remember, but I saw the anchor nut plates on the Model 12 drawings. I would have never thought of that on my own. The Skybolt drawings don't show a thing about how to make the firewall.
The Skybolt build manual is a great tool showing you how to do a lot of things the drawings don't tell you how to do. I'd like to add... purchase a set of plans for a biplane/airplane that has very detailed drawings showing you each and every part. Don't buy it to copy it neccessarily... but to show you want needs to be done and maybe avoid having to go back and re-do something because you didn't know it needed to be done. and... if you know about it ahead of time you can planned for it better.
I did... and I avoided having to either take the flanges off the firewall (after riveting 182 rivets) or having to do it all on a curved surface. and... as you can see, I still didn't realize I should have done something before doing that other something.
November 20 and 21, 2015 Some things...
are done on the fly...
A lot of work on the firewall and associated parts...
As noted above, the anchor nut plates are in the way of me counter-sinking (by hand mind you) several of the holes. okay... so I drill out all of the rivets on those anchor nut plates; everyone on the horizontal exhaust port flange (seems like this one flange is getting an awful lot of attention). Take a break... come back to the project... and ya know what?... I'm not going to drill out all of those anchor nuts on the perimiter firewall just to have a counter-sunk rivet in it. I'll put a round head rivet in them and be happy with it; a reminder that ya can't plan for everything.
I had the one hole on the horizontal exhaust port flange already started to be counter-sunk so I decided to remake the entire piece. For some reason riveting it was a major pain in the arse this time. I had to drill out and re-rivet several of the rivets a few times.
I got the plastic out of the way on the firewall; cut it from both sides just outside of the area where the flange would attach. Started to counter-sink the rivet holes in one of the perimiter flanges and discovered that there were only two or three holes that I couldn't counter-sink. Like I mentioned above... a reminder that ya can't plan for everything.
You may think it's odd that I'm keeping a few of those holes for round head rivets. I just may be... but, every time I look at them I'll be reminded of the unplanned events that happen every once in a while with the build.
Drilling out rivets from flange... the one
I'm not using now.
Match-drilling new flange.
Drilling rivets holes in new flange.
Counter-sinking rivet holes in perimiter flange.
November
22, 2015 STOPPING...
the hesitation !
The firewall is like everything else... just a matter of getting
into it to understand it.
Hesitate. Hesitate. Hesitate.
I'm getting better at not hesitating... but still. Sometimes
you just need to take everything you've studied, read and
asked about and take the leap of faith. If you make a mistake...
at least you've move forward and made it instead of never
moving forward and making any type of forward progress.
I'm not writing this because of some large mistake that I've
made, but the myth of the firewall has basically been debunked
by yours truely. And it may all just be in my head... my head.
And a lot of times I think, hesitation comes from... the further
you get into a large scale project like the firewall, and
you make a mistake, you sometimes need to toss it all away
and start again from whatever point. I did that with the first
firewall blank I cut out. I did it again several times over
with the various flanges I've cut, drill, deburred and counter-sunk.
Actually, quite a few times I've had to toss a flange. But
that's the beauty of it all... those discarded flanges are
bits of learning.
back on track...
Got quite a bit done today. Re-clecoed the 1/2 perimiter flange on the firewall and started squeezing those rivets. Took my time (as you can see by the amount of time I spent on it today) and all the rivets look good.
Feels good to know that I'm just about done the firewall which will lead to the sheet metal cutting and fitting up...
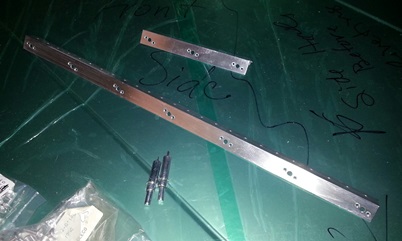
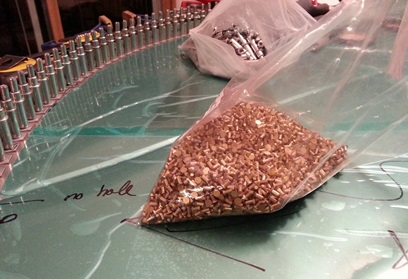
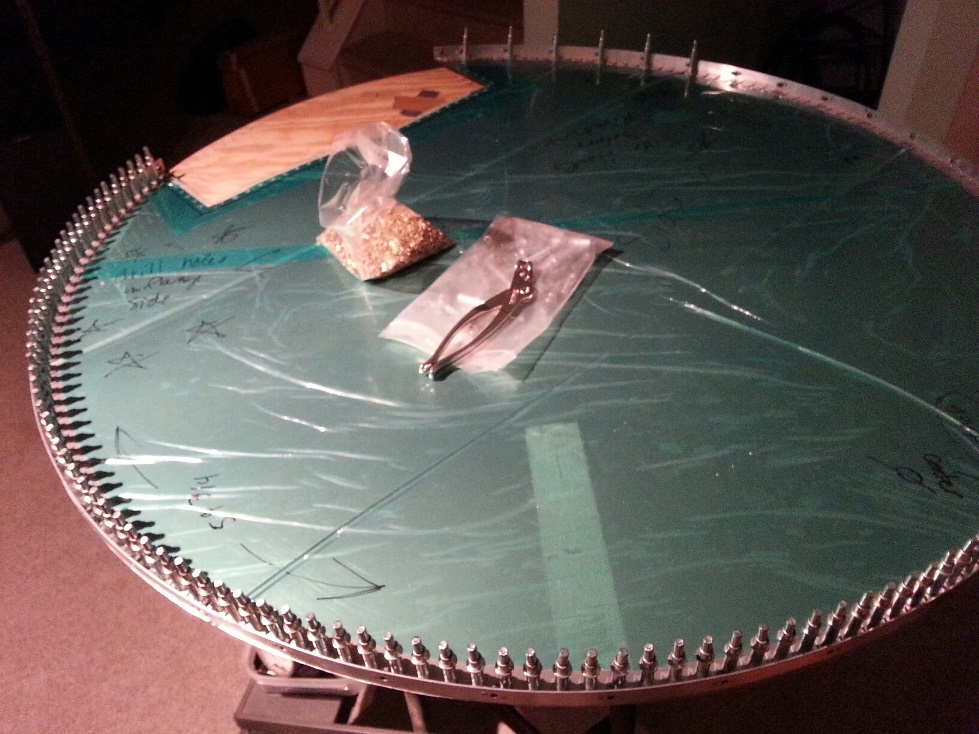
4096 3/32-6 rivets.
First two of many rivets. Click on image for close up.
Just about 1/2 way there...
November
23, 2015 Prolonging...
the magic
Spent the night watching tv... 'cause I was riveting the first 1/2 flange on the firewall. No need to be in one of the workshops doing something I can do in the warmth of my living room, eh ?
Really enjoyed the process of riveting the flange on the firewall. With just a little tweaking here and there... the entire process was text-book.
WAIT A MINUTE !!!... that was LAST night! Tonight I spent the entire night deburring all those holes on the other half of the firewall, and cleaning up both sides. Finished up with clecoing the flange in place. Still had the pleasure of doing all of this in the living room.