Mantua, New Jersey
Original Site:
September 2004
E-mail: usav8or@yahoo.com
Making.... The Radical Radial Fuselage Fuel Tank.
May 6 - 10, 2019 I'm now building.... the fuel tank!!!
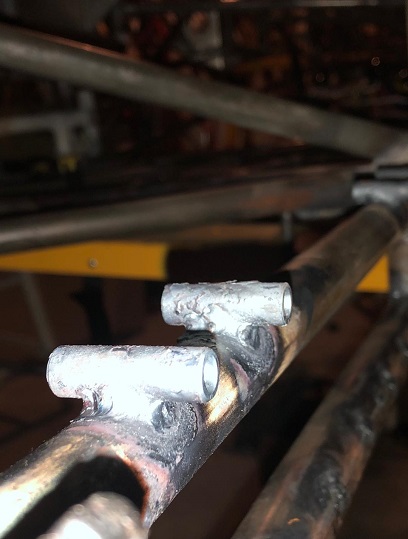
Getting things close to where I need to drill holes, insert the air vent hardware, take it over for welding... then mount the fuel sender.
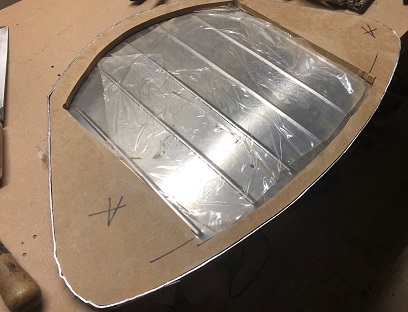
This past week I've been cutting down, and filing the depth of both end-caps. Still have to take off the excess filings (slag from when I filed them to the correct depth) for end-cap "A" and then it's ready for the holes.
Thinking back on the entire process... I guess I'm best when I have a comfort level with the piece I'm working on. And, there is a hesitation (most times longer than I would like) before I "plunge" into the project. And still, there is a learning curve that I need to work through before I complete the project.
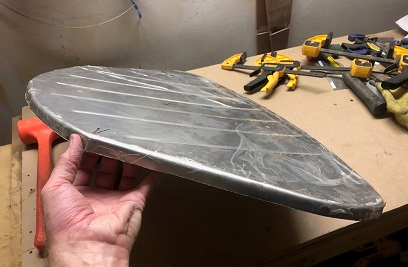
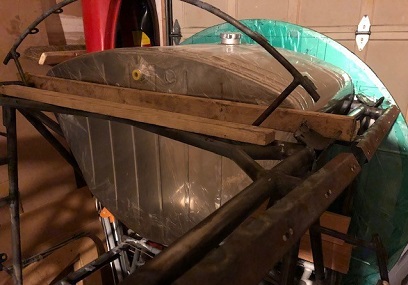
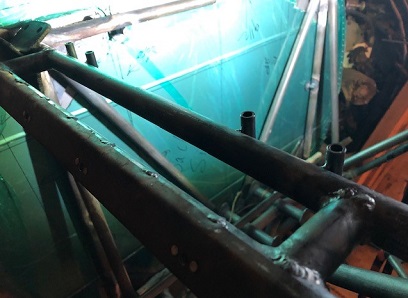
A few images from the past week. You can see a few areas that I still need to address with small waves on the sides.
May 11 - 18, 2019 It ain't a wrap.... until you've made the second wrap!
Beading the wrap... and tweaking the end-caps (file and sand edges).
Did you ever see the scene in "A Christmas Story" where Peter Bilingsley (Ralphie) and his dad (Darren McGavin) are on the side of the road fixing the flat on the car. Ralphie is holding the hub cap full of lugnuts... when his dad hits the hubcap with the lugwrench and teh lugnuts go flying, and Ralphy says "oh fuuuuuuuuuuuuuudge....". It was one of those moments this past week.
Finished the beading and... decided I wasn't happy with it. First, some of the beads need to be in another location. I could always just run more beads, but hell... I don't do things like that. Do it. Do it right. And second... some of the beads need to be in another location. Yeah... said it twice 'cause like, WTF?! I planned this all out before hand and then this???
Went to Fazzio's for a new sheet of .050 5052 aluminum. Rought-cut that to size. Still need to file the one edge, and then bead this one. This time, I'll make sure I mark it up correctly.
In between all this realizing I didn't bead it right, and buying the new sheet of 5052, I spent quite a few hours with the CAD program figuring out exactly where I'll have the bungs/fitting, and then worked the beading around that.
As of right now, I have the 2nd wrap rough-cut (real close to the line) and ready for final filing to size.
May 19 - 24, 2019 More work.... on the second wrap!
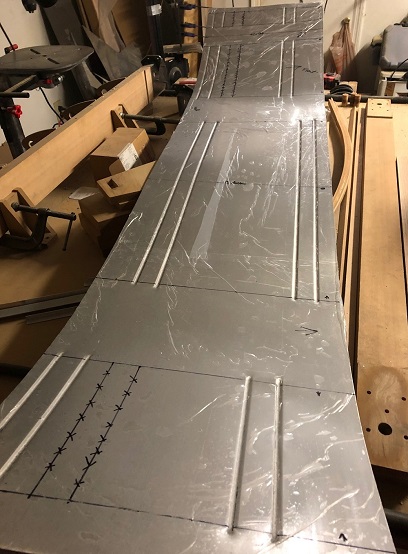
Beading the wrap... again. Or should I say... the second wrap for the main fuel tank.
Threw on some platic flooring covering (used for temporary protection for flooring... comes in a roll and has a light tack to the one side) to protect the backside of the aluminum blank. Kinda sorta needed to twist my mind around marking the inside of the tank for the beading and keeping in mind which side was the front... blah blah blah.
Did the double-triple check for the markings (actually ran one set of line wrong but saw my error right away) and then ran the beads. My Jerry-rigged jig to keep the lines straight worked almost like a charm. If I was in the business of making fuel tanks I'd have a better jig, but I ain't, so....
So at this point of the game I'm ready to test the wrap on my jig, and then mark the holes for the bungs, drill the bung holes, and then craft/bend the tubing for the air vent. This all needs to be ready to take up to Smizo, up in Northeast PA next weekend. The nice thing... it's a long weekend being Memorial Day weekend, and I took an extra day off. But let's not forget the reason for Memorial Day... remembering those that sacrificed everything for our freedom.
Full Honors Group Funeral Service for U.S. Army Air Forces Airmen Missing From World War II (Flickr: public domain)
New wrap... all beaded up.
September 21, 2019 My work is completed.... taking it to the proffesionals now...
I'm either missing a lot of postings that I thought I wrote
but didn't post (which I thought was the case)... or I never
wrote them (which apparently is the case).
June 1st:
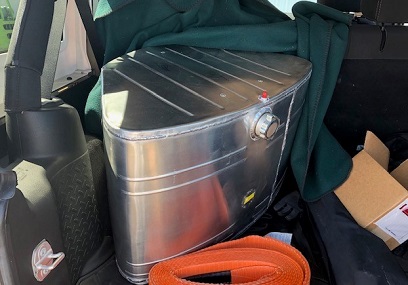
ok so... The plan was to take everything that I crafted to smizo's (Chris Murley) place in northeaster PA to get it welded it. All that work that I put into it and I didn't want to take it to just any welding place. They know aircraft and they would do it right. (Actually the plan was for me to weld it up, but... $3000.00 for a TIG welder, the cost of an electrician to run a line for the welder... it just didn't make any sense at this time.)
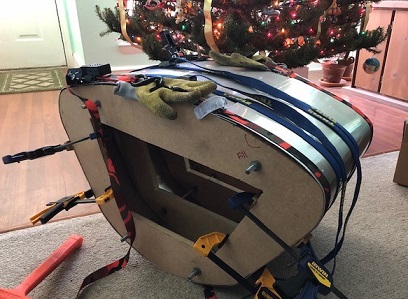
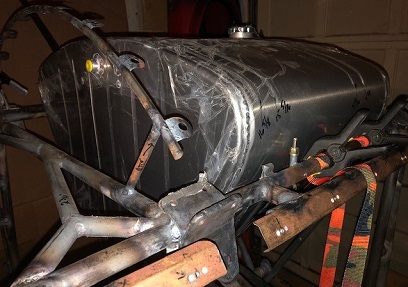
Here's a photo of what the tank looked just prior to me leaving to take it up to get it welded (although this photo is from around Christmas of this past year).
It was Saturday, June 1st... It's about a two and a half hour trip up to "Griggs Aircraft Refinishing"... I thought I'd get an early jump getting up there. They were having a small gathering of biplane and I wanted to check them out/hang out for awhile before dropping off the tank and leaving. My best intentions were pushed aside when I started taking off the protective plastic that I put on the tank. The plastic was squashed onto it pretty good in the areas that I beaded. So instead of an easy peeling off of the plastic... I had to use MEK to take off the plastic in the areas of the beading. Instead of leaving at 7AM I left closer to 9:30AM.
It was a beautiful day. Chris and a few other biplane owners were having their annual biplane gathering which made it nice. Instead of going up and just dropping off the tank... I got to see some of the guys from the biplane forum and look at some pretty biplanes.
After all the activies Chris and I went to his shop to discuss the project. Dan, another one of the guys from the forum, who works with Chris part-time stopped in while we were discussing the project. After talking about the tank project Chris gave me a tour of his place. He does it all... has an STC for putting a turbo on 210's, had a job where he was replacing all the steam instruments in a place with all glass... upwards of 500K for the instruments. DAMN!
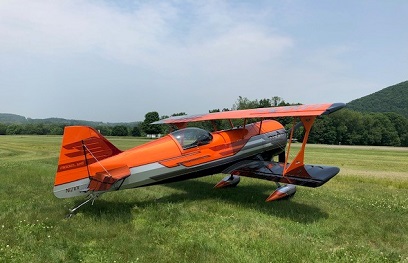
smizo's ASIIS
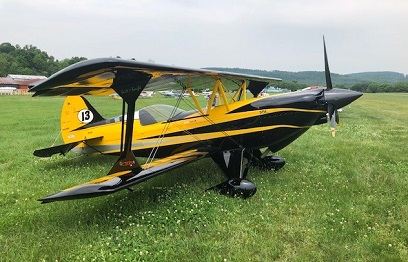
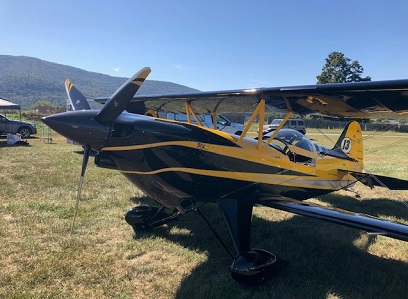
Pitts 12 (Proton)
Pitts S1 HIGHLY Modified (with Wolf Wings?)
September 22, 2019 All the work has been completed.... by both the proffesionals and the un-proffesional (moi)
Today... headed back up to Skyhaven Airport, not only to pick up my tank, but to enjoy the company of others that enjoy biplane (airplanes) as much as I do.
Going up 476 like I do for work each morning... traffic was worse today than the week days but I enjoyed that ride today. Can't imagine why...
Chris set-up a few days for another "get together/acro day" for a few of the biplane guys. (Yeah, we're snobs). I was looking foward to seeing everyone again. With the traffic it took me an extra 1/2hour. I pulled onto Runway Road at about 12:30... pulled onto the airports dirt road and all I saw was an EZ-up tent and Chris' ASIIS. What? Turns out either the weather, or other plans kept a number of the guys from showing up. Bummer.
Got out of the Jeep and Chris greeted me... explaining why so few biplanes. Said a few were expected to show up shortly. Saw Mark again (race38 on the form), and Eddie (re-building a 10-100 Ultimate). Mark had his clipped-wing cub back behind Chris' shop. When all was said and done, about a 1/2dozen biplanes showed up, along with a Cessna 152 that Ken (aka airplanegeek on the forum and re-builder of an Acroduster) and his nephew flew in to the event. An unbelievable turnout considering how things all started.
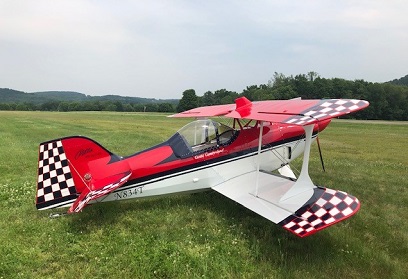
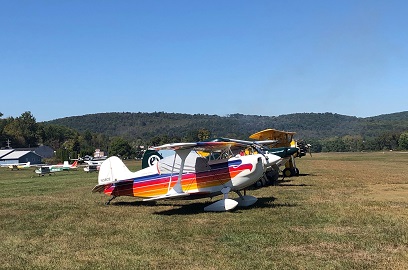
September's lineup.
Chris' ASIIS (HIGHLY modified Acrosport II)
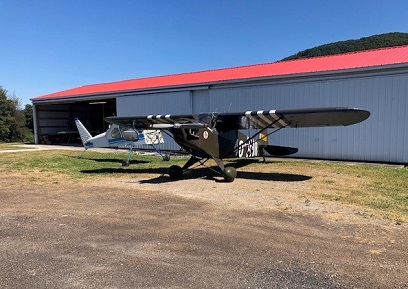
Mark's clipped-wing Cub.
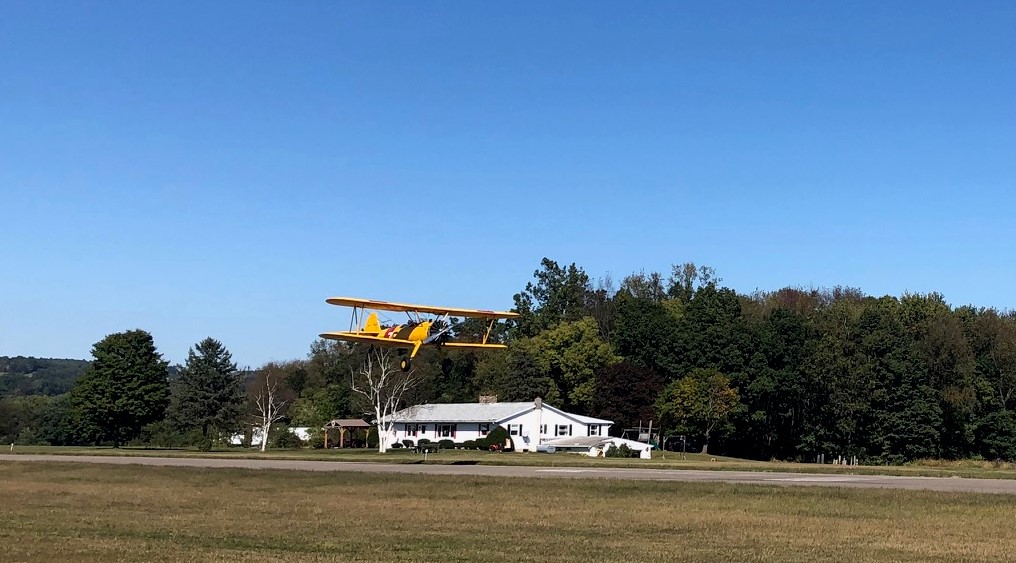
One of the highlights for me was Steve's Stearman. He's owned it for 42 or 43 years... After doing his acro performance, he described how he used his trim to help him through the sequence. The pressure is so strong when doing rolls and loops he eased the workload by using it. Nice job!
Click on Stearman image for close-up.
wait... where was I going with all of this? oh yeah... my fuel tank.
Things were starting to break up around 3/3:30 so I said my good byes and headed home with the tank in the back of the Jeep... safely tucked in for the ride home.
November 29, 2019 Location, location, location.... not just a term used in real estate.
The other day I pretty much finished up with mounting of the stringers. Figured out and created the back attach bracket for the belly's port and starboard stringers...
Starting to scratch my head with the location and mounting of the main fuel tank I made; the ideal distance from passenger panel to tank, and firewall to tank.
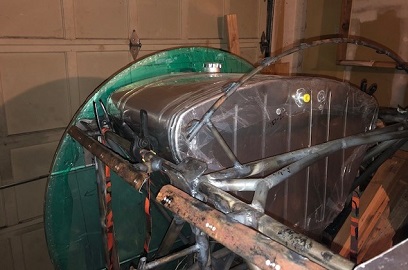
It's in place.. It fits! (it sure as hell better fit, I made sure to cut back those top corners by more than just the thickness of the metal) And, with the higher top skin I have a lot of room to place the tank higher (it's an option... not that I need to do it)
December 7, 2019 Remember to... just keep it simple.
I'm not just refering to the build itself, I'm talking about your approach to each of the smaller projects. My latest... a case in point.
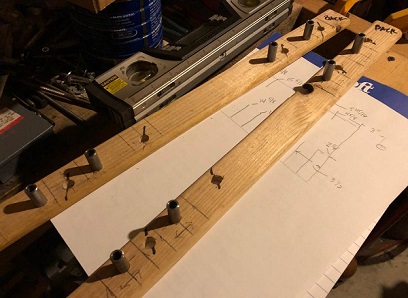
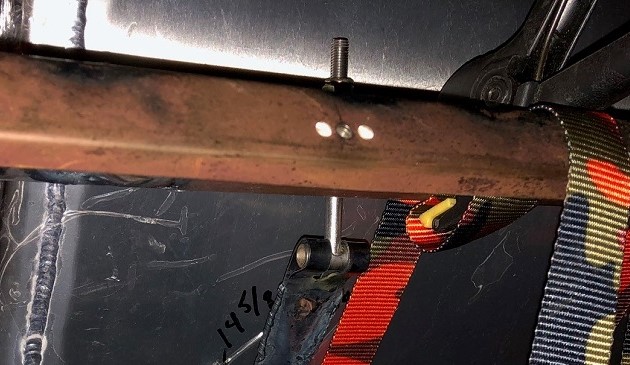
Measurng out for the placement of the bushings for the main fuel tank straps. I decided to add the distance from the tube at station 24 into the entire equation. At first it was going to be 3 3/4" in front of that station (the back of the tank). Then... I changed that to 3" to allow more room in front of the tank for the air vent tubing and all its turns.
I marked all the first measurements out on the paper I had. Then made the change to 3" mid-stream and marked all those on the same paper. Double-checked my measurements to the tank and went down to the basement workshop to make the simple jig for holding the busings in place when I tack weld them.
The next day I check the jig against the fuel tank to make sure that they were "on mark" to where they needed to fall. And... NOT! What the hell? Well, that's why I checked it today... took my measurements again. This time I didn't even add in the distance from station 24. Re-checked THOSE numbers. Went down and made another jig for both the port and starboard sides... Did the check against the fuel tank with them and BOOM! Spot on! Or very close to spot on. The straps are 1" and I made the inside to inside about 1 1/4" to allow for the rubber protector that I'll be putting oer the straps.
So... when taking measurements. Keep it simple. AND always check your work against what it needs to do... aka, this time I checked to make sure that they fell on the center lines of where they needed to on the tank.
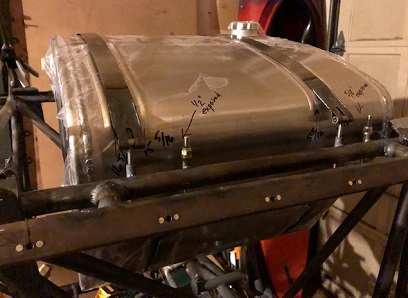
Strapped into place (fabric straps)
December 13, 2019 Moving along... just not "right along", ya know... like fast...
(I'd even be happy with semi-fast)
Still working on the biplane but it's not moving along very quickly at the moment. And I can't blame the holidays for my lack of work on it. I really haven't spent a lot of time with holiday things. Yeah... I've put up the lights, decorated the treee, blah blah blah... but I still had time to work on the biplane. Although, these long rides back and forth to work are killer.
With the bushing jig made for the main fuel tank strap supports... all I need to do is align, tack, weld.
Squeezing around the fuselage a number of times adds to the build hours. Eeeeeeeesh! Night 1: Aligned and squared up the bushings. Night 2: tacked all eight bushings onto upper longeron. (Now I smell like I've been standing around a camp fire for the evening.) Night 3: Prep of fuselage. Needed to take off all the stringers, and the firewall so that I could flip the fuselage for a better weld angle. After all of that... I discovered that if I just took off the firewall I could have probably gotten a good angle on all bushings... but maybe not.
All week... and that's where it stands. Heading out to the project on Saturday to weld those puppies on. Then... onto making the straps (now where did I put those lengths of...)
Update: December 14, 2019
Back out to the garage to get some work done on the biplane project. With the stringers and the firewall off of the frame I was able to get to the bushings without a problem.
I'm glad that I did strip off everything because... I needed to flip it on its side to get at a few of the bushing close to station 24.0 on the port side.
Next up... making the straps.
December 21, 2019 It's all about... the learning.
What with the holidays, kinda sorta, (my current excuse... which I didn't use last time) a little slow going... with the build.
Checked alignment of the tank strap bushings and all checked out fine. Re-reamed to get the slag from welding cleaned from the I.D.
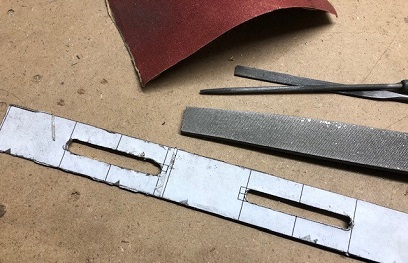
Need to make those straps now. Need to find the metal strips FIRST! Didn't take long to find them... thank God for my organizational skills (yeah right!). NOW I need to figure out how to make those slots. I've actually been thinking of just that for a while now.
Thinking at first to drill the two curved ends with a 1/4inch bit then bend over and rough cut the line with the bandsaw then file to the line. Then test to make sure that "T" bolt fits. Tossed away that idea... beofre even trying it.
Settled on drilling out the two end points with a 1/4inch bit. Setting up a straight-edge before the end point drilling... and then drill points in between with the 1/4inch bit; basically drilling the slot. Follow up with a few files to clean up the hole. It worked... but didn't work. The drill bit drifted slightly on some of the holes making the slot, when filed smooth, larger in some spots than in others. A little backing up here... to clean the slot of the excess metal I vise clamped it with a 1/8inch piece of steel with a straight edge. Lined it up even with both end holes and filed. This is when I discovered that the bit drifted on a few of those connecting holes.
Okay... lesson learned and make adjustments.
Second slot... I drilled both end holes then used a centering bit to make the holes between the two... not hitting the slot line... keeping the holes under 1/4inch. Took over to the vise... clamped with the scrap piece of metal straight edge... used a small file to open up the space between the holes then file to the line. Ba-BAM! Success!
Now to do that seven more times. Next three are made on the one end of the strap. The additional four will need to be measured before making to see where on the strap to make the slot.
December 27, 2019 It's all about... reflecting on the past; aka... using your learning.
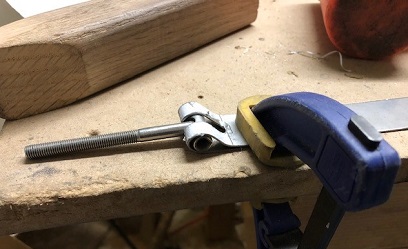
Buzzed through the bending of the tank strap ends. Ahhh... just like bending any other metal; mark your lines, clamp it in the vice, bang it over... then insert T-bolt, take oak bending tool, hammer on oak bending tool with deadblow hammer. Ba-bam! One done!
Thin metal... soes I need to be careful welding the edges... .032 4130 dontcha know.
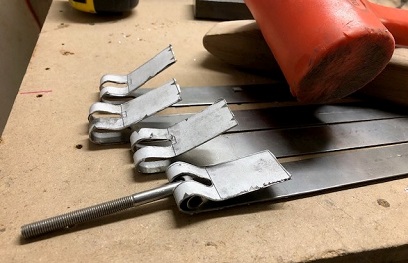
With all four ends on each of the four straps welded shut I needed to start figuring out the length of them soes I can do the same to the other ends.
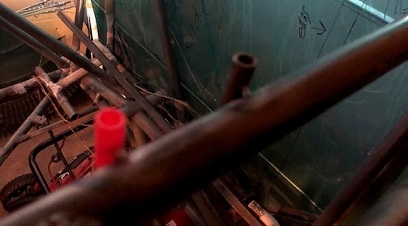
Flipped the fuselage... which you know, isn't an easy task in a one-car workshop. With it flipped, I attached a few fabric straps so that I could align the tank in the close-to-right position. I got to the point of bolting in the side of the first strap... but still need to figure out the length so that I can slot the opposite side, weld it shut, then bolt it in. Times four.
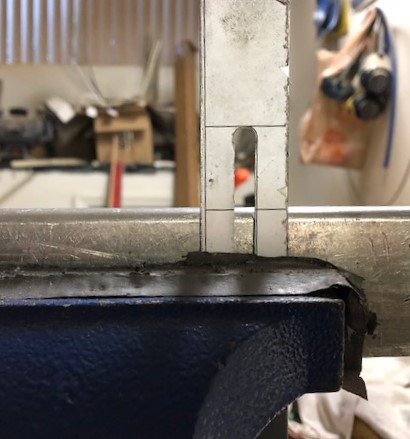
Click on image for a close-up of the T-bolt.
January 4, 2020 Put another check... in the finished column.
Most of this week's work has been just a repeat of last week... just on the other side.
With all the slots cut and welded up on the first end of all four metal straps I needed to measure and make the slots for the opposing sides. Simple enough to do, just a matter of taking the time to make sure I check, double-check, and triple-check measurements.
Confirmed that the tank had aboout a 1 degree back pitch for the fuel to ya know... flow back to the rear of the tank in level flight. Not that this is required or even suggested. This can always be adjusted as needed.
Tank in position... bolted in the first tank strap, swung it under the tank and took a measurement of where the center of the bend on the opposite end of the strap would be. Then... the entire process of glue on paper pattern, drill "dots", connect the "dots" by filing, weld slot closed, test on fuselage.
Repeat
Repeat
Repeat... and I'm liking the end results. All I need to do is cut the rubber strap covers to length, attach to straps, then tighten up.
Next!
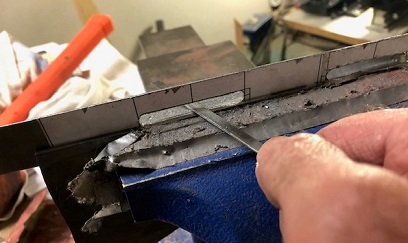
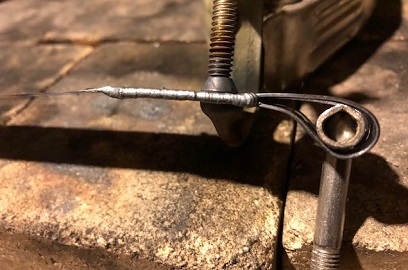
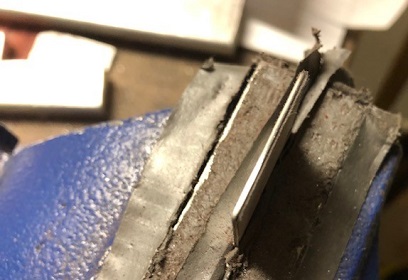
Excellence... below is a photo of the edge of the tank strap. It won't be seen by anyone. And... does it really need to be polished to that degree? No... but just like in life, you do things to the best of your potential even if nobody sees it... or knows that it has been done. Integrity...