Mantua, New Jersey
Original Site:
September 2004
E-mail: usav8or@yahoo.com
more work on the...Radial Fuselage.
April 15 - 16, 2017
I just think...
I can make them better.
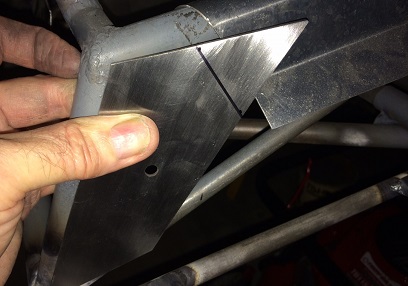
Spent the last few days prepping the fuselage for the re-tacking on of the side-rails. After buying a piece of retangular tubing and "pulling" the centers of the side-rails away from the longerons... they're STILL slightly bowed. DAMN ! I think I can do better than that.
That was my first thought... my second thought was, "I'm not sure if I can do better than that." Which was a damn cover-up for "I put all that work into making those side-rails and I really don't want to do all that work again." Which is bullshit. Bullshit !
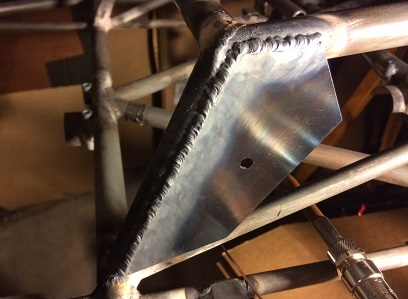
Below are a few images; the jig I made for pulling the centers of the side-rails straight, and the re-tacked side-rails. Kinda not happy with the .o25 thick material that I used for the side-rails (it's what they use for the Pitts S1 series). For the shorter lengths maybe... but for the longer lengths... NOT ! I liked the .o32 material that I used for the tailfeathers and how they turned out... and some of those were pretty long.
A few things I learned from making the first ones; 1. Need to make them out of .o32 material. 2. Need to make the last holes on the third set of side-rails 2inches from the last 4inch spacing in order to screw down the trailing end of the last upper sheet metal skin. And 3... When positioning, tack the front and back ends of the side-rails-to-longerons then use the straight-edge to make sure that the piece is dead-straight.
April 17, 2017
I can make them better.
Just not with the material I have on hand.
I have a large sheet of .o32 4130 sitting in the basement workshop... has spots of surface rust that I think I can clean off. Proceeded to cut the six lengths of material I needed and then started to clean the glue and rust off.
Worked at it for over an hour and decided to call it quits because I wasn't really getting anywhere. Went online and ordered a new sheet from Aircraft Spruce... fuguring I'll get the piece in two days instead of working on just cleaning these up for a week. I could better spend my time on things other than cleaning, or should I say trying to clean, the rust off of the pieces I want to use.
April 23 - 28, 2017
I can make them better...
and I am.
Received the sheet of .o32 4130 and started working on it. Same as before... cut the strips, clean the ends, drill the holes (both the bolt access holes and the rivet holes), then file and sand the ends smooth.
All that in 13.6hrs.
Still need to bend the bends, counter-sink the rivet holes, cut to length, fit to longerons (and another cut to fit), tack the ends, straight-edge for making sure that they're straight this time, finish weld.
No photo at this time.
April 30 - May 8, 2017
The process...
of making them better.
What a pain in the ass ! Don't get me wrong, I love the process of building each and every part. I love re-doing something to get it right. BUT... when you need to re-do the re-do... I just get tired of THAT process.
Cutting off the old side-rails, filing and sanding down the weld that is left from the first and second attempts. Received the .o32 4130. Cut the metal into strips. Drilled and de-burred the bolt holes. Drilled and de-burred the rivet holes. Ready for the bending... waiting...
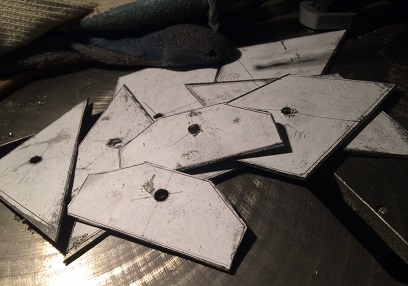
New blanks...
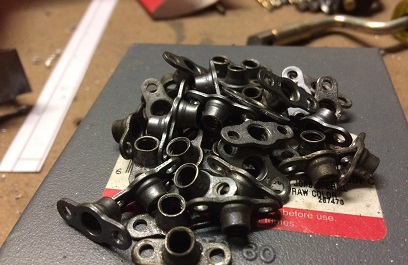
Re-used anchor nut plates.
May 27 -29, 2017
Trying to stay safe...
and secured.
While waiting on finding a new metal brake to use... my eyes searched for something else missing from the fuselage. Saw it, or should I say, I didn't see them... hard points for the seat belts.
Looked at the fuselage and kinda saw what I wanted to do spent (wasted) time making patterns. Then... got to thinking of throwing up the question on "the Biplane Forum". Got a few responses back... then Vic (up in Canada) mentions the article in the Skybolt Newsletter (November 1977), posted a few pictures too.
Compared what they said to what Tony B had written up... Did the best that I could to match the "perfect" arrangements to what I could actually do with the biplane configuration.
The turtle deck didn't make the connection of the back harness easy... needed to first figure out where I had to connect it based on how I was going to thread it through the turtle deck. THEN... I needed to figure out what type of hard point I was going to make for that connection.
Made the patterns based on my findings. Got a piece of .o71 4130. Drilled then cut/grind/file/sand to size. Burn pattern off. Sand both front and back of brackets. Ready for welding onto the fuselage.
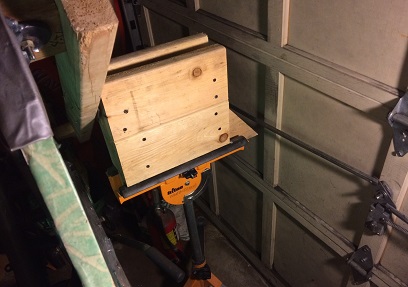
I'll take photos of where I put each of the hard points. oh yeah.... spent a large part of my time on Friday coming up with a new rotisserie for the business end of the fuselage. Don't need to be flipping the fuselage around and having it bend the side-rails (again).
May 30, 2017
Don't believe...
everything you read.
More work on the seat belt hard points... Did a trial fit to see how they would work when the seat pans are in place. Uh... they needed a little adjusting, at least the side hard points did. Just goes to show you... even though something is written up for the Skybolt (size and placement of hard point brackets) they don't always fit your Skybolt. They're like snowflakes... each and everyone is different.
Marked them where they needed to be trimmed. Cut, ground and sanded to the new size. Tried again... and they look marvolous... (in my best Billy Crystal voice).
Took a bit of time... got six of the eight hard points welded on. Two more to go and I'll be finished with this project. And... on to the next.
Needs trimming to avoid seatpan.
June 4 - 9, 2017
Sticks and rods...
getting things to work.
WOW ! Didn't realize that doing the push rods would be such a pain in the ass !
A few things needed to be done with the control sticks; weld them on (decided to weld in the front stick... instead of making it removable). While testing the control sticks in the torque tube assembly I noticed that the stick boot in the back was rubbing up against to the torque tube. Wondering what the hell is going on and... damn ! I'm going to need some thin-headed bolts to fit in there. Noticed that there was a little bow (from welding) going in toward the stick boot on the torque tube assembly. Re-worked that and it STILL kept rubing... Looked over the plans again and noticed that I didn't squeeze the bottom of the stick boot to a 5/8inch ID. Did that to both and now they're working just fine.
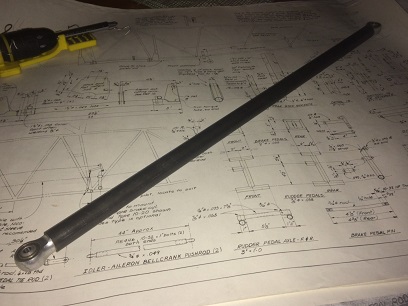
With that in place I began setting up the system for measuring the bush rods. Figured the first one to be 22" in length, plus the 3/4inch on both sides for the bearings. Cut the tube to length and looked for what size drill I needed for drilling the holes for the 1-32 x 1inch bolts. It doesn't tell you on the plans, so... I went online to look. The MIT page and a few other sources for engineers were telling me for a close fit use a #9 drill and for a loose fit use a #7 drill. Tried the #9 and it was a lot looser that what I would want. Tried a #11 and it's STILL loose.
Placing an order for some additional drill bits and the correct aviation grade hardware is in order...
June 10 - 15, 2017
Some lessons...
costs more than others.
Still figuring all this out... Wanted to make the openings in the turtledeck door for the seat belt webbing. Not sure of the size that I need to make them. From the looks of it... when comparing the seat belts I bought back in 1993... yeah that long ago... the metal fittings on the ends are too large to fit through the openings I made for the guides (DAMN !). I may need to re-do them. Not a problem, but I would like to know for sure. Sent an email to Hooker Harness... waiting for a reply ?
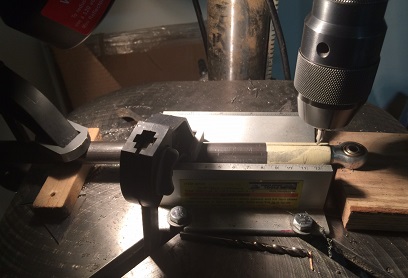
While waiting on that I moved back over to the control system. Heard back from the biplane forum... a lot of different opinions. And some even started talking about the fit in wood... not my questions, but anyways. Tried drilling the first hole in the push rod/bearing... everything is going along great and THEN I noticed that the freakin' tube is turning once I've started to drill into the bearing wall ! WTHeck ??? !!! I had it clamped ! THAT's a $55.00 mistake !
Can't be doing that again. Needed to come up with a jig that didn't allow the bearing to turn (yeah, that's what happened... the bearing turned inside of the tube). Also... decided that I needed the actual hardware that I was going to use so I ordered up the 10-32 bolts, along with the washers, nuts, and (2) number 12 bits (and a few other missing bits I needed). They arrived on Wednesday and I went about doing a few tests to see which size bit was going to give me the hole that I needed.
It turns out that the number 11 bit was the smallest that would allow the 10-32 to pass through it without scraping off the cadmium. The session on Wednesday lasted an hour and a half... I ended up with all four holes drilled (NICE !) and a test fit on the biplane and it works !
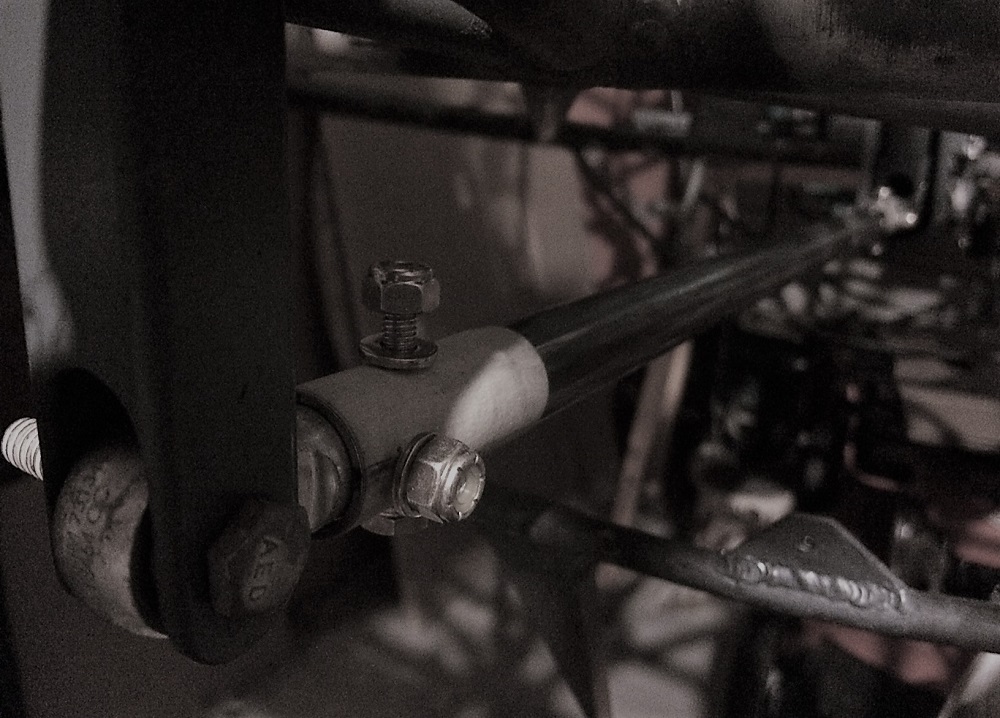
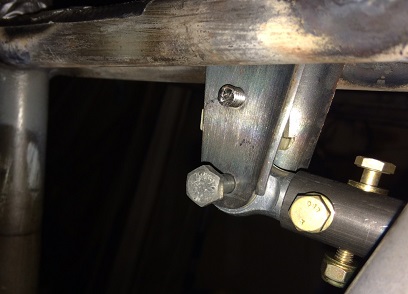
Note: Vertical bolt should have head on TOP, not the bottom.
Kept picture just soes I could point this out.
Called it a night after completing the first push rod. Did the same thing on Thursday night... jigged and drilled the second push rod. It takes quite awhile setting the drilling points up, drilling and getting things ready for just one push rod.
Anyways... got the second one complete and went to try it out on the fuselage set-up. Discovered that the tube I welded into the walking beam is too long. I didn't weld it all the way in, but I did extend the tube past the holes that the bearing connects into (the tube should be 3/4inch below the center of the tube.) I thought I was adding strength to the walking beam by doing that... lesson learned. I'll need to file/grind that out and try it on for size again on Friday...
June 16, 2017
Made more work for myself...
Spent more than an hour doing something that I shouldn't have had to do... and it was my wanting to make the system a little better/stronger ?
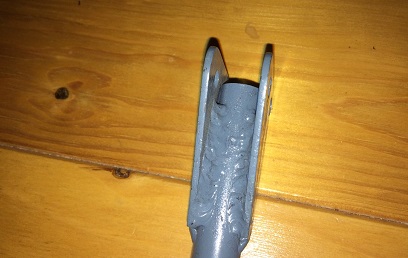
Filed out the excess tube from the first walking beam. The one pictured above. Filed it down to 7/8inch from the top of the piece to bottom of what I filed out; cleaning out a spot for the bearing to rotate. Works GREAT now. Just a little bit of fine filing and sanding to clean up the area and it's ready...
June 17, 2017
Two ways of doing it...
Let me preface this entry by saying... sometimes it's a bitch shuffling the Standard Skybolt's drawings with the Radial Skybolt's drawings...
Made great progress today. It couldn't be because I spent six hours on it... ?
Started off filing the top of the tube in the second walking beam. And... that's where all this bitch of a thing starts. The Standard's push rod set-up has only three push rods... the Radial's set-up has four. I designed the system to use four push rods and bought the tubing for the three-rod system. But, I'm not gonna let that stop me from getting as far as I can with this before having to stop, and either find or have to buy that additional tube. So... I proceeded to measure, mark, cut, file, drill the third push rod tube. Hooked it up... and it's smoooooooooth.
The last attachment is at the tailfeathers... spent the rest of the day moving stuff out of the way, moving the fuselage... so that I could GET the horizontal stabs on soes I could figure out where neutral is with the flight controls. I also took a look at the control stick and thought it best to go try it on for size to make sure that my neutral was close to a vertical stick. Glad I did... my vertical isn't straight up, it's slightly to the rear. Locked that into position...
Took the final measurement more times than I care to count. Made a few notes and started looking for that 3/4 x 28 x .o49 tube. Looked in all the places that I knew I had tubing. Nothing. One final thing to do was check the tube list I made a few months ago. Took a look and saw where I have a tube 1/2inch longer than the length I need. Went and got it and decided that it's not in the condition that I wanted it... kinda old and maybe some rusting on the inside ? I'm not sure of that but I don't want to use a tube that I'm unsure of.
Looks like I'll be buying ONE new tube...
June 18 - 22, 2017
Just a few...
of those moments.
Can we really place a value on thinking ? 'cause that's what I did a lot of this week...
Between the seat belt webbing guides and the control stick slash stick grip... there were a lot of WTF moments.
Started off with trying to make sure that my guides would fit the hardware on the ends of the seat belt webbing. It wouldn't for the ones I got MANY years ago, but looking on the internet on the Hooker Harness web site, it looks like the metal hardware on the ends of the webbing is smaller than the webbing itself ? Back and forth with a few emails to Hooker Harness and I'm still not sure. I'll need to give them a call.
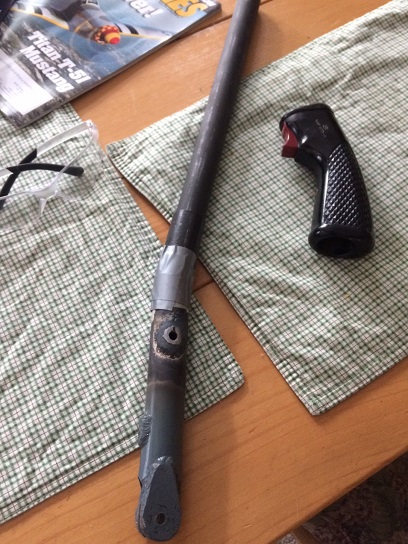
Wednesday rolls around and I get the tubes (one for the project and an extra for "just in case"). I measure and make a dummy push rod to the "correct" length to make sure it works. And (drum roll, please)... it doesn't ? The "nose" of the WWII stick grip, although at the correct height and the stick pushed the required 25degrees forward (per the plans), is pushing into the back of the co-pilot's seatback ? WTF ? How can that be ? Tried the throw in the other direction and there's a little bit more than a 25degree pull back (I need 25degrees).
I'm thinking there's no way in hell that the little bit of stick grip overhanging the stick can make that much of a difference. And... I... Was... WRONG ! I took the grip off and there's a little room to spare when the stick is at the full height. DAMN ! Good to know ! A little late... but better than something being f'd up with my work! I then RE-CHECKED the measurements and then marked, cut to length and then drilled the tube for the bearings.
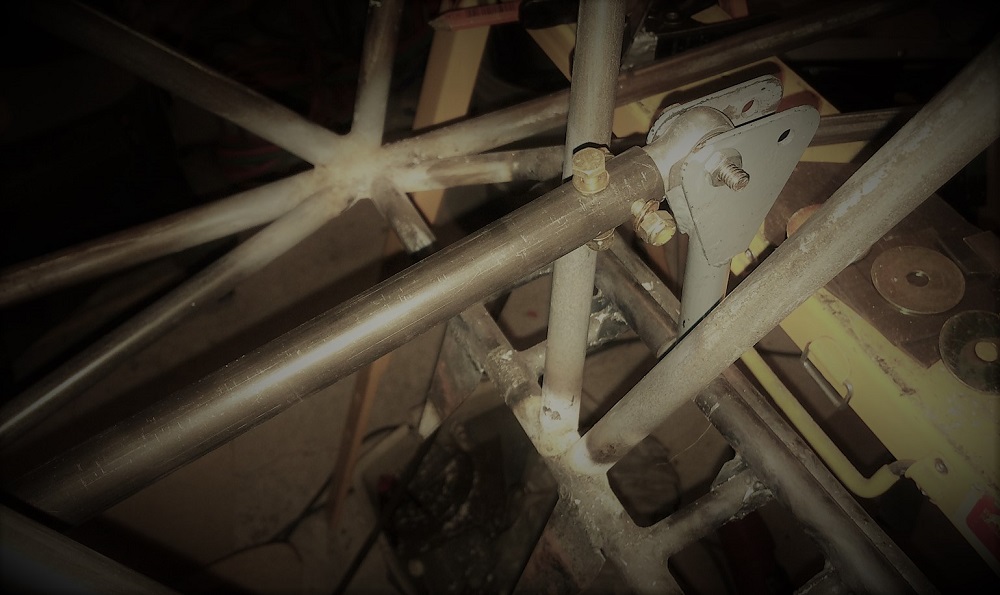
Some of the hardware shown will not be used
(aka... the cut-off bolt, just for the testing)
June 23, 2017
Mod work...
keeping the dream alive.
I wasn't real happy with the fact that I couldn't use the WWII stick grip I purchased... and the length of the stick was a little shorter than it should have been (without the total length of the WWII grip on the end of it) and it was just missing the seat-back by less than an inch.
The stick location, for the Radial version, is well ahead of the pilot's seat compared to the Standard Skybolt. Plenty of room to figure out something... so... I decided to make the back stick like the front stick; one that is bent at some specified degree. The front is bent forward 10degrees and I'm thinking maybe 20 for the back. Did a test and that's WAY too much of a bend. Tried the 10 and it looks fine. Did a quick test with the stick in place and it works great. How I was going to achive this was what I had to work through.
First I tried cold bending a tube... stuck the 14inch length in a vice. Inserted a 6foot tube into that and started to pull... Barely moved at first, but when it did, it collapsed. DAMN ! Thought that might happen but gave it a try. Next... chopping the stick about 1inch up from the fish-mouth weld, put a 10degree angle in it and welding together the stick at that point. Started thinking about this then decided to check out what was done with the front stick. Turns out that Curtiss has the cut and angle in the stick boot itself. So... that's where I ended up doing all the work.
Right now I have the original boot cut straight with the new boot top (1inch x .058) angled at 10degrees. Need to weld that on, then cut the 1 1/8inch top tube from the existing so that I can then weld it to the new 1inch stick... blah blah blah.