Mantua, New Jersey
Original Site:
September 2004
E-mail: usav8or@yahoo.com
Making the mount...
June 17, 2016 More steps...
less steps... it's all good.
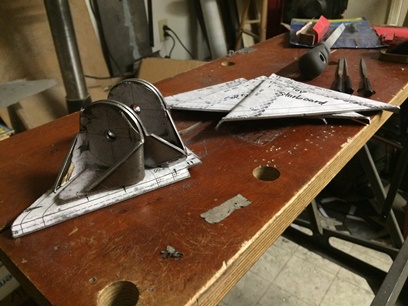
After taking a hard look at all the bends I need to make... I've decided to cut the back lip off the side pieces and weld these onto the (now .o90) bottom plate. I went ahead and did this today...
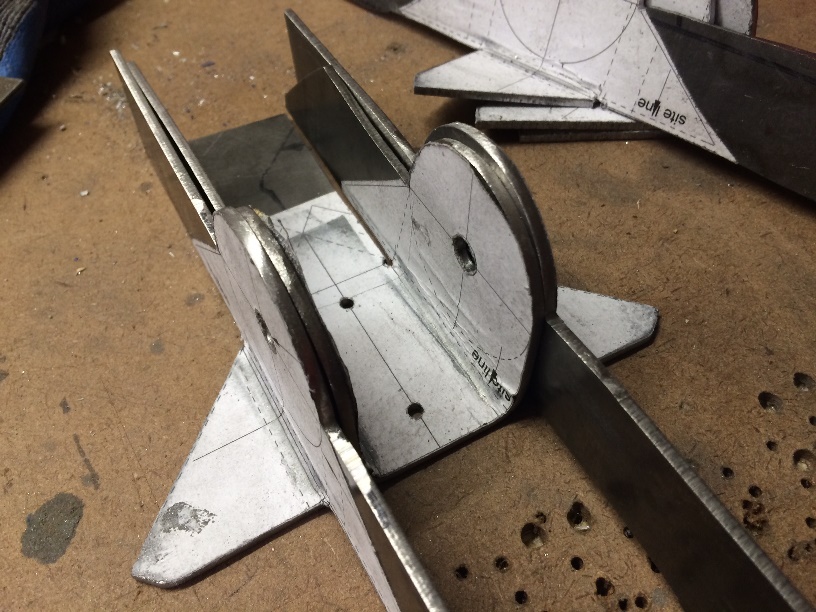
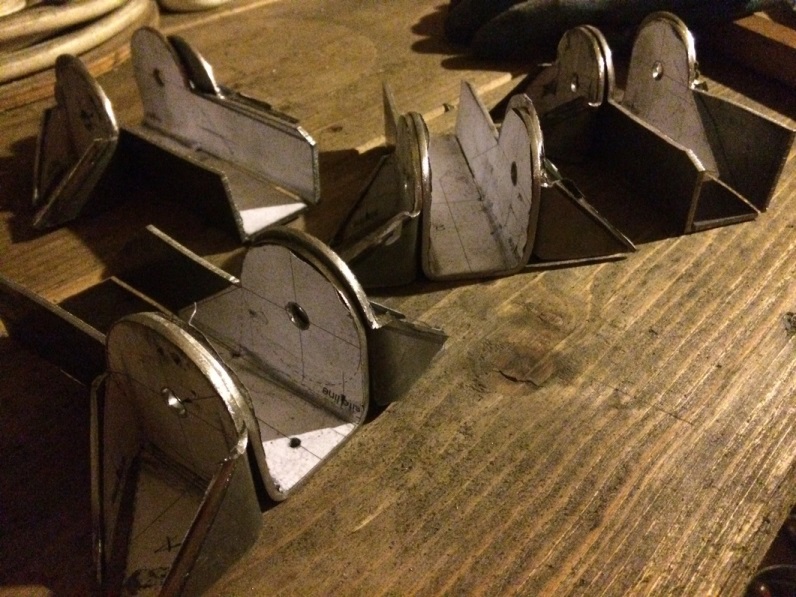
After cutting off the lips I matched each of the three-piece motor mount fitting together; sets A, B, C, and D. The bends in the side pieces need tweaking. I tweaked them today... The arms of all of the pieces still need to be bent... then jigged and welded together.
First set ready for more bending.
(click on image for larger image)
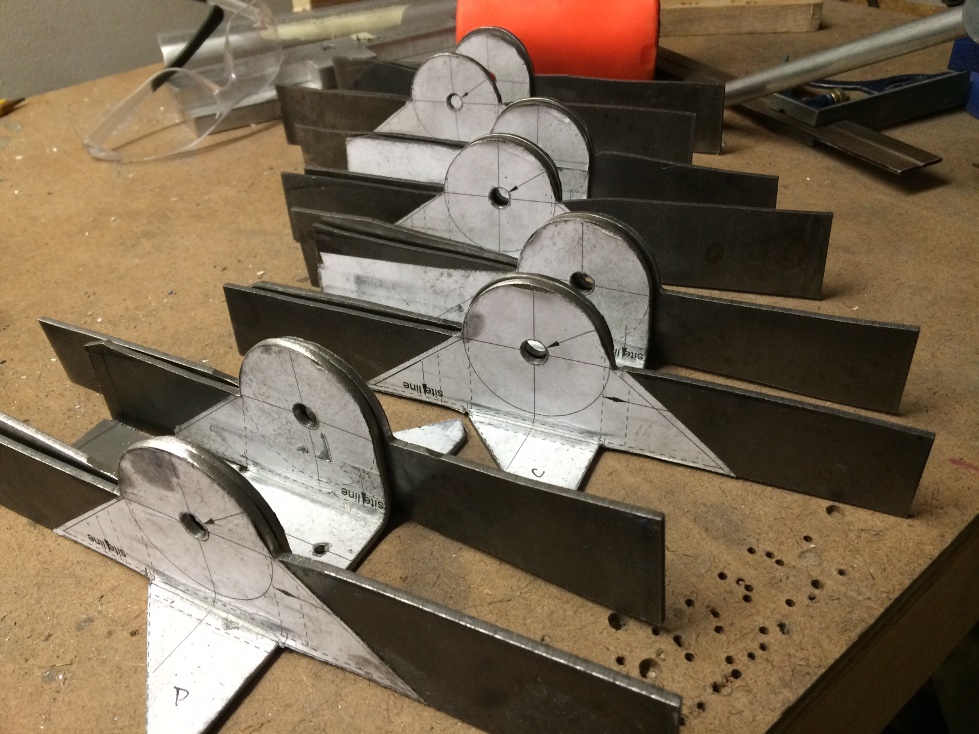
All four ready... (click on image for larger image)
June 19, 2016 And I thought the second bend...
on the center piece was a bitch...
Each step I take... things get more difficult/tedious. Today, four bends; two on each of the outer pieces of the motor mount. They're not perfect... and I knew they never would be, but they're close to being where they need to be.
These mounts are going to be stout for sure. Can't be anything but with the design... which falls back to military standards for a twin-engine transport from WWII. Gross weight for the UC-78 is 5,700 pounds. Gross for the Radial Skybolt... 2000 acro, 2250 gross.
Close to two hours on the project today and I have the outer two pieces of the mount bent and rough-cut to shape. Still need to make the bends on the center piece and then I probably have another hour of work before I can begin welding them up.
June 20, 2016 Not as much of a bitch as I thought it was...
Just a bit of learning...
The first few bends on these fittings aren't bad... but let me tell you, that fourth fitting it spot on !
Learned a lot from the first three and it all panned out on the fourth. Nice ! It's all about where you put the bending bar and how much you wack it in the vice before taking it out to wack it on the floor. The next two sets should be pretty sweet. I'll then need to bend the two bends on the center section, cut off the excess, file and sand edges, bend the bottom plate, make the welding jig and weld - them - up.
June 21, 2016 Knew I could...
and I did.
My last session had me feeling good inside. Where I had once dread (not really dread... but wasn't happy doing it) making these fitting... I now enjoyed it. Just a matter of know how and what to do.
Although I was "doing" it right the entire time, there was a technique that needed to be done along with the "doing". Once figured out, it not only made things look better, it speeded up the entire process. The one big kicker that I noticed I was doing "wrong" was bending the "past 90degree bend" more than 90 degrees while banging it against the bending block. This allowed it to form a curve past the bend that I had trouble bending out. If bent to the 90degree then taken out and bent the rest of the way you don't create this curve... the entire leg stays straight.
One point five hours, and two sets of outer motor mount pieces were bent into shape.
All four sets...
June 23, 2016 If I knew...
I would have...
With all the outer pieces bent and rough-cut to shape... I needed to start working on the center pieces.
Watched most of the Phillies game tonight... it was the eight inning and they pretty much had it made; 2 - 7 against the Twins. I thought it was safe enough to leave them now... they didn't need my help anymore. Headed down to the basement workshop to start bending over the 45's of the center section. Took one look at the first piece... DAMN ! the two outer wings that need bending are level with the bottom of the piece they need to be bent over. DAMN ! If I had known that before all this I would have cut that section out so that I wouldn't have to now file these down. And believe me... there's a lot of filing to be done.
Clamped the first one in my Black and Decker Workmate and started filing... and filing... and a half hour later I wasn't seeing ANY progress. There's got to be a better way. I'm not necessarily looking for a fast way... I'm looking for the best/fastest way. Thinking... my best bet would be to use the hand grinder and slowly take them down. It's almost 11PM now and I'm not going to go out into the garage and make all that noise... it'll have to wait until tomorrow.
Left needs grinding. Right side ground...
June 24, 2016 I knew...
now, I have to do...
I knew what I had to do... just a matter of now doing it.
Marked the sides of the first center section... staight lines that I could follow while grinding down the wings so that I can bend them over the center-bottom. It wasn't difficult... but was time consuming. Just more hours on the build... but I did learn something else. Won't come in handy unless I build another motor mount for the Jake.
Ground both sides down so that they'll clear the center-bottom... then down to the larger vise in the basement. I didn't use a set-back/sight line for these bends. I wanted the bend at the line that I had... so I lined the line up as if it were the sight line. And, because of the extra length that I leave (for bending over the piece) I needed to go back and forth a few times so that I could get these to the 45's; bend the first piece until it hit the other over-long piece, cut down the length of the one I just bent over, jig and bend the second one to almost the 45 degree angle ('cause I can now with the other one cut down), cut the second one down to length... then bang both until at the desired 45 degree angle.
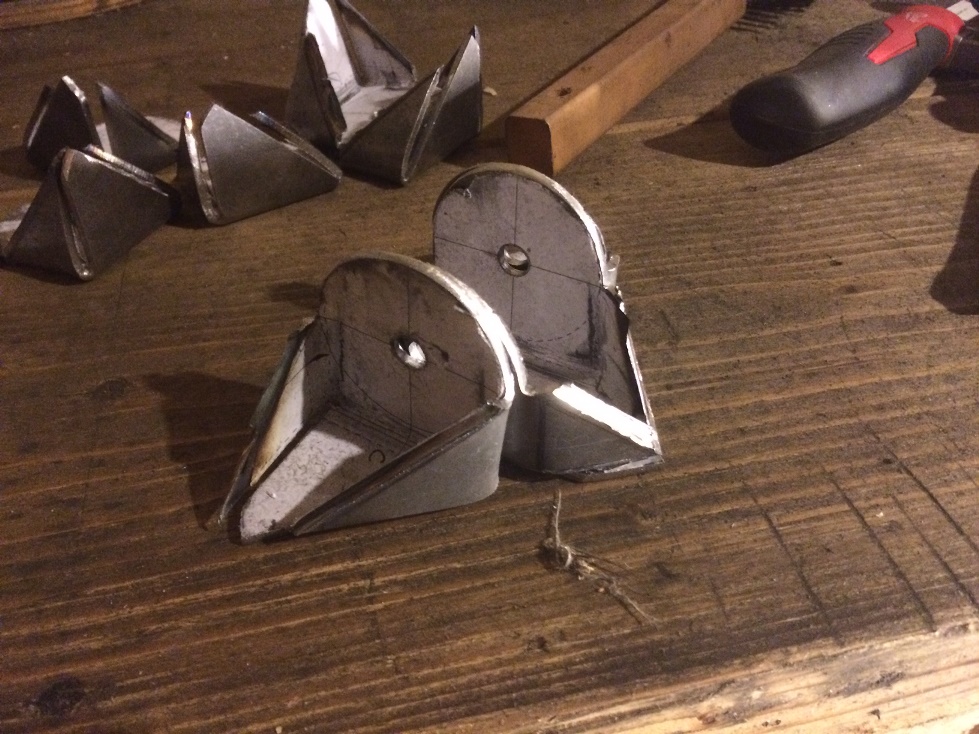
Okay... so now they're at the correct angle but they need to be shaped; an angled wing from the main circular part to the base of the fitting; mark and then grind to a rough-shape.
Did the first one in 1.7hours. The second one in 1.1hours. They still need to be filed and sanded before putting in a jig (still to be made) and welding them together.
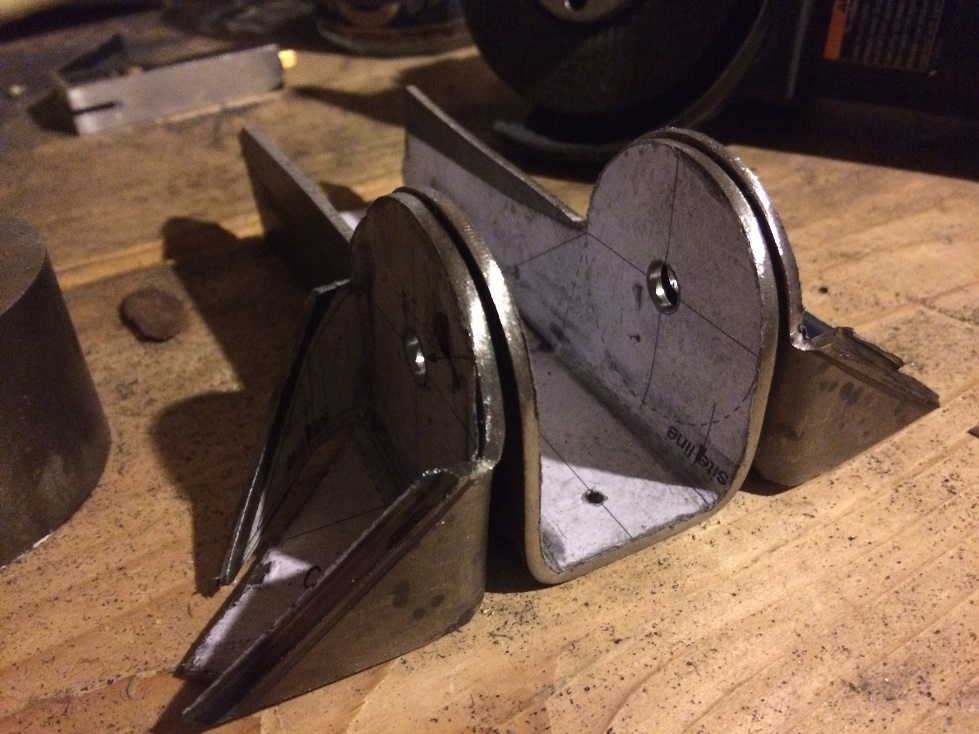
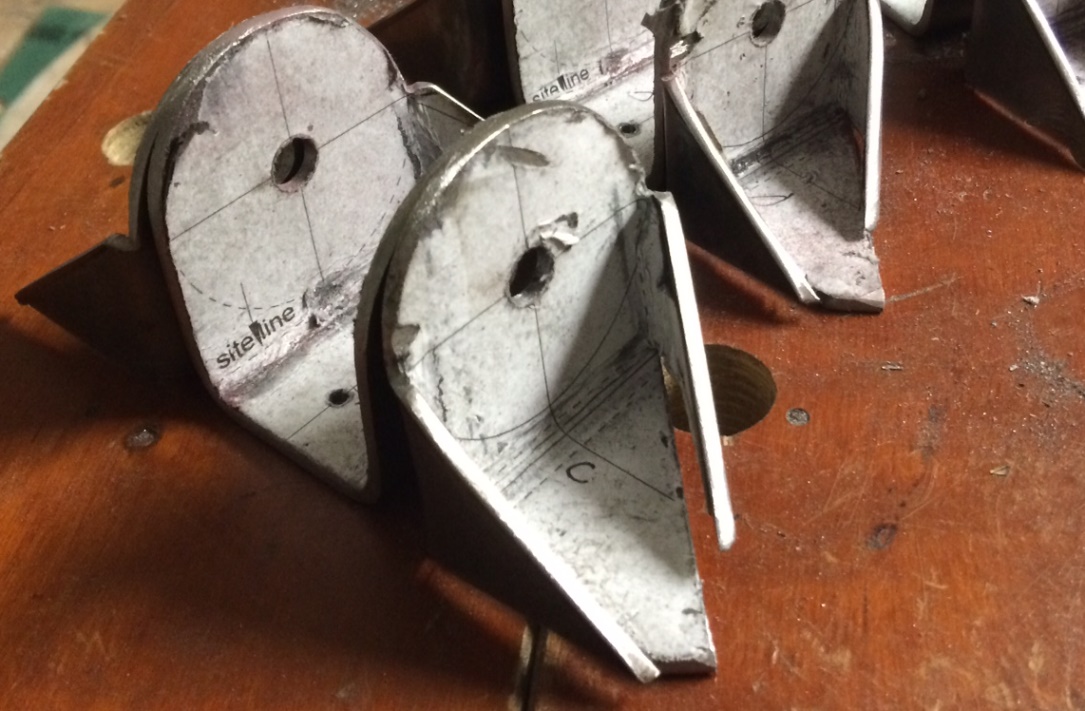
First one. (click on image for larger photo)
Second one with first in the background.
June 25, 2016 Quick, faster...
but not necessarily better. (they were already better)
Repeat.
Repeat.
Repeat... as is the purpose of building our biplanes, I learned quite a bit and have put it to use on the second, and now the third and forth sets of motor mounts. It feels good to have purpose when you walk into a room; aka the workshop in this instance.
The purpose I'm talking about is in opposition to walking into a project still wondering what or how to do it. Building this biplane has put a few additional squigglies in my brain.
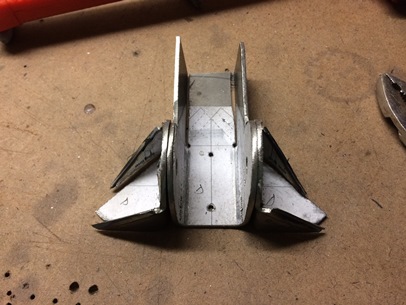
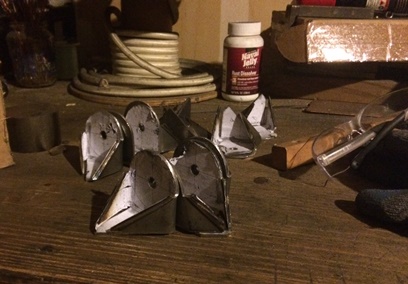
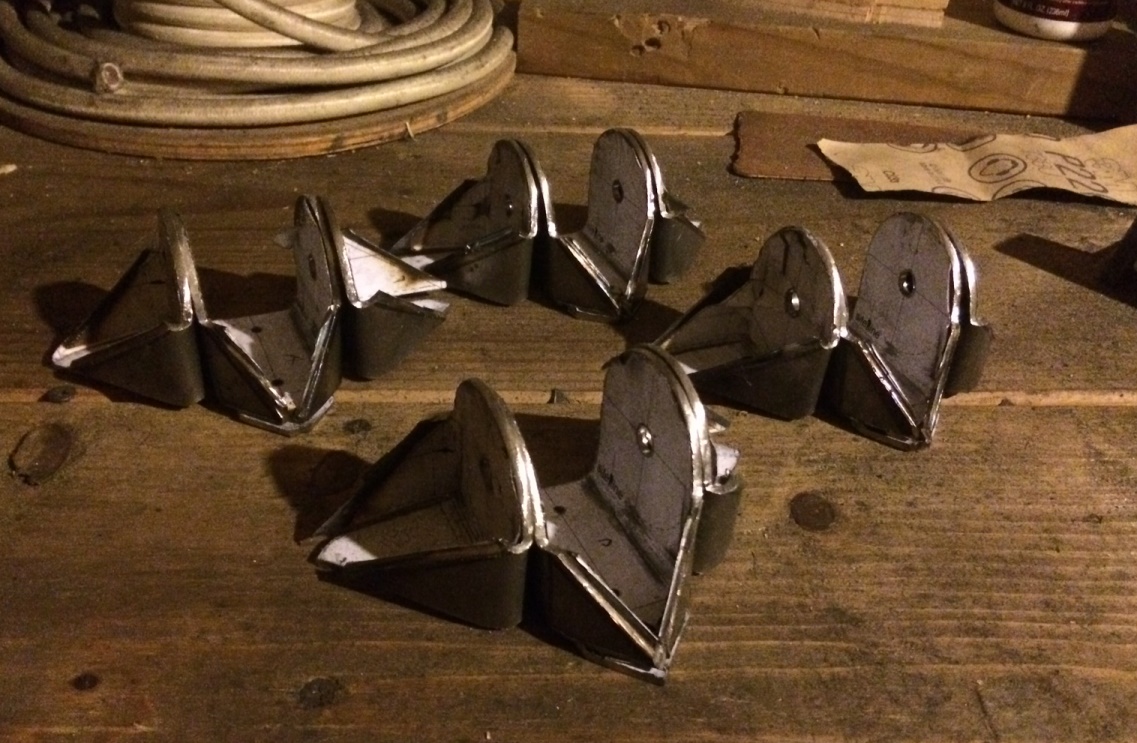
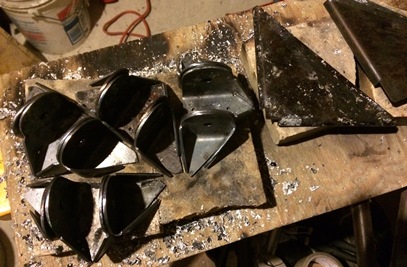
Final two.
All four ready for the next step... (click for larger image)
June
26, 201 Winning battles...
to win the war !
Another step closer... it happens with these "bigger" projects. And... you need to appreciate the completion of each step of the process; they're all little victories. It helps the project move along with thinking like this.
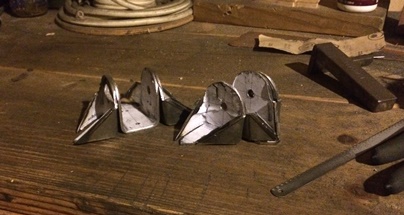
Today... grind the wings of all twelve pieces close to size. File and sand to shape.
Three sessions today; grind close to lines, files and sand two sets, file and sand remaining two sets. With a little tweaking... they're ready, but I still need to make the bottom plates and the jig for welding them together. I still need to make lathe down the tube/rod that keeps the holes on all three parts aligned.
Wings filed and sanded to 150 grit.
(click on image for larger photo)
June 27, 201 Spending time to...
save some time.
There's still one more piece that I need to cut and fit before welding these together; the base plate...
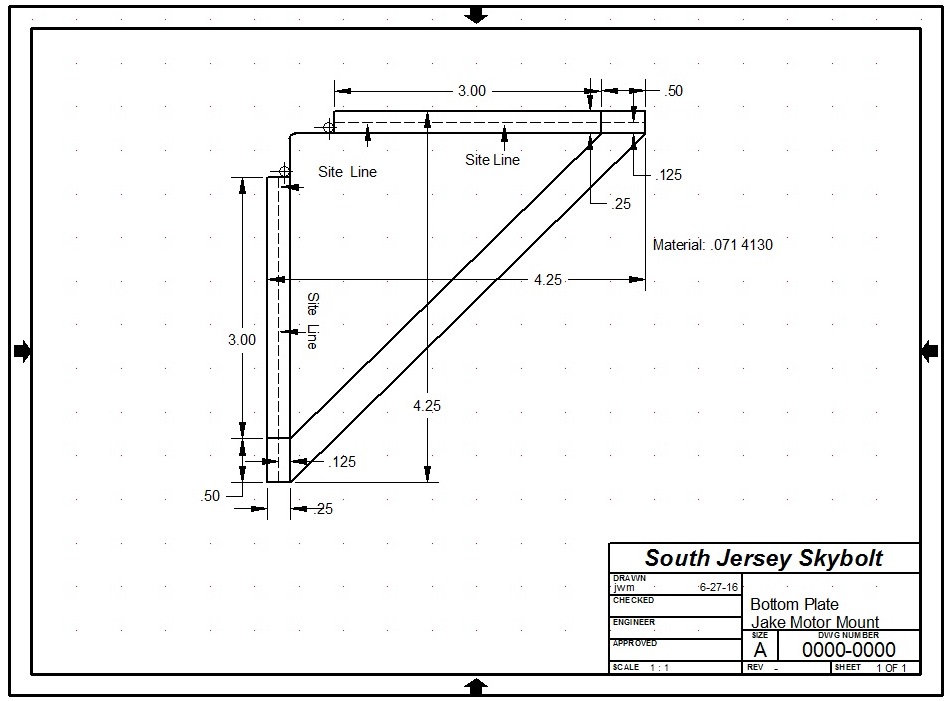
I thought better... than to draw each of these up on a sheet of paper and not be all that accurate. So... I opened up the DeltCAD program and spent some time pushing lines around with a mouse. Close to an hour later and I have what I need to print out.
CAD image shows two different size mounts; one being 1/2inch longer than the other. Just in case...
Base plate for motor mount fitting. (click on image for larger photo)
June 30, 201 Paper patterns printed...
preparing project "power".
Illiteration... ahhhh, whatever.
Did a test fit of the actual 3-piece motor mount on the paper pattern bottom plate; too small... So, instead of having to draw the extra length on each of the pieces and not being all that precise I decided to hold off until I could modify the existing CAD (last night) and print it out (today). In the mean time I started fitting out the fuselage with the parts and pieces I've made over the past several years. Still a lot to be done (tweaks all over the place and re-dooing some things I've thought over again).
So, we're at today's session. Paper patterns have been printed and they're the right size. Now just a matter of cutting and shaping before welding all that stuff together. And it's at points like these, along the build process, that I think "What, or how, am I going to do this?" Always the same thing... just a matter of thinking things through; a few more of those squiggles made in the brain.
okay... Earlier in the process of making the fittings I modified them by cutting off the lips that would be welded to the tubing. With the tools that I have I wouldn't be able to hold and bend them at the same time (they'd have two, three or four bends in the fitting already. So, I made a .o71 bottom plate that the .100 fittings would be welded to that would then all weld to the tubing; that's one THICK fitting !
I'm at the point of making these bottom plates. Spent about one and a half hours cutting, grinding, filing and bending two of them to shape. Here's what I ended up with...
July 1, 201 All pieces for motor mount...
made and accounted for.
Two more bottom plates to make for the motor mount fittings... and I made them.
Same exact amount of time as the first ones. Other than not having to notch these out as much... they pretty much look the same.
An, oh by the way... I cut the "wings" on the bottom pieces to size (no overhang). It worked for me but it took A LOT of extra time to bend over. Not as pretty looking either, but... all that overhang is going to be pretty much eaten up by welding it to the fuselage.
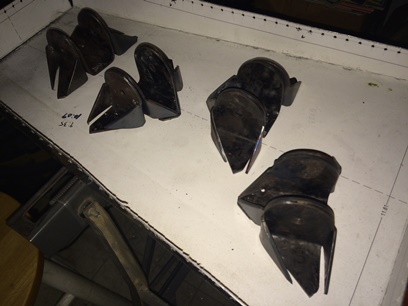
All four bottom plates. One has 3-piece motor
mount; all ready for welding up.
July 2, 201 All pieces for motor mount...
made and accounted for.
Finally... I'm to the point of welding these all together. Need to clean the patterns off... so I fire up the torch and have at it. It took a little while to get them all burned off and thus... they were hot as hell. Couldn't touch them for awhile so decided to see what else needed doing...
Remembered that with the whole sway wire thingie... I tacked on a few fittings that I finally took off from the firewall area; station 0.o. Now was as good as any to grind them off; grind, file sand...
July 5, 201 Running puddles ???
Buidling bridges ???
I've been putting this off... as I always do... with something new.
Why ? 'Cause it all eventually needs to be tackled. As so... I began to tackle it today.
First things first; needed to make sure everything was square. Back down to the basement workshop to take a square to each piece and if not square, bang it into shape. Funny... I had to bang all of the outer pieces in to shape by some degree. Only one of the center pieces needed tweaking.
Now, up and out to the garage workshop to begin welding these puppies.
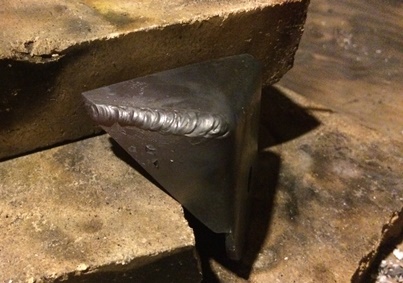
Used a pretty large, hot flame and a 3/32nd welding rod. Some of the gaps are pretty wide. First, tack the center and tip of the gap together to keep from moving... then start running that puddle. More like buidling of a bridge... but I made sure that rod bit into both sides of that gap with a firm hold on it.
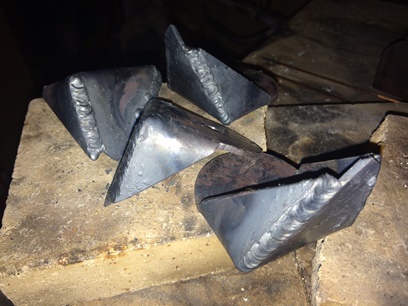
First one went real well... as did the additional four pieces. It was a very enjoyable hour of welding.
Squared things up.
First weld. Nice...
Four outer pieces. Ready for the next step.
July 6, 201 Running more puddles ???
Buidling more bridges ???
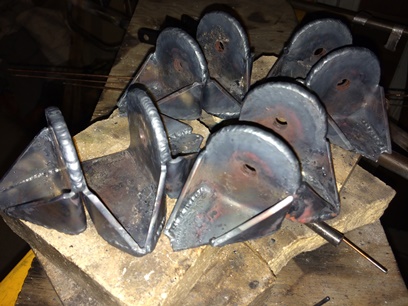
Finished welding up the four remaining outside pieces and did all four inside piece... of the motor mount. It was rather enjoyable...
On to welding up the inside edges and making a jig to hold these puppies aligned when welding them together.
First wave of welding completed. (click on image for larger one)
July 10, 201 Lost a cord...
this time ??? Maybe not !
Decided to weld the pieces together before putting anymore heat to them to weld the inside corners.
Took the large drill bit that I used to drill the under-sized holes and threaded each of the three-piece fittings onto it and welded them up... fittings one, two, three and four. No problem there except when I was taking one of the clamps off, that was holding one of the fittings together, it fell and landed on a 50ft extention cord. Stick a fork in it... it's done. Or... maybe I'll buy four fittings and make two cords out of the one ???
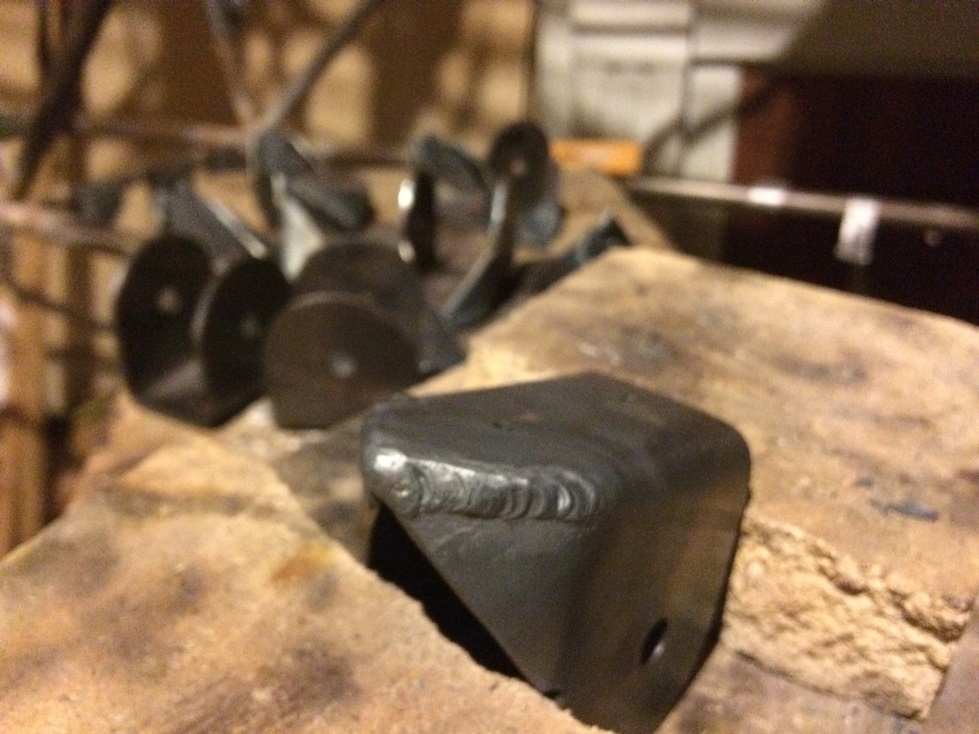
Another step completed.
July 11, 201 Three ??? Five ???
SEVEN !!!
Went for it tonight...
Tried a number 203 and it wasn't doing it. Tried my 205 and couldn't get a proper flame. Tried a number 207 and things went smoothly... after I learned which way to run the weld puddle.
Tried doing the first weld going from bottom to top. Had all kinds of problems AND will be grinding that first weld out. Second one I welded from top to bottom, just by chance, and it worked perfectly. Had to use a lot of heat... but that's what a SEVEN is for.
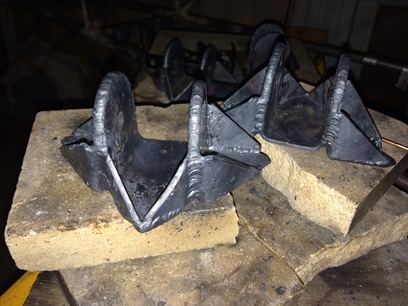
I welded four welds on each of the two fittings i worked on tonight... which finished up the welds on those two. Still have two more to go.
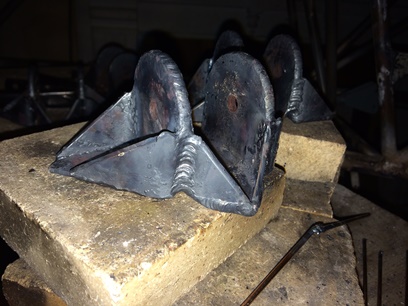
Two fully welded fittings.
Same fittings, different view.
July 12, 201 Seven...
again !!!
Did the same as last night... even went as far as not being happy with the "look" of the first weld line I did. But then again... looked at yesterday's not so pretty weld and, it looks much better tonight !
I'll be going back and looking at that ugly weld I did tonight... tomorrow.
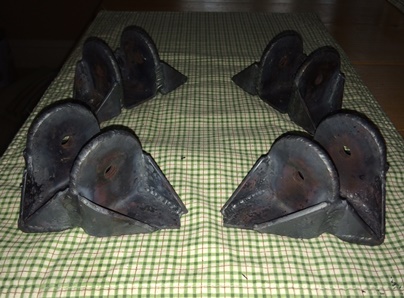
All four welded up.
July 13, 201 Checking...
and correcting...
As mentioned in my last post... went back looked at and re-did the weld on that one weld line. It was a good weld... just didn't look pretty. Another one looked like it had a pin-hole so I re-heated that area of the line and ran a line through it.
The remaining two, cool to the touch, fittings were aligned and tacked onto their mounting plates.
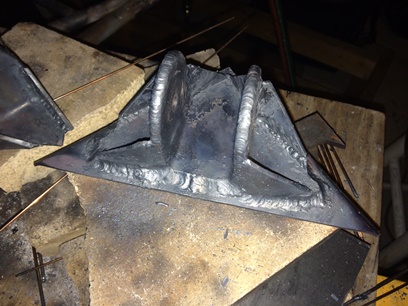
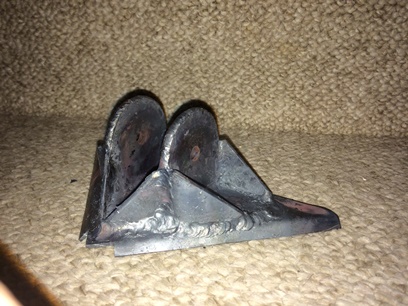
July 14, 201 Finished welding...
Just the first motor mount fitting.
There is one helluva lot of heat needed to weld these puppies up.
Got it done... good welds, just not happy with the look of the welds. We'll see...