Mantua, New Jersey
Original Site:
September 2004
E-mail: usav8or@yahoo.com
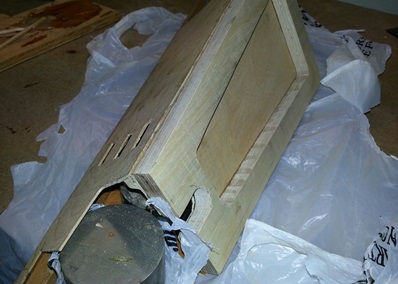
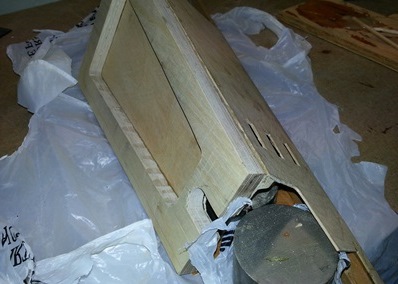
The Radical Radial Turtledeck.
May 12, 2014 Just saying...
again !!!...
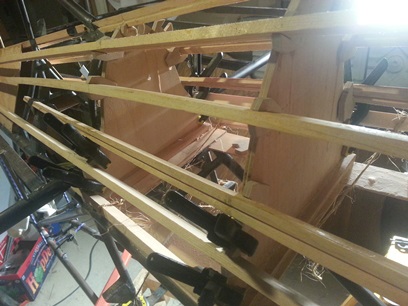
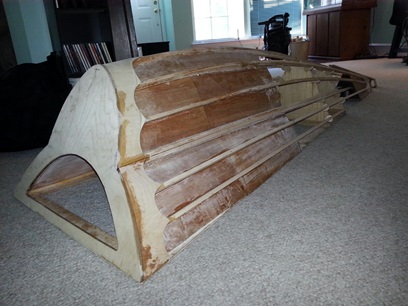
Getting close (I say again...) to finishing up the turtledeck. Yea... I said it back a few weeks ago. And yea, I think I'm there (again) this time.
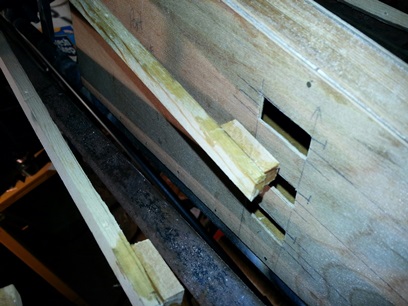
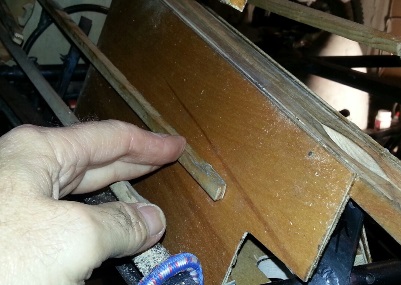
Checked on those tabs that I "made" yesterday AND they look pretty damn good. Just a little filing here... and filing there... and a little more filing... Now they fit like a glove. Still need to clean them up. Maybe a little adjusting here or there to make them all look the same (I was free hand filing these while they were still on the turtledeck). Always good to make a biplane symetrical.
Still need to pull the stringers down into place. Positioned and marked the gussets and then pulled and tied a few of the gussets close to where they need to be. I'll leave the rest for next time... pull them all into close position then take a few measurements, make a few adjustments....
May 15, 2014 Maybe...
next time...
Thought I was going to make the small tracks (?) to hold the rear-end of each of the stringers in place. Like I said... thought.
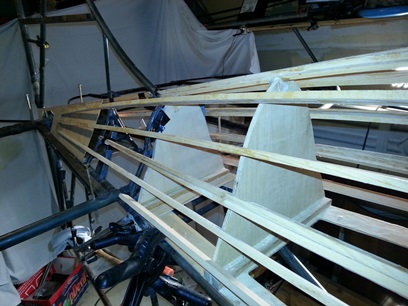
Ended up clamping the rear-end of the stringers in place then aligning the four upper stringers. Took a little bit of time; used a square to make sure that each was the same height and distance from the center line. Saw that the gussets for the upper four stringers weren't long enough (only a small part of the gusset touched the wood former) Re-made the eight.
After tweaking the opening on them (needed to put a slight angle on the top and bottom of the opening_ I checked them for fit... mixed a small batch of T-88 then glued them on.
Still need to align the lower stringers and set those gussets in place. THEN I can make the rails for the back-end of the stringers.
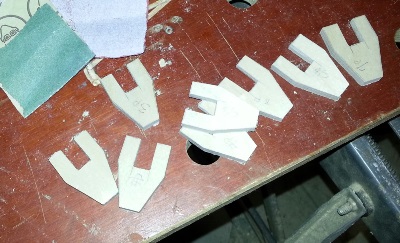
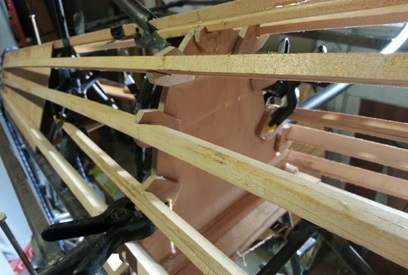
New, larger, gussets.
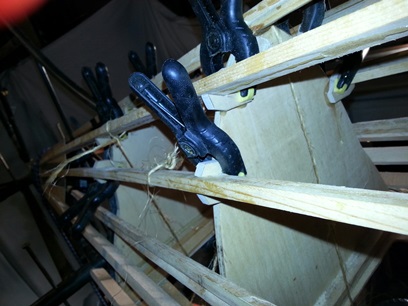
Yeah... you shouldn't use this type of clamp for clamping.
The smaller ones aren't as "strong".
May 18, 2014 More gussets ...
to make...
I'm ready to put this thing to bed... just need to fit a few more gussets ??? yeah... uh... no....
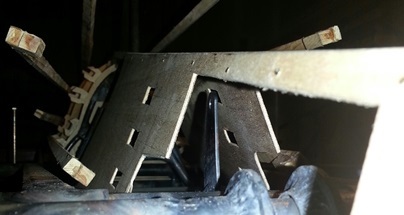
Got those gussets all fitted up AND notched the lower stringer on each side of the turtledeck so that I could bring them in closer (to avoid having it stick out past the upper longeron). In doing all of that stuff, I remembered/saw? that I need to make four more gussets to hold the double stringers.
Close to three hours on it tonight so far. Decided to let these sit before gluing... wait until I make the four double-gussets.
Lower gussets set into place. Not glued yet.
May 19, 2014 Take care of it ...
NOW !!!
If you've been following my blog along you know that I've beeen working on the turtledeck for longer than... well, let's just say it's been a while.
I'm getting close to finishing it up... just a few loose ends left.
Made the last gussets for the turtledeck tonight... These were for the double-stringers. A little more complex to figure out the shape than the singles but... ya gotta do what ya gotta do. To finish these up all I needed to do was put a slight bevel to them so that the double-stringers sit on them flat. Just a matter of a few passes with one of the micro files.
With that completed all I had to do was glue these puppies on to the formers and I'm finished ! or so I thought... Took another look at the bottom stringers and decided that I wasn't as happy with them today as I was with them yesterday. (they're sticking out a little bit further than I'm comfortable with)
For a brief moment I thought of just leaving them as they were and taking care of it later (maybe sand it down some ???) but then thought about that bad thought and decided that I can't leave it for later (it will just turn into a royal pain in the ass !!!)... Gots to take care of it now !!! but, No time to do it now. In a few days, when I'm working on it again, I'll notch them a little more and THEN glue these gussets into place.
Two of four...
May 22, 2014 Take care of it ...
next time !!!
Back to working on the turtledeck again... just a little bit more to do.
Gussets were made a few days ago for the remaining "stand-offs". Tonight I needed to located the position of the stringers, then mark and glue the gussets in position.
At the end of the night I had all the gussets/stringers completed except the center double-stringer. Didn't have the room for clamping it tonight. So instead of fighting with it I decided to do it the next time I work on it...
Just about there.
May 24, 2014 Wasted time ...
???
Four more sets of gussets to align, attach and glue... Just a simple matter of getting a few measurements, pulling one into place, apply glue to the back of all eight gussets and clamping into place.
Took a little doing (aka... time) but I got it done. Next I needed to look at how I was going to attach the rear of the stringers to the tail cone. Actually I had a plan; cut a few 5/8" high extra-stringer-material to 1 1/2inch, mark the radius of the stringers, cut the radius on each piece of wood and glue into place. Drill hole through each group of three and lock into place...
or so I thought...
I started marking and cutting and it was a whole lot more work than what I need to do. After cutting the blanks and while cutting the angles on each (to match the angle of the tail cone slope so that they would sit square on each stringer) I tossed the idea and the pieces out the window. Spent a little bit of time f-in with them but ya know... I realized I was going down a road I shouldn't be going down. Some times you just need to accept that that time was "wasted". Don't get me wrong... it was a necessary step to get to where I was getting, but eh... nothing to show for it.
What I'll do is glue a support block inside of the tail cone just in front of where the stringer tabs enter it. This will allow me to place a fitting there that I can then screw into (or at least that is what the plan is for now).
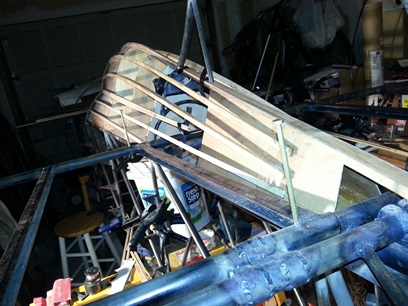
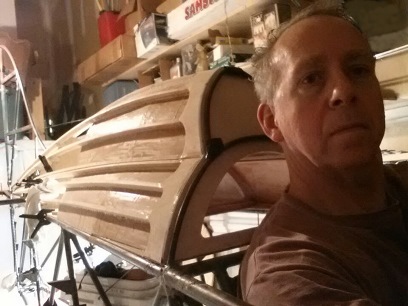
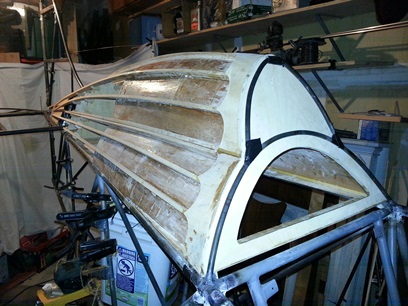
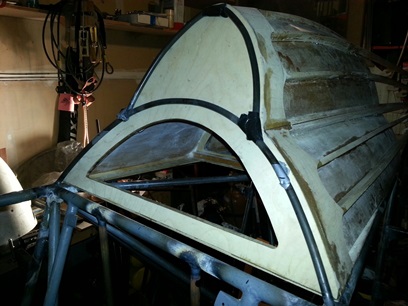
Last of the clamping on the turtledeck ???
Trying it on for size.
After all that I took pencil to paper and listed some of the stuff I wanted to get done next...
1. Attach the tail wheel
2. First need to buy the metal springs for tail wheel
3. Attach the control sticks (aka torque tube)
4. Figure out, make and attach:
a. Battery box (not attach yet)
b. Throttle plates
c. Fuel pump plate
5. Finish making fuel tanks
a. Finish making
b. Attach
6. Finish making upper wing center section
7. Make instrument panels
I think that's enough to do for now.
May 26, 2014 Finished ???
Pretty much.
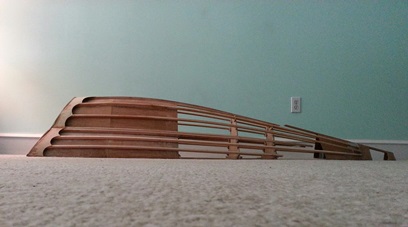
Turtledeck finished ??? Hmmm... just a matter of drilling a few holes for attaching to brackets, sand and seal.
Took the turtledeck off the empenage so that I could start work on a few other things. (as mentioned above) Pretty much cleared the space for me to lower the tailpost so that I could figure out what shape I need to order for the tailwheel.
All the specs for the height of the main wheels was at the place on Lombard. Need to take a look at that before moving foward .
March 22, 2015 Finished ???
not so much.
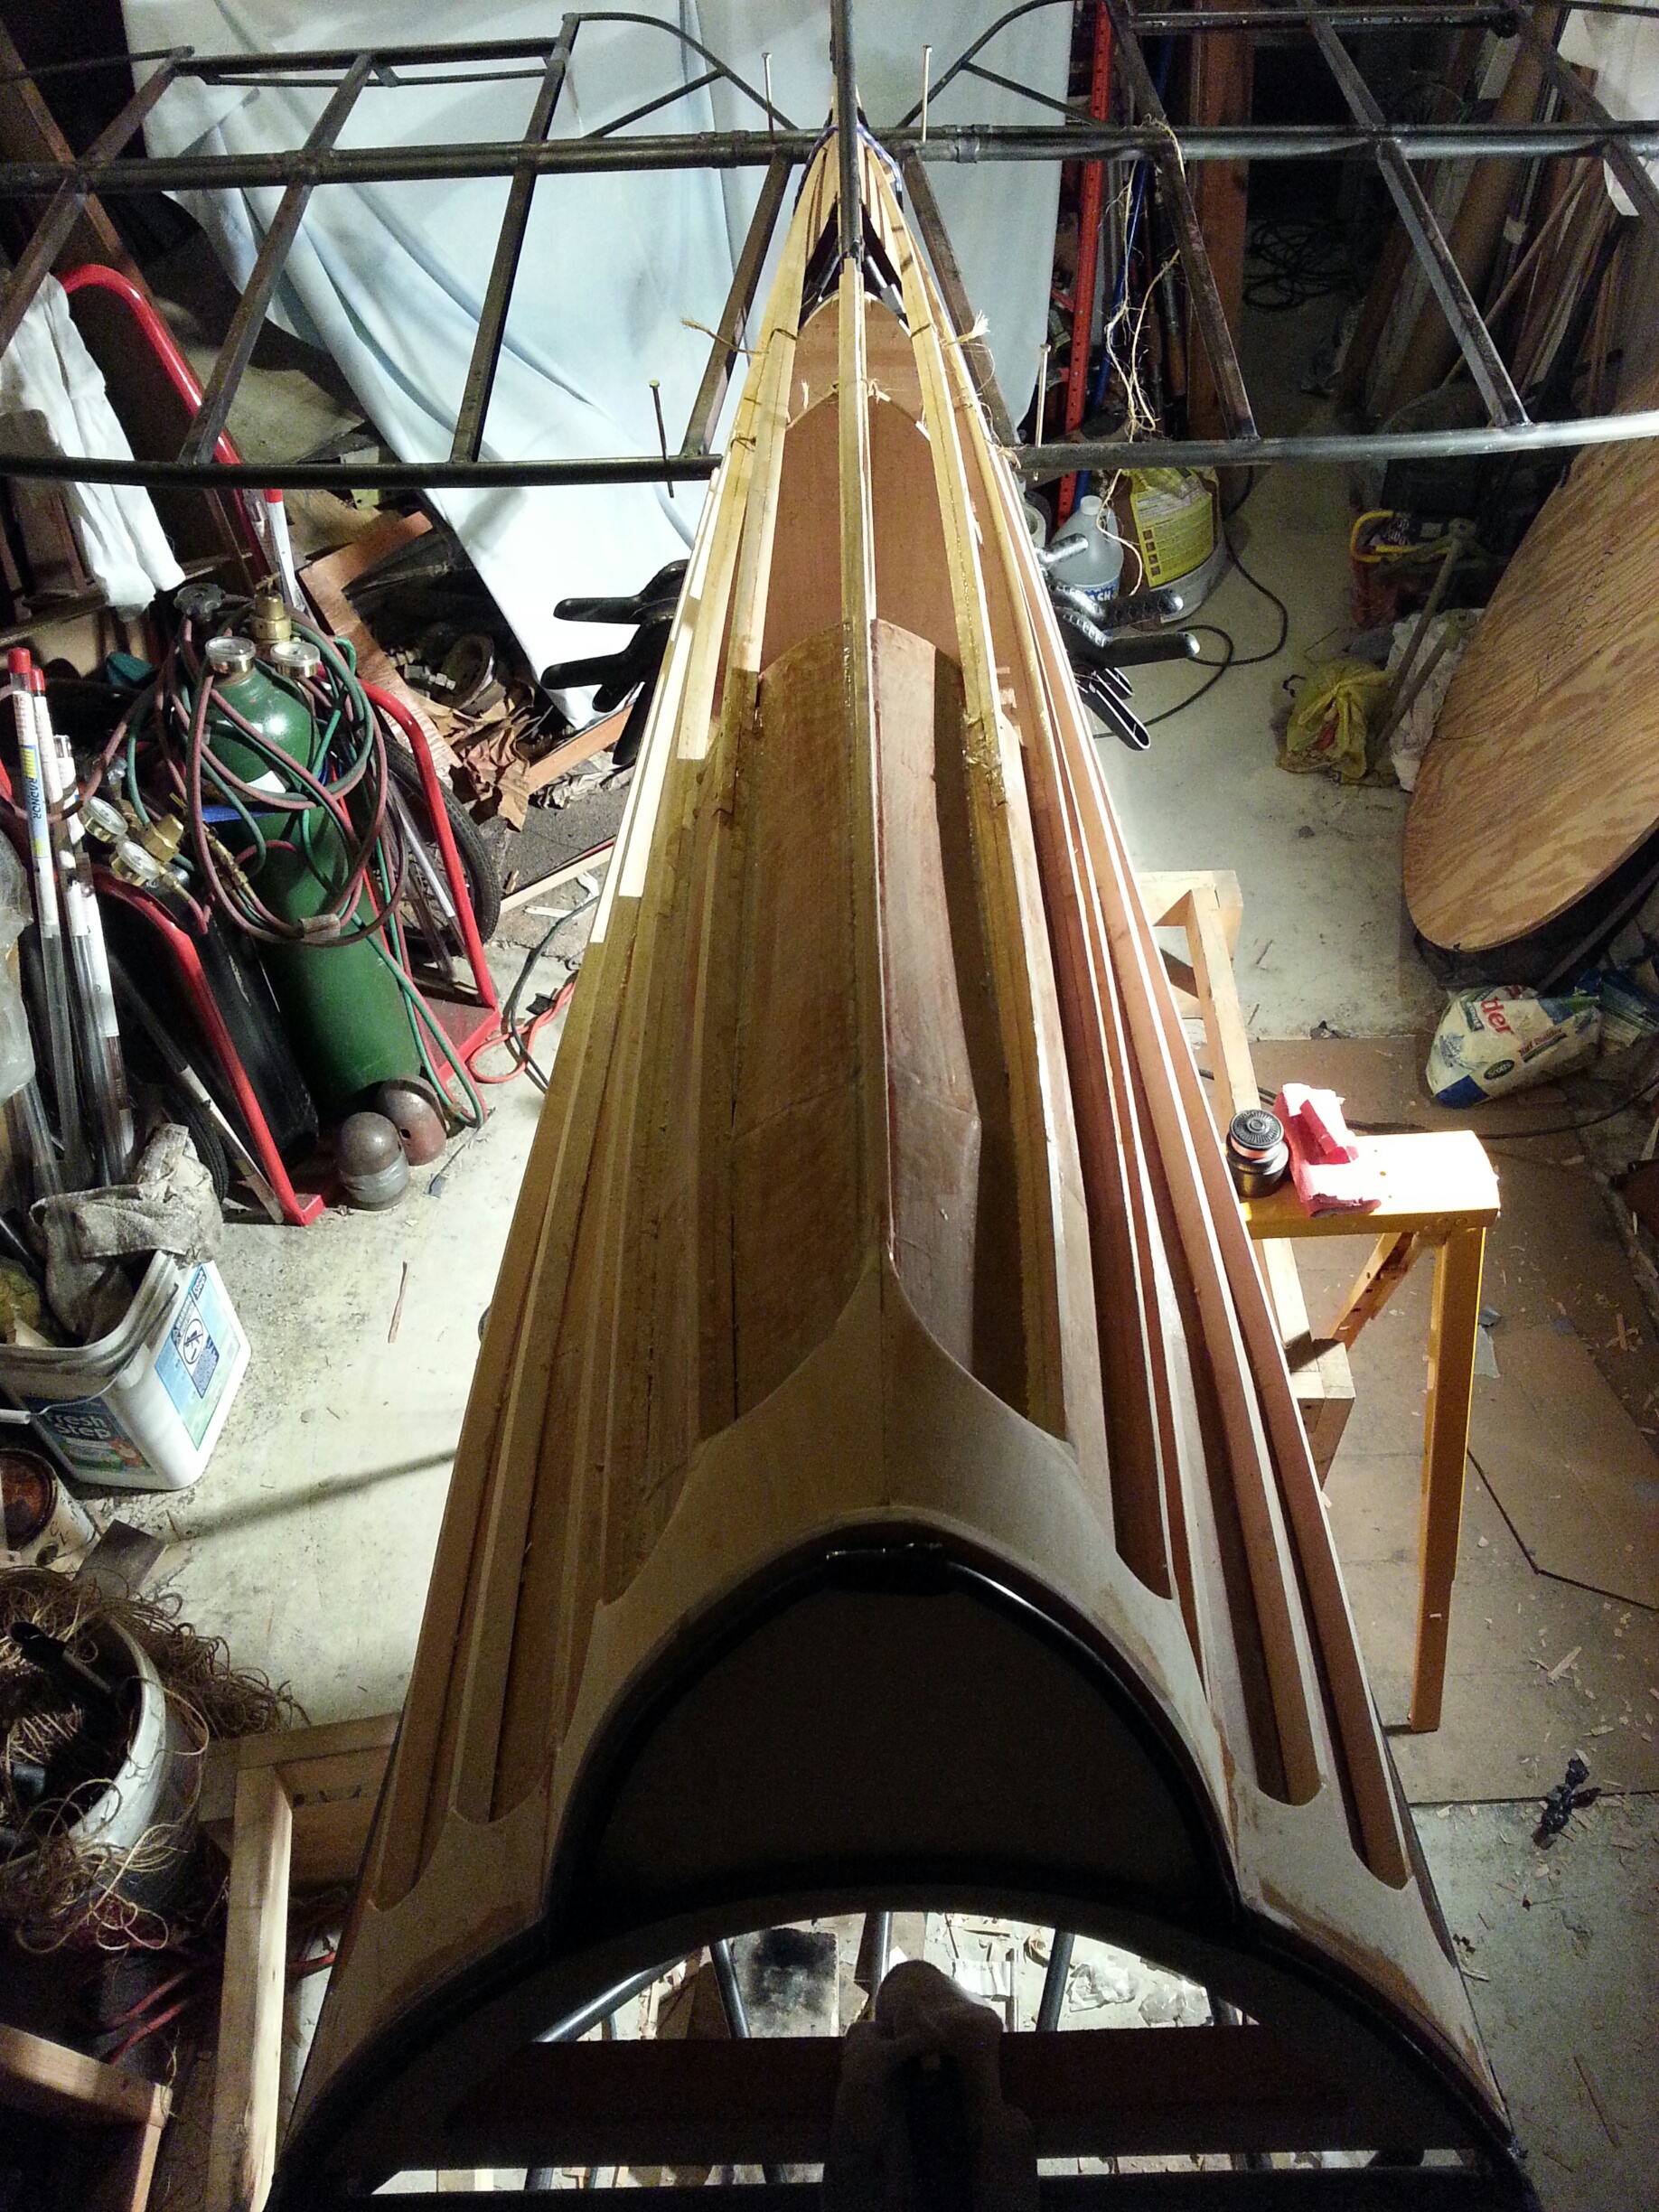
Did a test fit of the turtledeck on the fuselage... I have the trim/servo system finished now. Ut-oh... looks like I need to do some cutting out of the tail cone so that it will fit over the system. Okay. It should fit around the system now.
Got it on (need to put the tail cone on before I hook up the trim system... which is gonna chance - I need to cut the "foot" off of the tail cone to do this). Went to hook up the trim horn and boom... it hits the spline of the tail cone. DAMN ! Had time to start cutting it out before I had to leave for dinner tonight. Leaving gave me a chance to think things through on it.
I think I'll raise the entire spline 1/4 - 1/2inch by adding ply to the bottom of the piece. This will lift the tail cone up high enough where it won't interfere with the spline. I also need to make sure it is high enough so that I can fit the bolts onto the trim horn too...
Re-worked... but needing more work.
Notched
Possible fix ?
Not enough room for connecting to system.
I'm thinking... I'll lift the entire tail cone 1/4 - 1/2inch. This will lift it clear of the trim horn and give me room for having the system connected. I'll also need to cut the "foot" you see in the side-view above to allow me to place this onto the fuselage AFTER hooking up the system. I may also use this rear-end as a pattern for carbon fiber ??? maybe...
March 22, 2015:: tail cone update:
Stole away an hour after a family gathering. Worked at getting the tail cone to work. Took a few rough measurements of what I need to cut away in order to move the tail cone back to the vertical tailpost. Needed to cut the bottom, back edge off the forward section and then file about 1/2inch of horizontal material off the very tail of the cone.
Now I need to glue 1/2inch of ply to the bottom. I'll have this routed out similar to what I did with the floor of the turtledeck. I'm going to need to re-work the spline on the rest of the turtledeck now...
Lifted 1/2 inch.
Plenty of clearance for the trim horn now.
March 26, 2015 The Event Horizon... not so much a point of no return...
as much as a STOP THINKING !!! Start doing.
Traced and cut a few pieces of 1/4inch ply to build up the bottom of the tail cone. Lifting it up 1/2inch to clearly clear the trim horn. Looks like I'll be resurfacing the sides of the tail cone too. Reason... I need to readjust the hole cut-outs for the ends of the turtledeck stringers. I'm looking at this for the umpteenth time and wondering if there is a better way to do it ???
I've got the pieces cut and glued up (waiting for them to dry). I'll cut and route next session... Right now, I'm kinda finding myself just staring at the fuselage... looking for what needs to be done next.
Thinking: After re-working the re-work on the turtledeck... the upper wing tank needs to be completed. the firewall material needs to be purchased and I need to start working on the firewall so that I can make the patterns for the skins. the throttle quads need to be purchased and installed so that I can begin hoooking all that stuff up... etc etc. A lot of little stuff for completing the fuselage. oh yeah... heel rails and floor boards... and... hell ! just get doing it !
March 28, 2015 Stopped thinking ???
Started doing ?
Plan of action today... route the false bottom for the tail cone and glue them on. Thought I'd stop by Whitey's to ask him a question about the flanges for the fuel tank too.
Got to the house around 12 noon... turned on the radio and headed down to get some work done. I needed to find a few scraps of wood so that I could use them as a pattern to route the plywood false bottom. As usual... it took a bit of time finding those scraps. Once I found them... piece of cake: cut them to size, tacked them on, drilled the starter hole and routed away. It was a little bit more involved than that, but you get the picture.
It was close to 1 o'clock now so I decided to put a few things in the car and go for a ride... over to Whitey's. Got there and the only car I saw was Tony's truck parked over next to his plane... looked like it was a part and he was working on it. Walked on over and didn't see him around. Thought maybe he went to lunch with the rest of them and wasn't back yet. As I turned around I saw him catching a nap in the front of his truck. Didn't disturb him... thought if he was that tired I'd let him sleep.
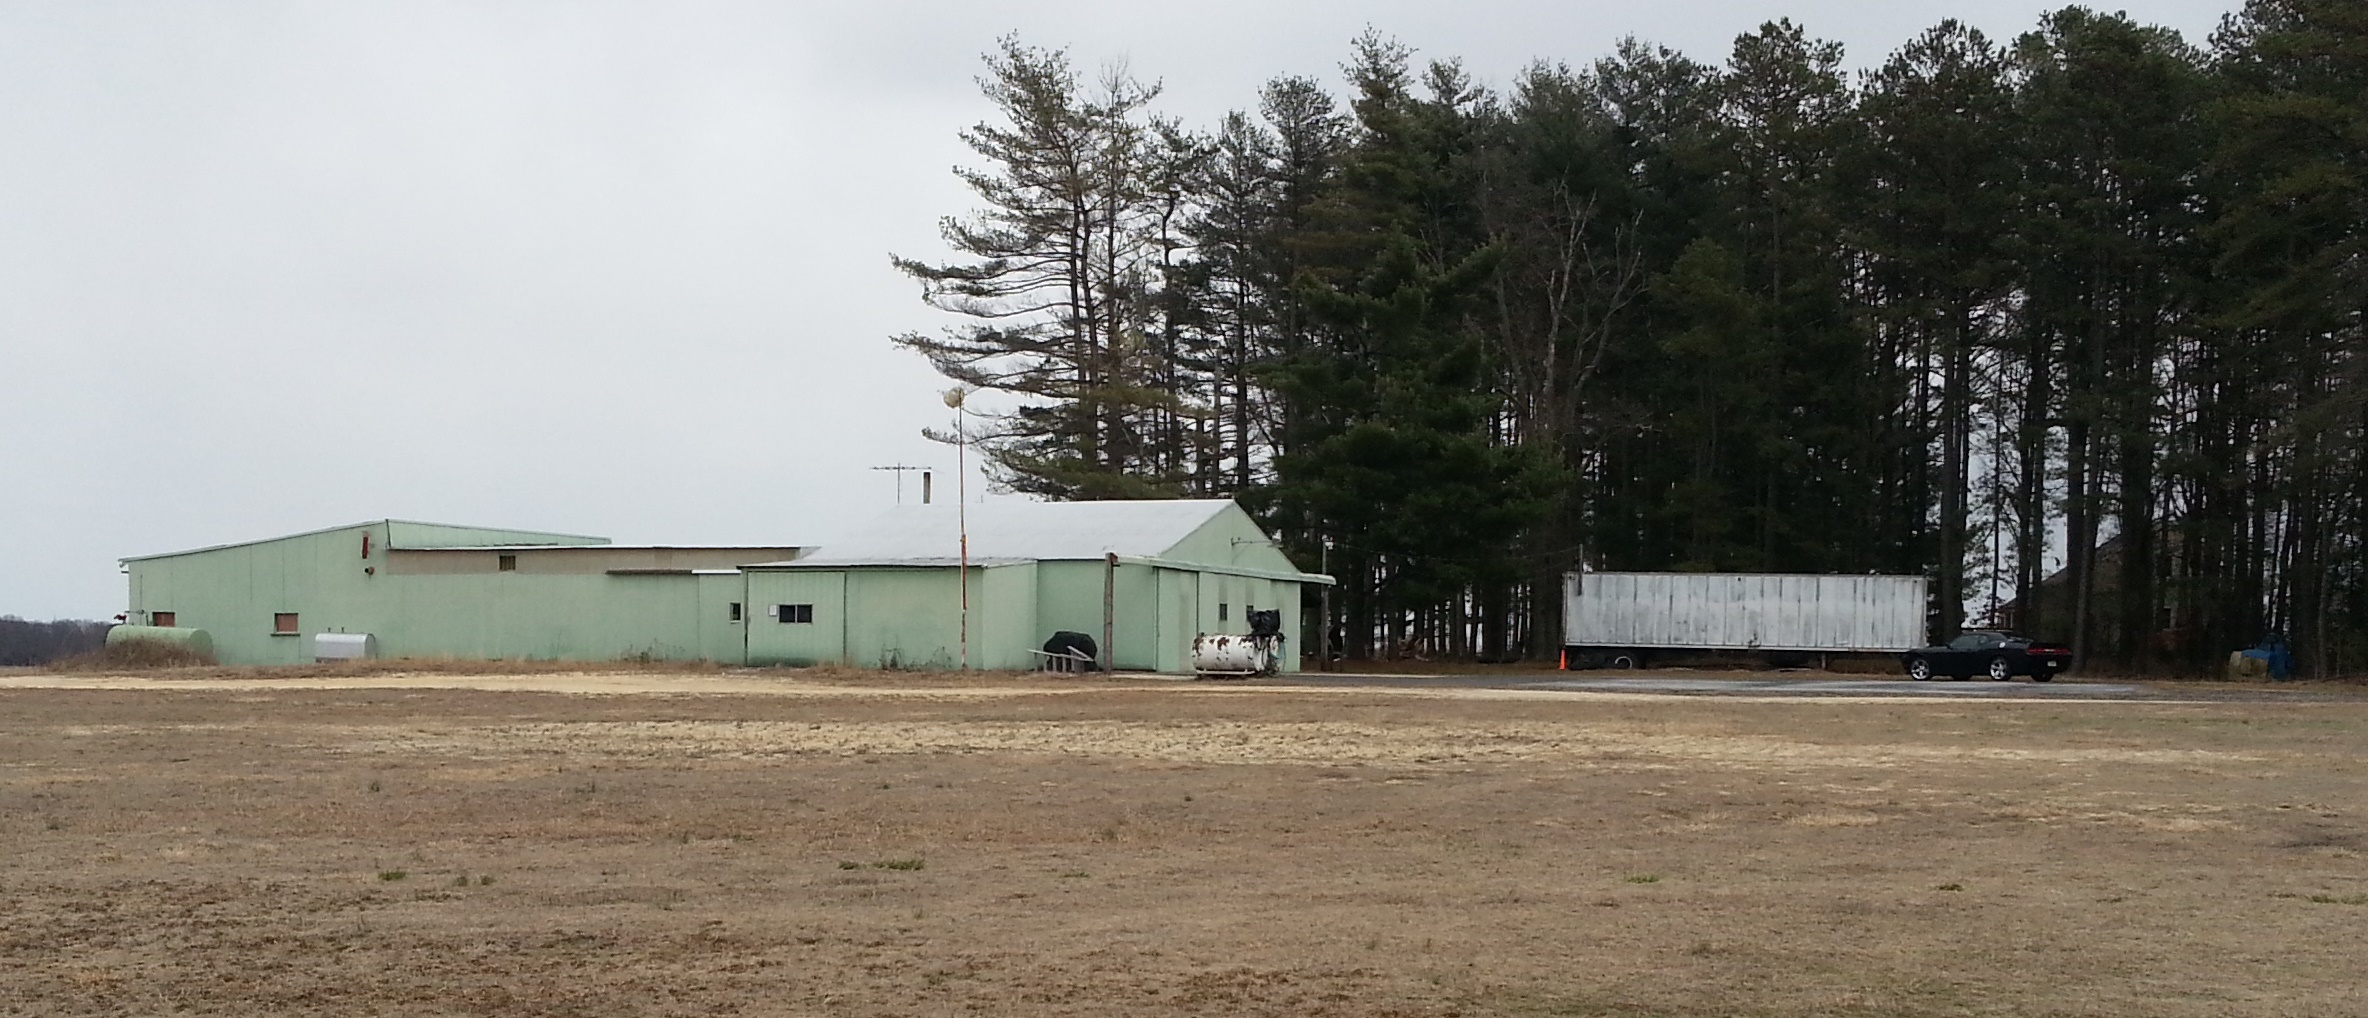
My car at the airport: Alloway Airfield NJ2
Walked back across the field and sat in my car for a few before pulling away. (Not sure where everyone was... but they weren't here.) Headed back to my place on Woodstream Court to put some more time in on the project.
Back working on the biplane... filed the inside of the routed hole smooth then took the pieces over to the sander and took the wood off to the line. Mixed up a batch of glue and set the existing tail cone in place. Used a few brads to hold the larger piece in place then weighted them down.
Glued and weighted tail cone.
March 31, 2015 More thinking.
More doing.
Playing with the tail cone/turtledeck stringer connection. They need to be separated until I put it all back together for fabric covering.
Instead of attaching the stringers individually... like I originally planned, I'm thinking of making a wood plate/block that I would attach the stringers to and then screw that onto the tail cone as two pieces (port and starboard sides). I made two plates out of 1/8inch ply and I'm thinking I need to build up the ply covering on the tail cone to 1/8inch also.
So to recap... I've made two plates for attaching the back-end of the stringers to. I'll build up the ply on the tail cone to 1/8inch for a beefier base to attach the stringer plate to. oh... I'm extending that double-stringer back to the tail cone now.
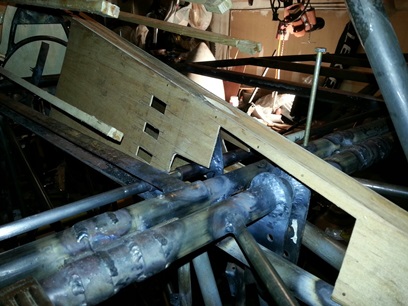
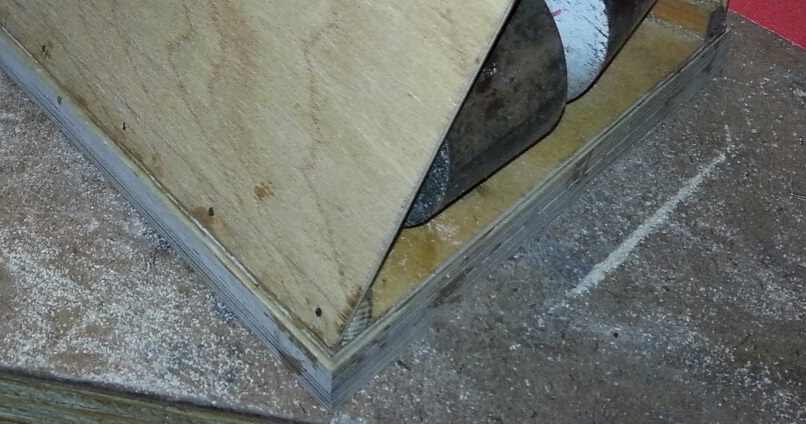
Here's a little over two hours of work... incredibile the amount of time I spend on things.
Click on image for a close up of tail cone and stringer plate.
April 2, 2015 Moving right along...
Actually you can scratch that "right".
Moving right along on the turtledeck ? Wha...t ???
Moving right along ? yeah, right... More like moving along, not moving right along. To get things to where I want them it's taking a lot more time that I want to. But, hey, I'm building a biplane... to build a biplane. Not building to get it in the air as soon as I can... that's pretty apparent ! I was telling Andrea last night. If it takes me another 20 years to get it in the air... I'll be happy about it.
I'm pretty sure this is how the tail cone area is going to go together now... it makes good sense. It makes perfect sense. It's a good plan of attack. It's how it should go together.
Cut the two pieces of 1/16inch overlay ply to build the outer walls of the tail cone up to 1/8inch. Cut the two pieces for the rear-end stringer plates (the stringers will get glued to this and this in turn will be secured to the tail cone VIA nut plates.) Glued the first ply overlay onto the port side tonight.
Nice shot showing the false bottom.
April 4, 2015 Same ol' same ol'...
Just the other side today.
Flipped the tail cone... trimmed the overlay and glued it up. If you want... you can read what I did on the 2nd and just apply it to today. It's just the other side.
oh yeah... had some extra glue so I coated one side on each of the stringer plates. Figured, what the hell, use it as a sealer.
Same photo as April 2nd... just flipped.
I say "same ol' same ol'" and I make references to it taking a long time to do things... but I am moving along at a pretty good pace. It's not until you write it down that you realize how far you've come or what you've got going on.
Writing an email to a buddy of mine in Chicago (Richie Boi)... I was writing down the stuff I'm doing at this moment; finalizing the re-adjustment on the tail cone, working on the instrument panels, buying the material to make the firewall, finishing up the upper wing fuel tank, and working on the trim/servo handle. I've got a lot going on and a lot of it is the finishing part of it. Now if I could only get started on those wings...
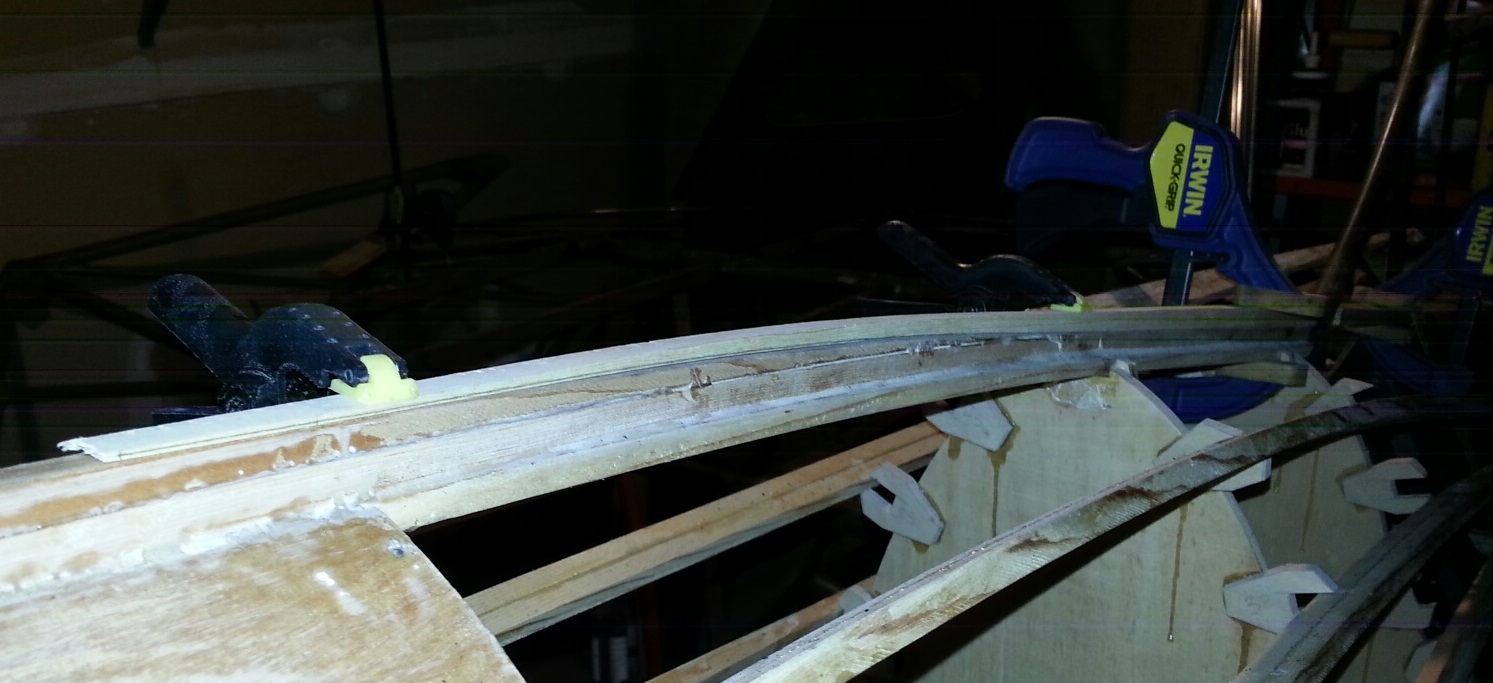
April 7, 2015 Getting closer...
every day.
Forward progress on the turtledeck and tail cone. Ply build up on the tail cone is done (glued sides up over the past few days). Needed to fit the tail cone up to the fuselage and see where I am with what I need to do to fit the forward "fork" of the tail cone into the leading edge of the vertical stab.
Trimmed both sides of the fork down by about 1.5inches. A little shaving of the front part of the forks and they fit up against the back-side of the vertical stab's leading edge nicely. Need to make a new metal bracket to weld onto the leading edge for attaching.
With the forks trimmed I was able to see what I needed to do with the spine on the turtledeck... how much of a build up it needs. Marked up a test piece; sawed and sanded. Close... just needs a little bit more height. Time to call it a night... I'll cut a new piece next session.
Click on photo for close up.
I say "same ol' same ol'" and I make references to it taking a long time to do things... but I am moving along at a pretty good pace. It's not until you write it down that you realize how far you've come or what you've got going on.
Writing an email to a buddy of mine in Chicago (Richie Boi)... I was writing down the stuff I'm doing at this moment; finalizing the re-adjustment on the tail cone, working on the instrument panels, buying the material to make the firewall, finishing up the upper wing fuel tank, and working on the trim/servo handle. I've got a lot going on and a lot of it is the finishing part of it. Now if I could only get started on those wings...
April 9, 2015 The closer I get...
The more I have to do.
I thought I had it all figured out... but not as figured out as I finally figured it out to be (which may not be as figured out as it may end up being figured out to be). ???
I like how making the stringer plate (that I'll glue the stringers to) will make for an easy attachment of the stringers to the tail cone.
wait... let me back up a few...
After making the additional spine strip (to build up the spine to match the ever so increasingly higher tail cone) I began working on the stringer plates for the tail cone. Did all my measuring to make sure that the stringers-ends were spaced nicely. Checked them out on the fuselage to make sure that they actually looked as nicely as I had measured them out to be... and they were. Took the one plate down to the basement workshop and started cutting out those holes for the tabs on the rear-end of the turtledeck stringers. Back and forth a few times between the fuselage and the workshop before getting things all worked out. Back out to the fuselage and looked at it... then looked at it again... A better way of doing this would be to cut off those tabs and just glue them directly to the face of the plate. The only reason I had those tabs on there to begin with is because I was going to lock each of them onto the tail cone individually. I'm not going to do that now.
Okay so do I continue on with patches or re-make... is it... 2.3hours and I'm back to basically where I was? Well, not back to where I was... always that learning to appreciate.


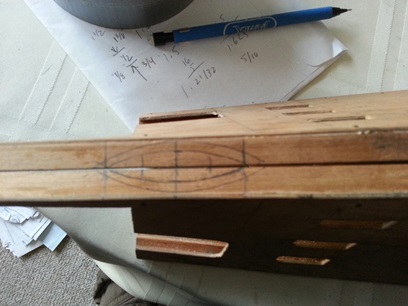


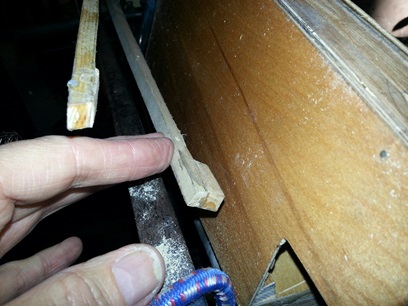
 Stringer without tab.