Mantua, New Jersey
Original Site:
September 2004
E-mail: usav8or@yahoo.com
The Radical Radial Turtledeck.
May 10, 2013 A saddle...
made for two...
Things are getting complicated...
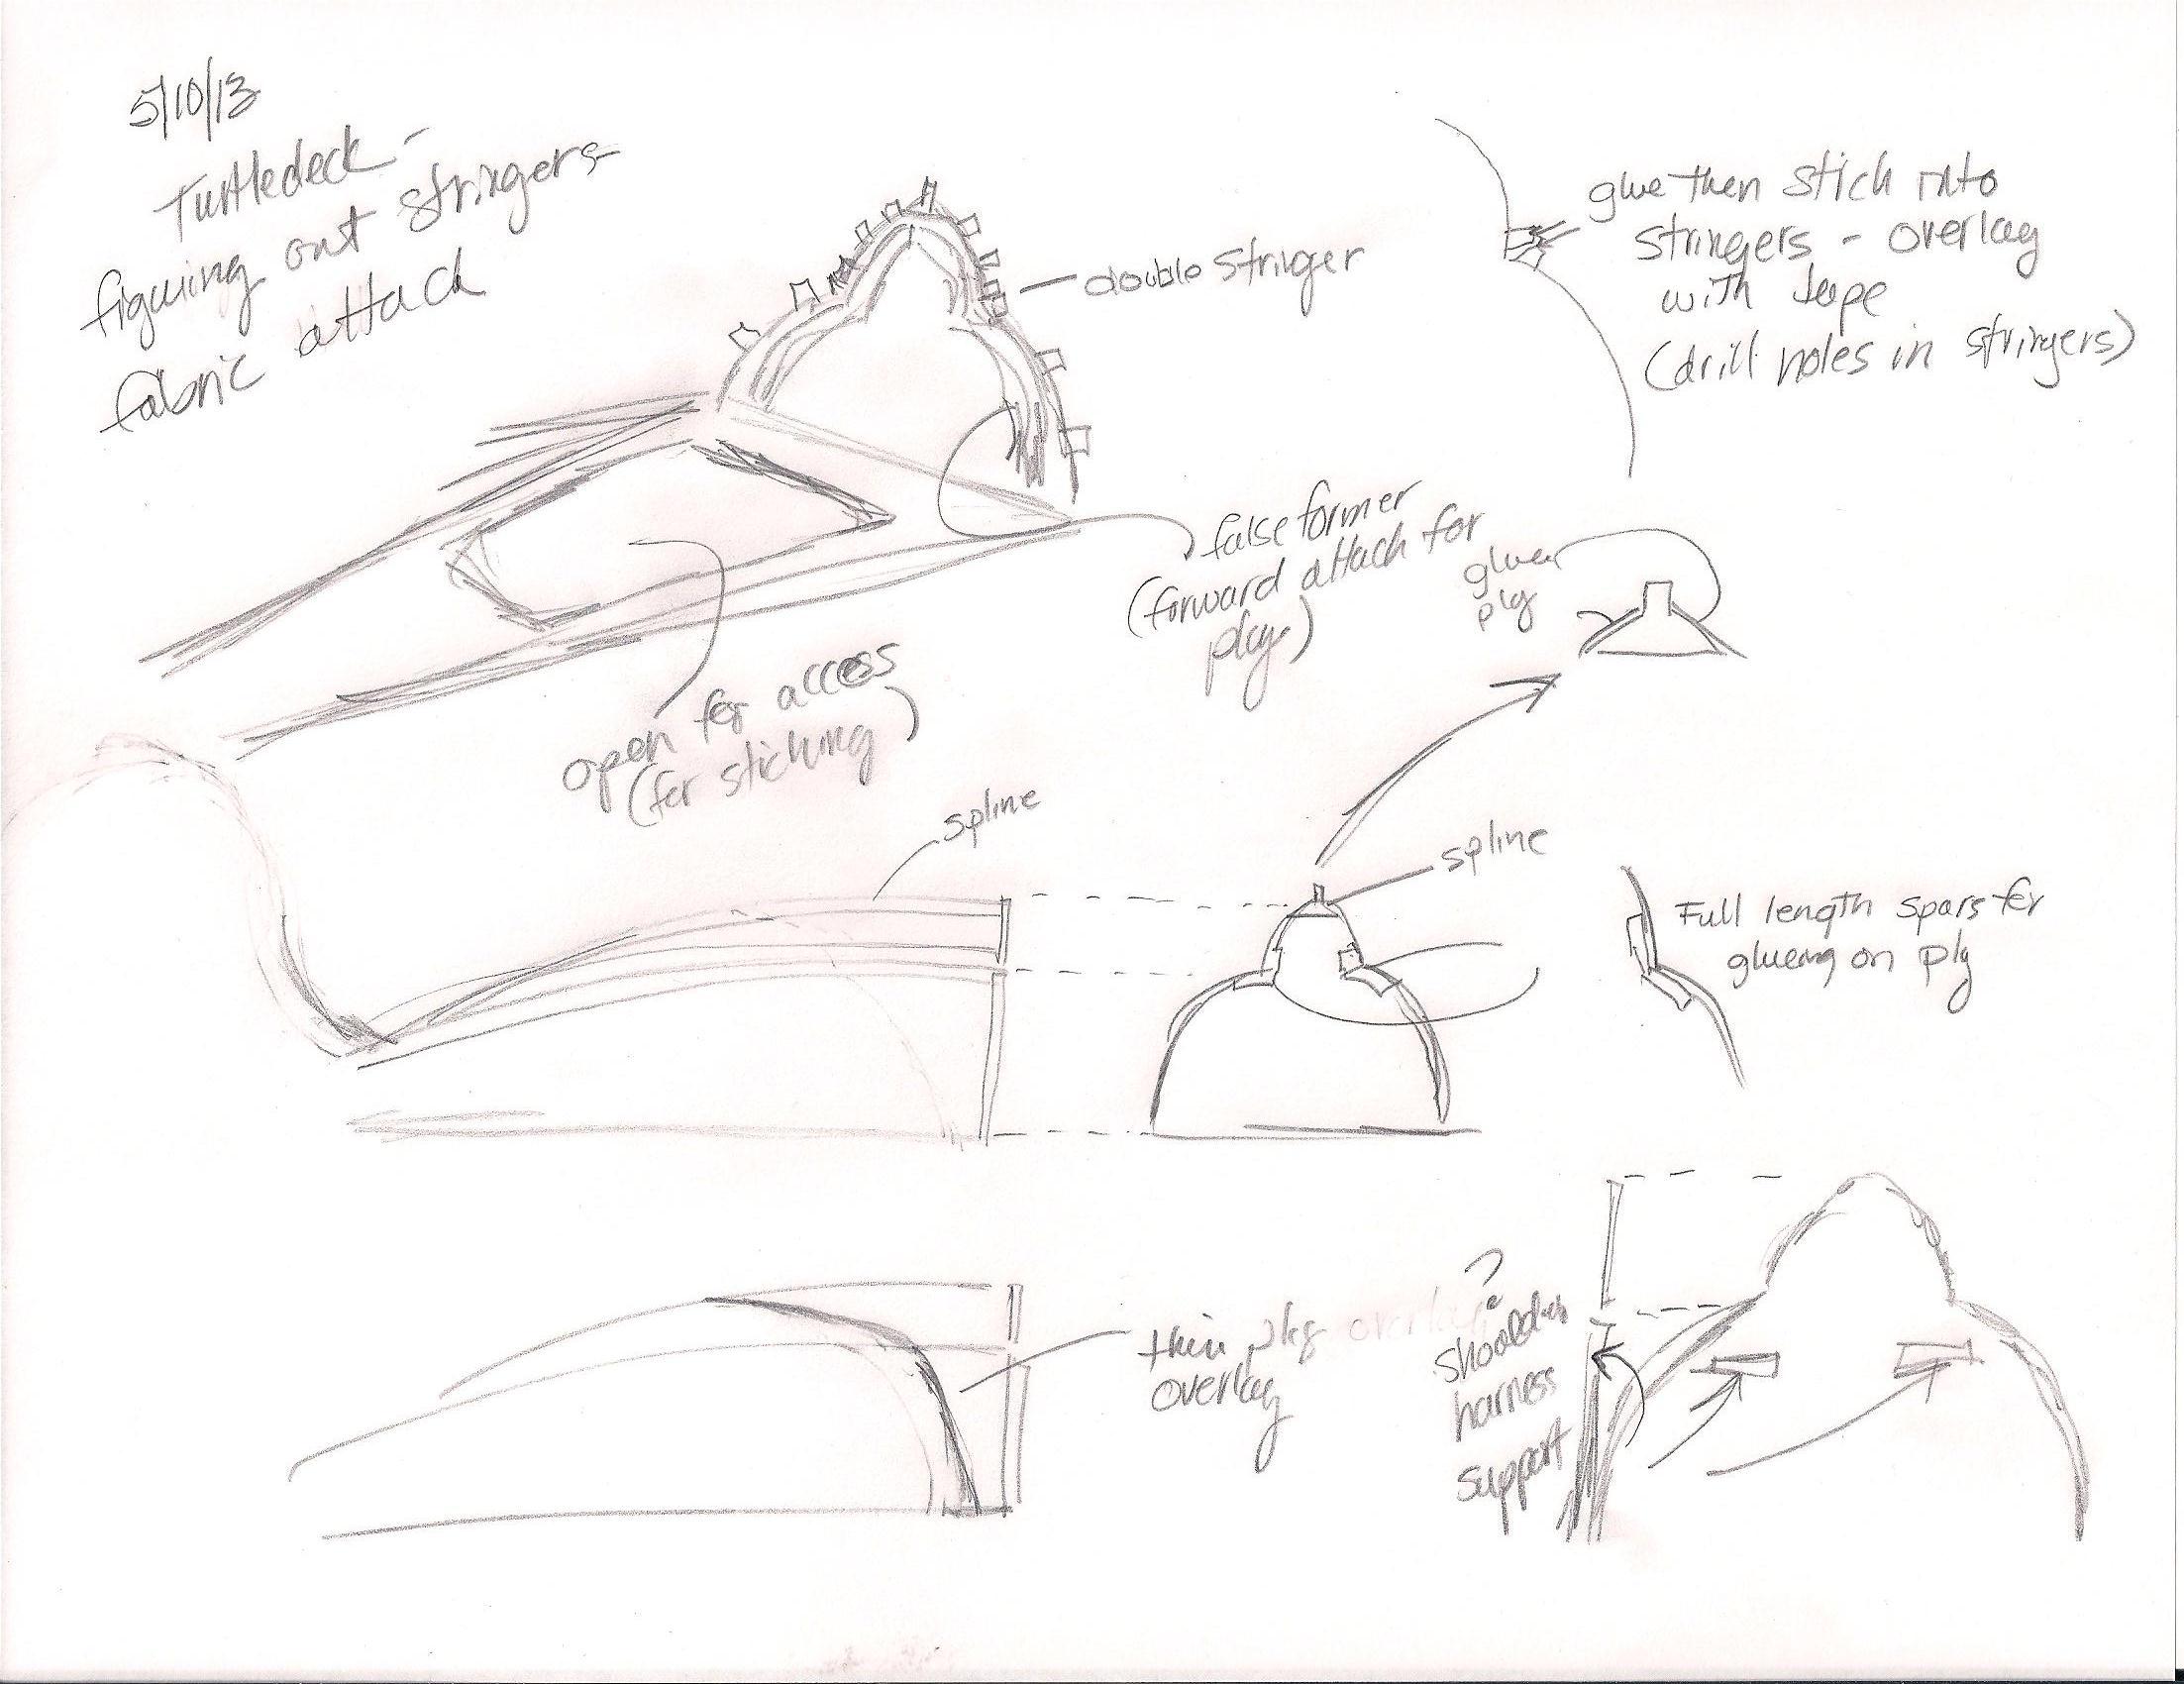
The shape of the turtledeck and the fact that I'm making it out of stringers... well, let's say that the intersection of the upper half and the lower half is rather unusual. And... I've been thinking about it way too long.
It's another one of those... throw it out to the guys on the biplane forum and see what they have to say about it.
As usual... got several quick replies back from the guys. They were all kinda, somewhat, saying the same thing. I needed to have two surfaces at that intersection that I could attach the fabric to; glued and stiched. It'd either need to be two stringers close together or a highly modified single stringer. I've decided to use the dual stringers.
Just saw a recent post by Kevin Kimball (of Pitts Model 12 fame) saying that the Gee Bee Model Z has a similar set-up and does that exact same thing. Nice to know that I'm in good company...
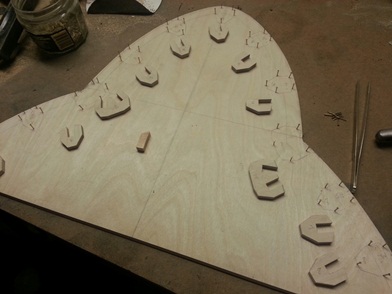
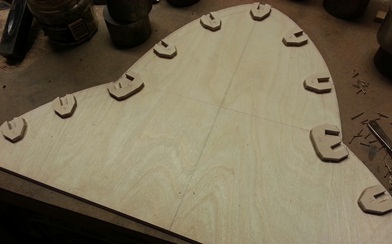
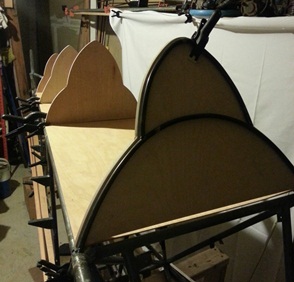
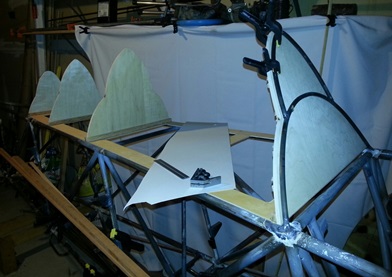
Worked on getting additional saddle gussets made and then saw that I needed to make a modified saddle gusset for the areas of those two stringer intersections. Below is a photo of the basic set-up as of now. The inset photo (hard to see) is a close-up of the dual saddle gusset. (update: added an additional image of just the dual saddle gusset)
Close up of dual saddle gusset
May 11 and 12, 2013 I'm a regular da Vinci...
a design for a flying machine
Well, it ain't exactly a design, but it's a few sketches of ideas for the turtledeck.
For your viewing pleasure. (click on image for larger version)
Spent a few hours this weekend working on the forward bulkhead for the turtledeck. Made a few more saddle gussets. Made quite a few measurements for alignment and then glued the gussets on.
Prep
Glued and weighted
Finished with squeeze out
May 14, 2013 My pace...
a tortise or a hare ?
Progress slowly moves forward on the turtledeck (get it... turtle... slow... ahhh, never mind.) Actually... I'm pretty happy at the progress and the results.
It's all hand made... no CNC routed pieces.... no water jet cut pieces... no nuthin' but hand made patterns to make hand cut pieces.
Spent close to two hours doing hands on work tonight. and... here are the results. Still needs to be glued up, but she's ready !
May 15, 2013 Messin' ?...
or workin' things through ?
Spent most of the night messin' with the pattern for the turtledeck flooring. Didn't even have display board to use... used corrugated board, which, well, let's say... gave me a close approximation that my measurements were correct.
Not really sure why I moved ahead with making the "test" pattern when I knew it wouldn't be the actual pattern I would use.
For some reason I felt compelled to work on it... guess I was just in that frame of mind. Wasted time ? hmmm... none
of it is ever really wasted... let's say that the hour I spent on glueing the 2-piece false former to the turtledeck bulkhead
was moving the project forward. Although, the test piece did prove to me that ending the edges in the center of the upper
longeron works well (for the floor of the turtledeck)...
I picked up some additional display board today (I'm writing this on the 16th) that I'll use to make the useable flooring pattern. What the hell... here's a shot of that "test" pattern.
May 17, 2013 More than what it seems...
Last night... I had the night "off". Went and saw a pretty kick-ass band; Indigenous. They're a cross between the blues and country rock. The leadman, Mato, plays the guitar like Hendrix and Stevie Ray Vaughn. Awesome ! I'm not one for breaking the build routine on purpose... but ya got to every once in awhile... and seeing Indigenous was well worth it.
anyways... One point three hours tonight.
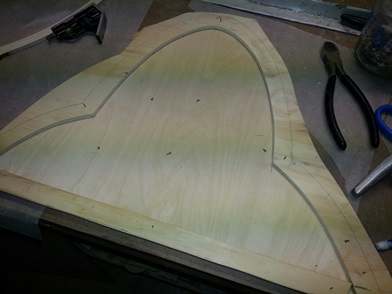
and... What did I get for that amount of time ? well... I ended up tracing the final pattern on the 3/32nd inch birch ply. That's what I ended up with. Spent that time marking, making and cutting out the pattern that I drew on the 3/32nd birch ply.
I'll be routing it out tomorrow.
May 18, 2013 A few firsts...
Took a big chunk out of the turtledeck project today. Chunk, meaning... a large piece of it has been worked on and finished. but it was... Another session where quite a bit of time was put in... with little to show for it.
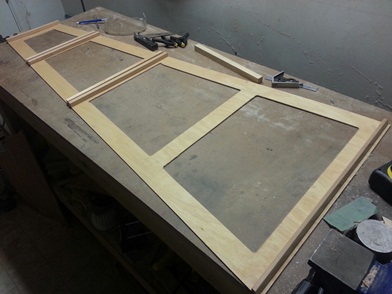
The plan was to cut the flooring out of the 3/32 birch ply. I had it marked on the ply and all I needed to do was cut out the shape.
what to do ??? what to do ???
hmmm... ??? The tablesaw isn't that accurate unless you use the fence... and this is too wide AND is cut at an angle... no go on the tablesaw. The bandsaw is a "close" cutter and then needs to be sanded for a nice, smooth, straight edge; not enough room to use the bandsaw and my sanding disc is only 6" diameter... no go on the bandsaw. The router... all I need is a straight edge and it'll cut a nice smooth line WHEREVER I want... YES !!! the router is perfect for this application. All I need to do is find a straight-edge and then... clean off the table in the basement work area. (which took a crap load of time to clean off)
I made a run out to Lowes to pick up a nice 1/2inch finish bit with a bearing. Found a nice straight piece of sitka. Clamped it at both ends and ran the router down the length. Repositioned both of the clamps that were at the end so that I could finish routing off both ends... and WA-LA !!! The first side was done... or, so I thought. Put the pattern up to the piece and the damn piece of wood bowed in. Hmmm... I mean, DAMN !!!. Actually... not a problem 'cause one makes plans for mistakes like this. I had plenty of room to move the pattern in and re-mark for the next "first" cut.
Went out into the garage work area and got the 8ft 2inch x 1/2inch metal tube and used that to make all the following routed cuts. The remaining four cuts... piece o' cake.
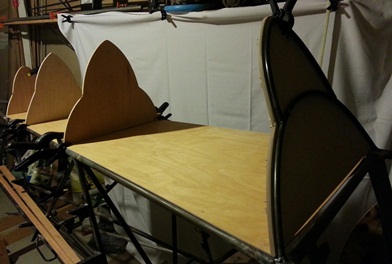
Here are a few shots of it... a work in progress and the finished piece on the fuselage. Laying it up on the fuselage I confirmed that I need to have something at the forward edge that will support the ply.
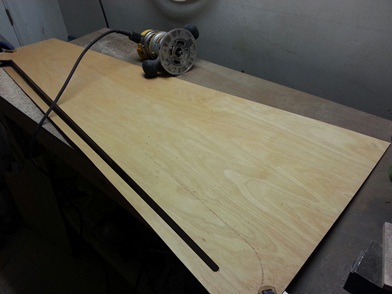
Routing the floor (nice DeWalt... eh ?)
It's all coming together now.
Nice size baggage area.
May 19, 2013 Making a few holes...
YEAH BABY !!!! gonna use the router today !!!
Not sure if I mentioned this before, but I need to have access to the sides of the turtledeck after it has been locked into position. I need to rib-stich the fabric onto the sides where the top curve meets the bottom curve. Lucky for me I thought of this BEFORE even starting the turtledeck. I've thought long and hard on this piece of the puzzle and I think I have it all thought out.
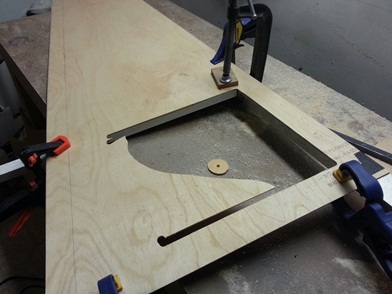
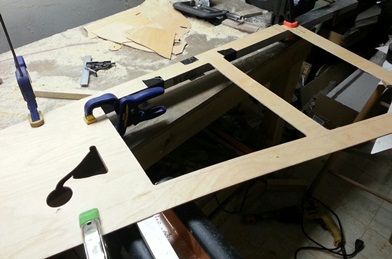
For a straight-edge I used a combination of my long 2inch x 1/2inch x 8foot long rectangular metal tube, that I used the other night for making the pattern, and a few pieces of wood. I was able to clamp the 8' rectangular tube on the sheet of ply and not have to move it. On the other side of the equation... I had to CONSTANTLY repostion the other two pieces of wood in order to postion them to route the holes.
Two point nine hours...
Routing holes in the floor
More routing.
Finished routing.
In position on the fuselage.
May 21, 2013 Cutting a few more support blocks...
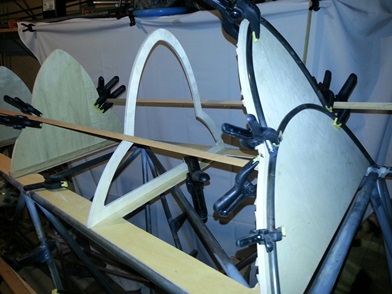
Another hour and a half on the turtledeck tonight. Cut a few more former blocks... the front one needed a 25degree angle cut.
Right now I have all the blocks cut and sanded. Three of these were gluded into place. Tomorrow I'll glue the additional and also glue the formers into place. Although... now that I'm thinking about it, I need to cut the opening in the forward bulkhead for the baggage access.
Hell, I need to glue that block into place, so... maybe I'll cut that opening in the bulkhead tomorrow too.
Blocks in position, ready for glueing up.
May 22, 2013 A baggage door opening...
Working towards excellence...
I'm not sure what the issue was but it took me forever... to come up with the pattern for the baggage door.
The first time I drew and cut it out I completely forgot about the saddle gussets on the back-side of the forward bulkhead. The second time I drew up and cut out the pattern I figured I'd allow one and three-quaters of an inch around the perimeter and... in some places it was okay... in a few places it cut into where those saddle gussets were. I finally figured it out.
Still need to cut the jig for routing the baggage door hole. Not tonight... so, I headed down to the basement work area to get those former blocks glued up...
May 23, 2013 nothing accomplished... ???
It couldn't be further from the truth...
Home from work by around 6:30... out the door again at 7:30. Just enough time to feed the pup.
Needed to pick up a few things for a bar-b-que this weekend. By the time I got home and got a bite to eat it was 9:00. I wanted to keep things moving forward so I headed down to the basement work area to see about starting the pattern work for the plywood to cover the turtledeck.
I figured out quite a few things I won't be doing and several things I will be doing. Saw what I need to do and a few things I shouldn't do... at least I have some direction... I think.
I do a lot of this "thinking through" throughout the day. When it happens during my "build time", I feel like I'm not accomplishing anything... which couldn't be further from the truth.
May 24, 2013 still working through...
how I'll build the turtledeck...
as I'm building it.
Still working through the construction of the turtledeck.
I've re-thought my re-thoughts and I'm moving toward covering only the baggage area with plywood... the rest will be just the stringers over the formers. AND the very back portion of the turtledeck, aft of the most rearward metal tube former, will have 3/8inch 4130 tubing as the stringers.
Focusing on the baggage area... There's a fairly large space between the front, bulk-head, former (headrest) and the second former, on the turtledeck. I wasn't too keen on that... thinking that a span that large may tend to bow under the shrinkage of the fabric covering.
Spent tonight figuring out the size and shape of it... then cut it out of 1/4inch birch plywood. Eyeing it up... it looks pretty good. Still need to test a cardboard cover to see if it works with the other formers. If it does, it'll be time to cut the guts out of it (it is in the baggage compartment so it needs that opening).
May 25, 2013 I think I'm finished...
with these formers.
After all this thinking and trying and doing and re-doing... I think I know which direction I'm headed in. Well, it's obvious that I'm heading towards completing the turtledeck, but the plan is pretty much set now (so I say again).
Made the jig for cutting the opening in the former that is inside the baggage area. Need the opening so that the baggage compartment is as useful as a baggage compartment can be on a biplane (which ain't much).
I had a pretty good plan to hold the piece in place and was going to write about it... but it crapped out on me because the plywood jig I made wasn't thick enough. Hell... I'll tell you anyway. The brads I used to tack the jig onto the former were left sticking out from the jig. I then cut the heads off of them and was going to use the sharp ends left from cutting off the heads to tap into the table to hold it in position and to keep it from moving. If I had ONLY made it from 1/2inch instead of 1/4inch ply it would have worked. As it was... the bearing on the bit stuck about 1/8inch too far down to use my brilliant !!! idea.
It wasn't an issue... I just had to fall back to the way I have been doing it: Clamp route re-adjust. Clamp route re-adjust. Clamp route re-adjust...
It's done. It looks great. And I'm happy with that. I also cut and glued the first of two former blocks into positon for this former.


 Just saw a recent post by Kevin Kimball (of Pitts Model 12 fame) saying that the Gee Bee Model Z has a similar set-up and does that exact same thing. Nice to know that I'm in good company...