Mantua, New Jersey
Original Site:
September 2004
E-mail: usav8or@yahoo.com
The Radial Skybolt's Fuel System.
May 2 - 9, 2020
When you're on a roll, you're on a roll...
and you don't want to stop.
A lot going on this week... and it's feeling good. An ASS-load of hours' considering I'm only doing this part time.
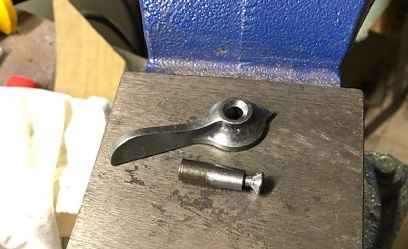
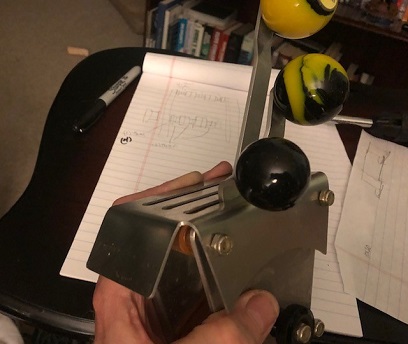
Working through the fuel system, or at least the connection for it. Decided that I'm only having the one fuel selector knob. I'll just need to plug that one hole going into the top of the main fuel tank (where the upper tank was going to feed into it). I want to keep things VERY simple (less weight too).
A lot of connecting and disconnecting of the fuel valve...
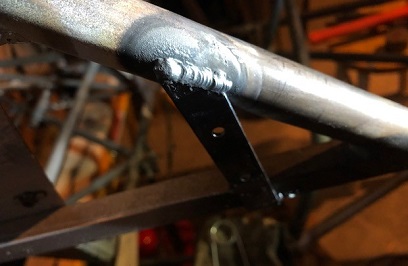
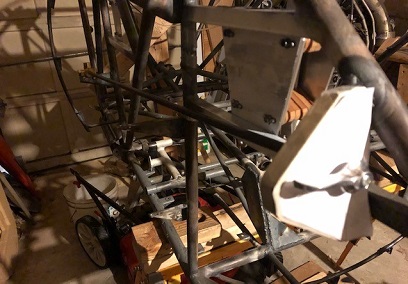
Began the week by figuring out the angle of the fuel selector panel so that I could tack and weld that onto the fuselage. Had to make a tweak in the original tacked-in position. Welded that in place. Looks good!
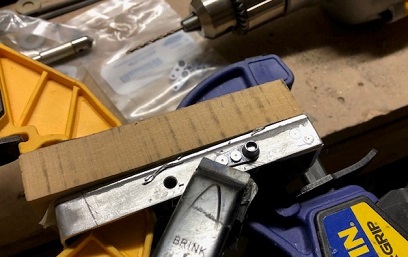
Still need to match-drill the selector panel to the mounting bracket and then drill/rivet on the anchor nut plates. DONE!
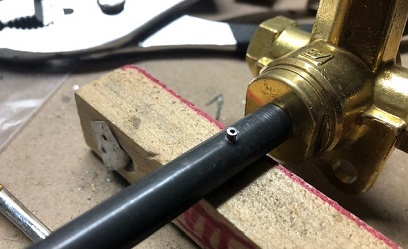
With the panel in place I could figure out the length of the extension tube... cut that to length and then drilled two holes in the tube/fuel valve (at 90 degrees) to insert the roll pins. Followed that up with doing a test of drilling/tapping of the adapter insert (to attach the selector knob to the extension tube). The test piece came out great! Set it up on the micro-lathe and drilled the hole. Vised-up that drilled piece and tapped it for the correct screw. BINGO! Drilled and tapped the two that I had previously tapered and notched. Both turned out great.
Took everything out to the fueselage and set them up... mixed up some T-88 and glued the insert in place to cure/dry (had the knob screwed onto it so that it would be pointing in the right direction when glueing).
Next day started to drill the holes for attaching the adapter insert (for the roll pins) and the damn drill just didn't want to go through the tube/insert. And apparently I'm not thinking right... and I'm thinking WTF?! and tried another location. NO JOY! THEN it hits me... the drill bit is dull. Well, actually I thought that a few times, but I only used the drill bit once to drill those other roll pins holes. How many times do you have a need to drill a 5/64th inch hole? RIGHT! That's what I'm saying!
Called it a day... even though I thought of a few things that I could probably do to continue working on it... but knew I was probably going down a dark road if I did. Sat down at the computer and went online to Graingers to order a few 5/64th inch bits. Discovered... that they were having this masive sale on bits! Drill bits that normally cost $1.80 were on sale for .30 cents. I ordered up probably 3 dozen bits of various sizes.
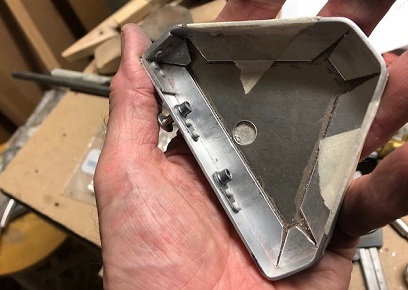
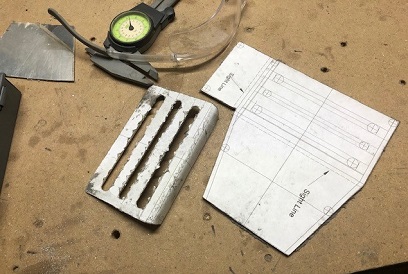
The next day I received the drill bits, well, most of them. Crazy how Grainger sends out things (they pull from differenct locations). I received four packages (some LARGE boxes) with bits in them. A box that probably cost $1.00 and cost $3.00 to ship... with probably $5.00 worth of bits inside. Pretty funny. If that's how Grainger operates, they're going out of business. (I'm sure that this was an exception... sending these bits) Getting back to the story... I received all those bits and not the 5/64th bit I actually wanted! DAMN! Okay... tomorrow, it'll be here tomorrow. Plan "B" for today is to design and CAD up the throttle quad cover. I wanted something simple and light, something that I could put verbage on to let the pilot know what lever was for what... and what it did when you pushed or pulled it (also an FAA requirement). DONE and printed out the layout for making it.
Next day, glued that pattern on a piece of .040 aluminum and cut/drilled/filled/sanded start to finish. NO JOY! Although the slots I cut for the levers are in the correct location, I cut too much off of the front panel and didn't take into account where I needed to connect it with the existing bolts going into the throttle quad. okay... I'll re-design and make another one (the first one took me about 4.2hrs)... it's all about the learning, right! Re-designed it .25inch wider and put a side panel on it... and then printed out the pattern... glued it up and cut/filed the blank to shape.
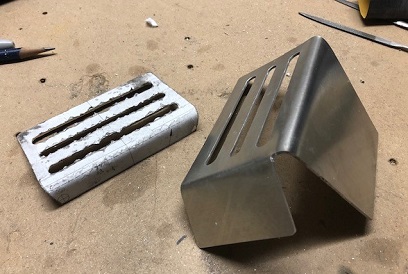
Next day I did all of that stuff I did to the first one (but now on a piece of aluminum .070, I was going to just plow forward and use the same pattern but thought that I'd better check before moving forward... checked the difference between the bend allowance and set-back of the .040 and .070 and it was only fractions of a fraction of an inch)... but didn't cut the front off. Spent an hour, that I didn't record in my log, taking apart and then putting back together one of the quads to make sure that the cover worked. Perfect! I match-drilled the holes in the throttle quad to the cover plate...
I was in this flow this week... I didn't want to stop. I still need to make a minor tweak to the cover. It's not bent a full 90 degrees. I'll also put a small spacer in the front... the forward control lever is just touching the opening and I'd like to move it about an 1/8inch forward. Other than that... beautiful!
May 16, 2020... I just noticed that this post about the throttle quads should have been posted on another page... click here for this and other exciting adventures!