Mantua, New Jersey
Original Site:
September 2004
E-mail: usav8or@yahoo.com
Building the Skybolt
aka Radial Engined Skybolt..
April 30, 2016 Needing to see things...
differently.
sometimes we get so locked into one way of thinking...
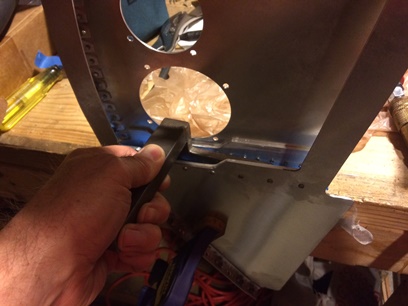
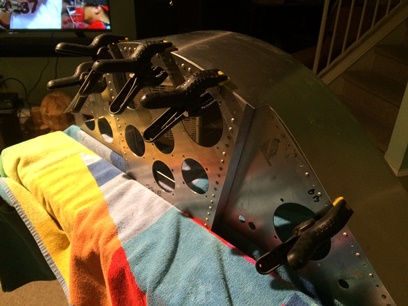
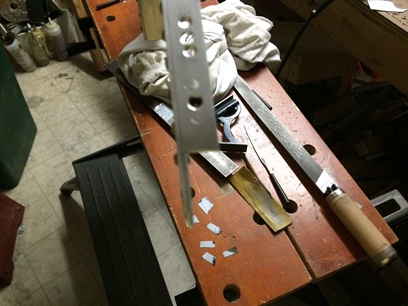
It was the right time (not too late at night) and I had the time (it was Saturday) to work on the instrument panels. Had the new bucking bar and I was ready to have at it...
The new bar was great. It could get into areas that I wouldn't have dreamt possible with the other bar I have. But then... there were areas that I just couldn't get to... still.
I was moving right along with getting those rivets squashed until I got to my "road block". I imagined turning that bucking bar every which way along with turning the work piece every which way. And... every which way wasn't working out. It wasn't until I started "experimenting" with the bucking bar by holding it in my hand that I discovered that it wasn't the bucking bar that needed to be clamped at this time, it was the piece I was working on that needed to be clamped !
I remember seeing a video on this now... it's not the best method of riveting but it can be done. Seems like "not the best method of doing it" is sometimes the only way of doing it...
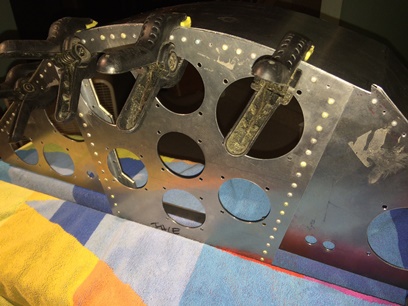
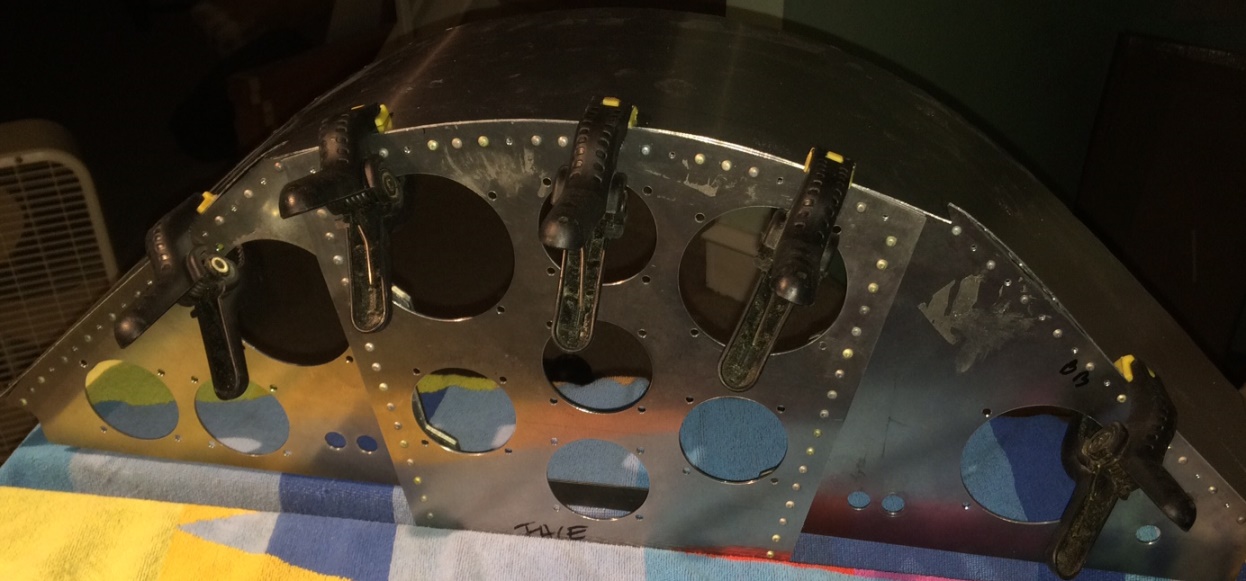
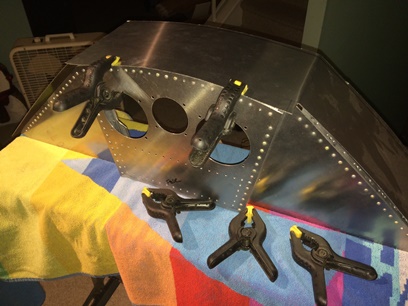
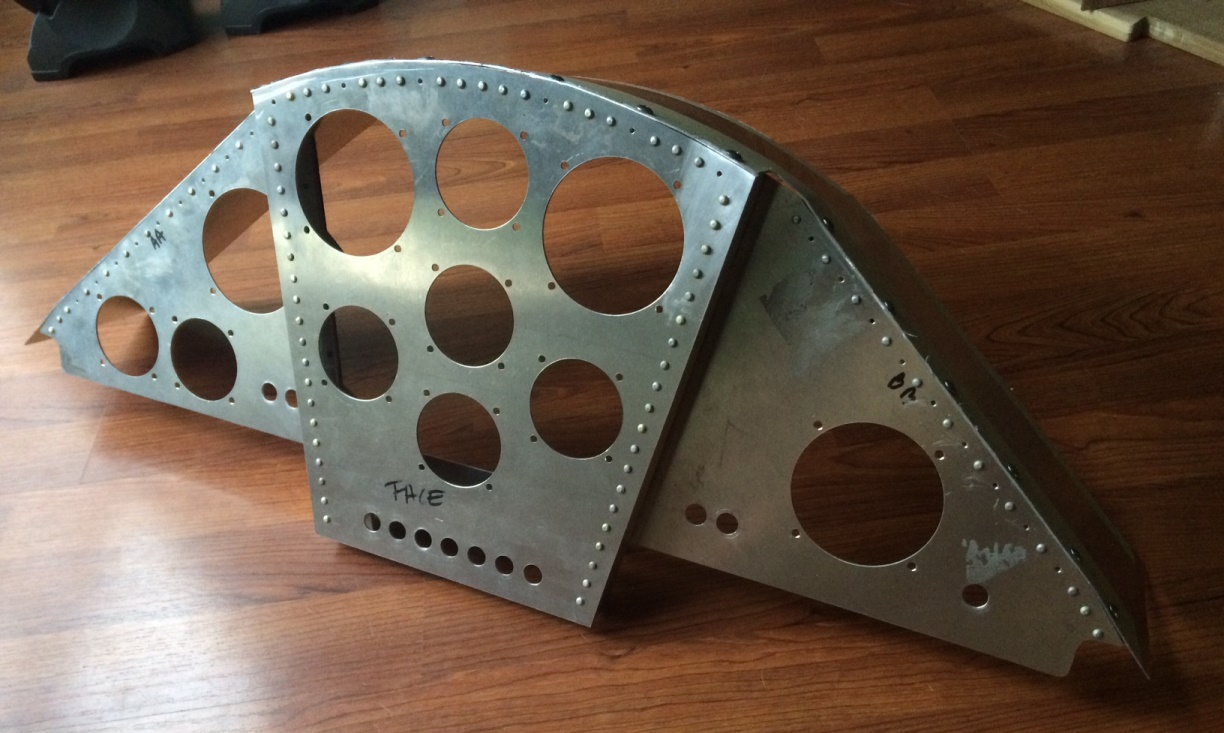
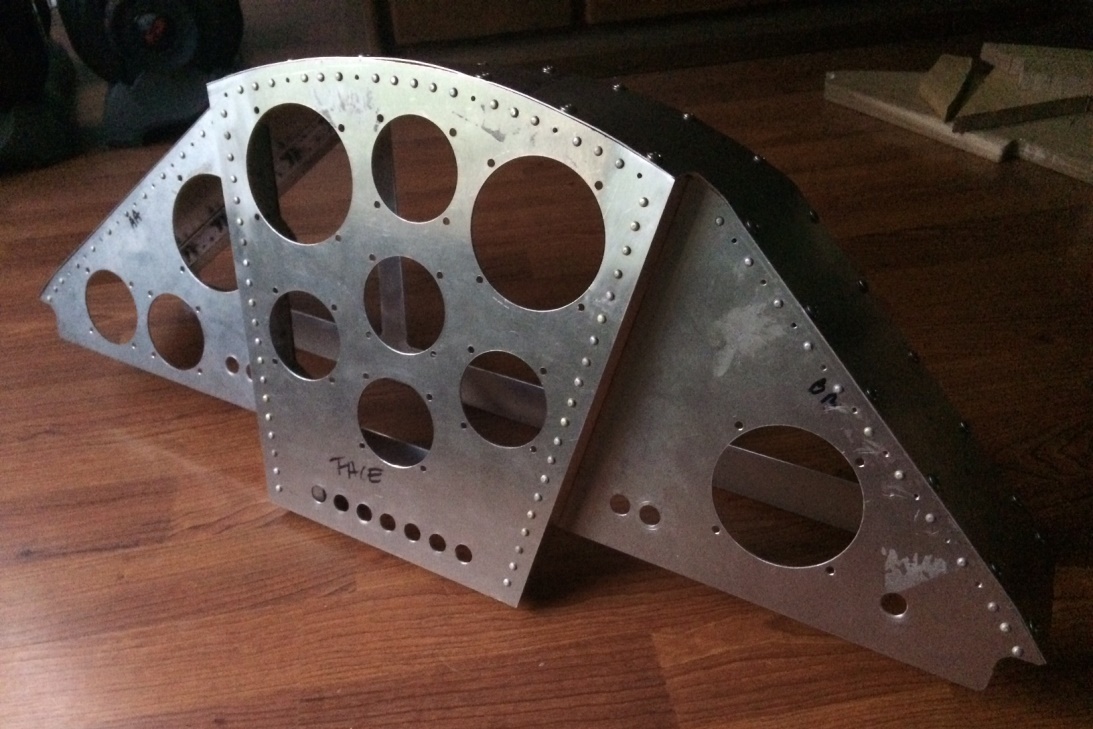
There are a number of rivets that are hidden behind the anchor nut plats that I will try and get at tomorrow... Other than those few that I will either be able to get at, or will need to hammer (for looks) and then glue... these panels are ready for cover.
May 1, 2016 Needing to...
cover things up.
Damn !!!
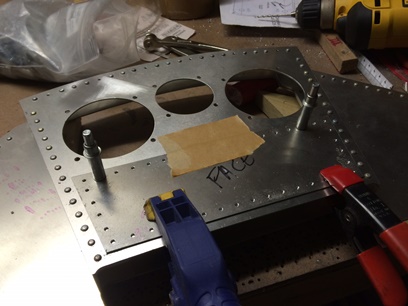
The rivet gun dance across the face of the front instrument panel "face". I can; 1. do the squeezed rivet thing like I did with the holes to try and hide the dance marks or, 2. make a cover plate and rivet it on. The bottom area of the front pit's panel looked kinda sparce so... I created a cover plate.
Designed, cut, drilled and match-drilled a cover in a little over three hours today.
Match-drilling.
Without cover plate...
May 2, 2016 Closer to...
covering things up.
Now if I can only get these covers attached... they'll be ready for the instruments (of which I pretty much don't have right now).
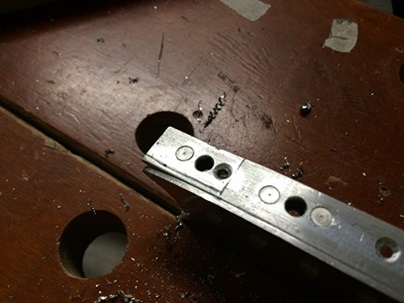
I bought one of those hole locator thingies... you know, there's a hole underneath that aluminum sheet and you need to match-find that hole to drill one in the aluminum. Well, I've had it for a while now and I'm just needing to use it. So... I played with it for a while tonight. Works like a champ. Precision holes for each of the anchor nut plates. Nice !
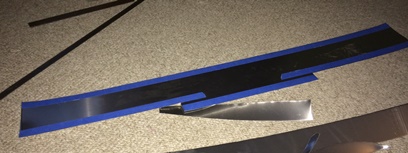
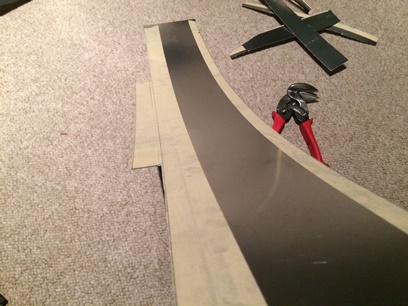
About a month ago I did a test bend but now the real deal-e-o. Made my marks. Drew the lines... then used that hand-seamer I bought back last year... to make the bends.
Trial fit before making bend.
With bend in cover...
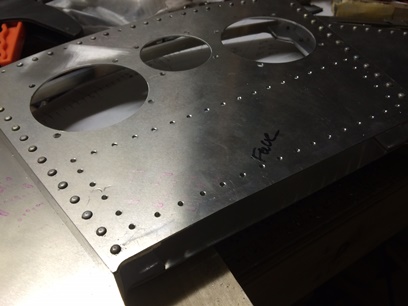
Beauty shot before drilling holes. Click on for larger image.
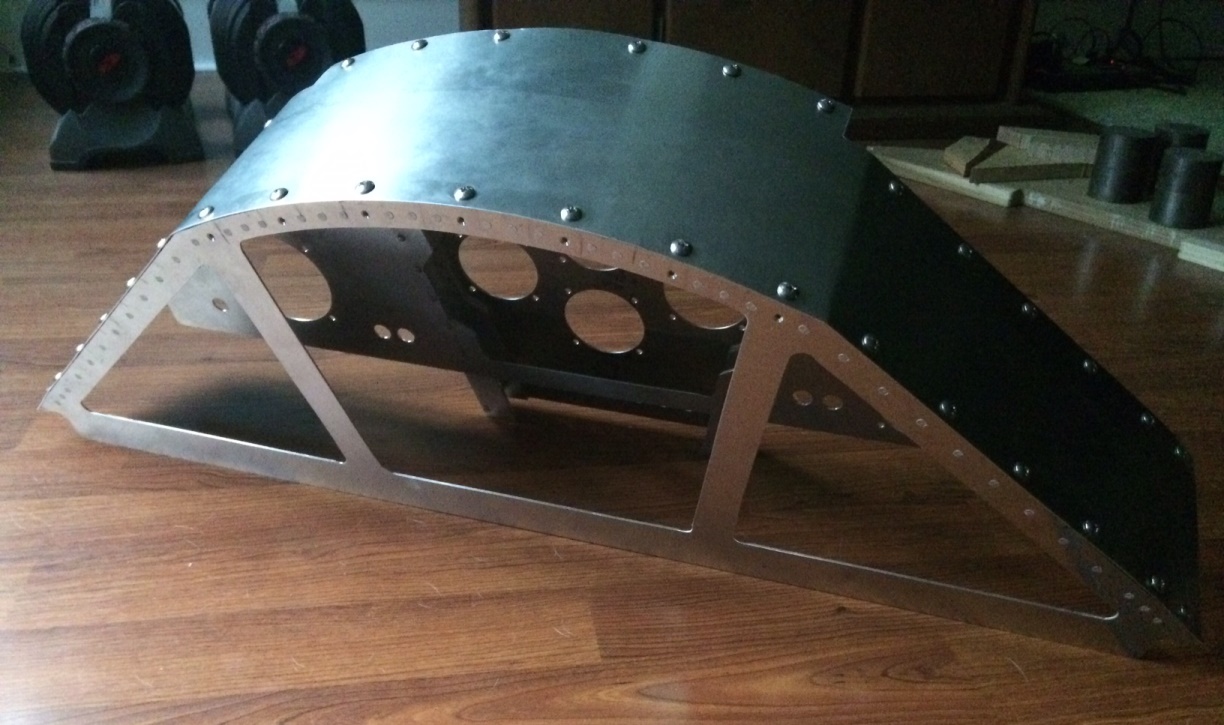
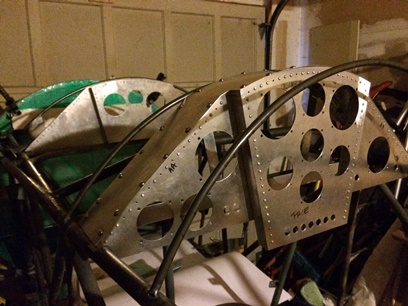
Front pit.
May 3, 2016 Starting to...
cover things up.
Stick with the plan... and I didn't.
I'm working on attaching the shells/coverings on the instrument panel boxes. When I initially cut out the coverings I made sure I squared everything up so that I wouldn't be attaching them on skewed... or something like that. Tonight I worked on attaching the first covering; the one on the back pit's panel.
I didn't follow plan... When I initially started tonight the front edge on the forward, raised section didn't "naturally" lay inline with the cover I made; well actually it did, but it didn't look like the back panel wings were lining up. So... I lined up and attached the forward edge on the raised section slightly skewed. This, of course, threw off the back alignment; the edge of the cover was approx. 1/4 inch ahead of the edge and it wasn't off evenly from one end to the other (if you can follow that).
Okay, so this is a practice piece.
I also discovered that the hole locator thingie isn't as precise as I thought it was. I actually built up the pin that inserts into the hole with a piece of duct tape. It worked pretty good. The precise thing comes from when you insert the tool underneath the aluminum sheet... it raises the aluminum and skews the hole. Most of them are pretty close and useable... and then, some aren't so much. I think I need to mark a few alignment marks on the front edge of the aluminum and the pieces I'm match-drilling to. When I insert the tool, I'll need to make sure that the alignment holes line up before drill the hole. Sounds like a plan... that I'll need to test out tomorrow. I also need to remember to stick to that plan...
Build up of gray duct tape.
Top holes are nice. The sides... not so much.
May 4, 2016 Figuring out...
the drift.
HAPPY STARWAR'S DAY !!! May the 4th be with you... haha
Tonight... needed to make a replacement for the shell I practiced on yesterday. Not much to say...
Made my marks... struck the lines... snipped it out of the .032 aluminum sheet. Although, I did cut it to the exact size (unlike the last time where I left crap overhanging). I actually cut it close to the line and tomorrow I'll file to the line. Cut it to the exact shape 'cause I need those edges to line up the front and back plates. oh yeah... figured I might use spacers to lift the shell off the face I'm match-drilling to... that should help to keep the hole from "drifting" to one side or the other.
May 5, 2016 They say three's a charm...
right now, I'm hoping that four is.
I'm going to need to try this again... no, seriously... I'm going to have to make another one of these.
My spacing idea work GREAT with the top, curved section of the back pit's instrument panel shell. Figured, what the hell and did the sides the same while the top was spaced off. My idea didn't work so well; the holes were about half-way off of the holes I was match-drilling to (and come to think of it... I was thinking that they would be about 1/2 way off... I should have listened). So... my idea now is to make a few marks on the sides to make sure they are align and space them off without the top curve being space. Should work like a charm... should. It'll be my forth attempt !
A few photos from my third (of which some of my theory worked).
Spacers in place.
Clamped and being drilled.
Tomorrow's shell attempt.
May 6, 2016 Today... four is a charm.
But, I'm not promising anything about tomorrow..
Persistence pays off...
I run into alot of this; having to work through something. And... most times it requires that you learn through trial and error. And I'm not talking about basics here. Alot of the time I'm finding that it's the way you do it; the sequence.
In the case of the instrument panel shells... I needed to use spacers to lift the aluminum shell off the work piece. I then needed to fit and drill each of the three section (two sides and the top) as individual pieces.
And because this is handmade and not CAD fitted... I made the holes a little larger than I would if it was a precision fit. A little wiggle room worked.
Click on image for larger photo.
May 7, 2016 Today... was magically delicious...
too.
Attaching the back panel to the shell was a little more than just attaching the back panel to the shell...
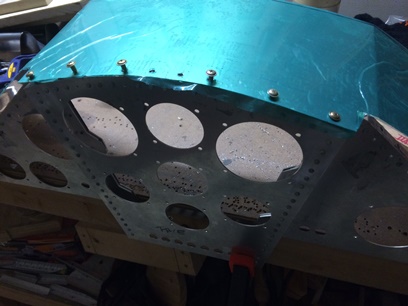
Repeat of the successful last try on the front side. After all the tweaking was done and trimming was completed... I put another 3hrs on this puppy. STILL need to glue on those pseudo rivets ! by the way... "magically delicious" is alluding to a cereal commercial that was on when I was a kid.
Still needs some finishing work done to it. And... the back needs to be attached. The pieces looks like I had planned all along. It's not perfect, but that's the charm of it all.
May 8 and 9, 2016 Test fit. Uh...
not so much.
On Sunday I test-fitted the completed instrument panel. Shoved as far forward as I could get it... it was still too wide (note: the fuselage starts to narrow from the furthest point forward that I can push it). So... there is a tiny bit of over-hang on the side; just a wee-bit. But, it's enough to be a concern... that point would wear on the sheet metal covering. I just looked at it and thought about it for a looooong time. One of those 100 yard stares...
I originally had it measured for four inches deep but changed
it to five inches thinking I actually had six inches of space
to work with ('cause that is what I measured). One of the
things that worked against that was the fact that I angled
the passenger's seatbelt, shoulder support. This ate up about
an inch of space which doesn't allow the panel to move forward
the entire six inches.
Anyways...
I knew what I was going to do but I just don't have enough time to do it. It's Mother Day and I'll be taking my Mother and Sister out for brunch. Then, we're heading over to Rennie's for dinner. Actually had enough time but I was so pissed I didn't want to work on it right then. I eventually measure out a new piece and rough-cut to size.
Monday night rolls around and I set about filing the shell to size and drilling the holes. The piece was already cut to size, side-to-side, so I did't have any wiggle room, and it's already square. I thought about and tried the method I used to space the holes in it originally but thought better... I figured on using the pattern from the first and then kinda eye that up with the holes in the instrument box back piece. They align nicely so I free drill those holes by centering the drill bit and then going for it.
After all was said and done, the holes aligned but the left, back side has a little overhang (maybe a 1/16th). Not perfect but, I'm not making a 6th shell for this one because of that slight overhang...
Click image for close-up.
NOW it fits.
May 10 and 11, 2016 Modifications...
making it fit.
I've been in limbo these past few days; at least it seems like that... I'm at a point with the instrument panel project where I'm needing to think a few things through.
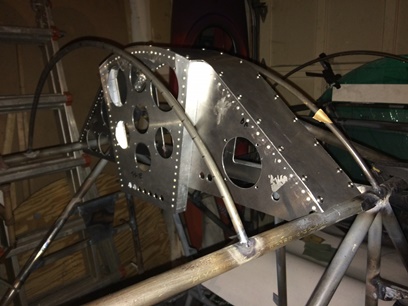
When I started the instrument panels I thought there weren't any rear sway-wires. NOW... there are (long story you can read elsewhere), and it's after I had already measured up and figured out where the front instrument panel was going. Tested fited it and now it's too wide; the tips of the panel won't slip under the inside leg of the sway-wire fitting. Also, the panel fits right up against the front, top former so... there's no need to attach the back portion of the instrument panel or make a shell for it. All I need to do is finish off the top once I have the rest figured out.
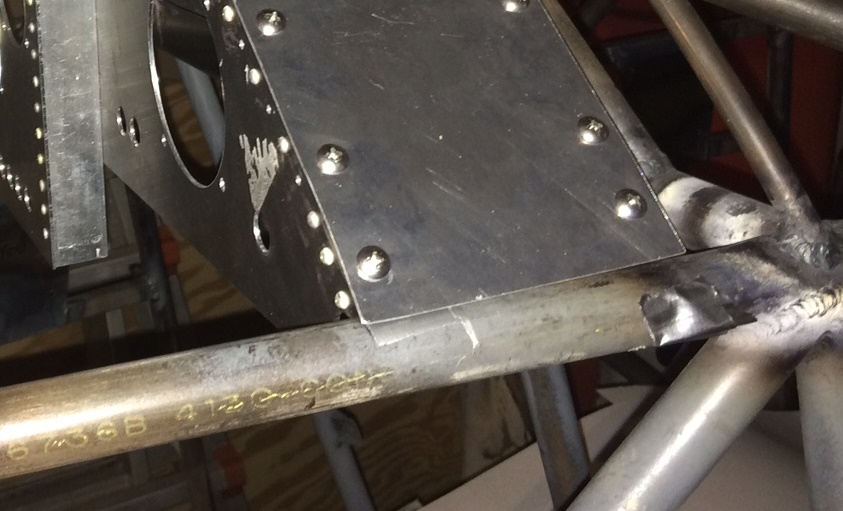
Now... if I notch the rear-facing leg of the "L" flange, at the tips, on the instrument panel it'll fit in there real nicely. I did... and it did.
Marked.
Notched.
Notched and in place.
I need to start working on the upper sheet metal structure; figuring all that out. But, I need to have the firwall locked into place before I can do that and I need to get hold of the drawing for the engine mount fitting so I can do that...
March 10 - 17, 2018 Reading...
before working...
I'm back again... working on the guts of the instrument panel now. Seems like I'm slower than snail, but I'm moving forward.
It's been so long since I worked on the panels that I had forgotten what instrument went where. No problem... 'cause I always keep a record of that shit. Well... seems like I can't find that record. Had something close that, hey, maybe it is the record, but not the one I thought it would be. But, I'm done wasting time looking... so I move forward with planning what it will be like now.
All these toggles and breakers, especially breakers, where do I begin??? What size breaker for each component? What's the loss of amps over the distance of wire and what thickness does that wire need to be??? Hell, I can just draw up something that looks like it's gonna work, but is that my style? Reading up on the basics of electricity isn't my go-to reading but where there is a strong enough desire...
There are several areas of the project like this... where I just want to gloss over it. "Make it just happen, will ya???" A terse glance and I want it to be finished, complete! Something that I really don't want to deal with... but really... wanting to deal with it because it's a part of the project. I push it back to the end of one of my lists... just to deal with later. Later is now, or, it's my decision to make it now. So...
Threw out the question to the biplane form... "Electrical Wiring for Dummies?"... Got some answers. Got some links. A few suggestions on easy to read books... I guess that's all relative when it comes to electrical engineering. One, online book... at least right now it's free, is a book by Bob Nuckholls, "The AeroElectric Connection". As of right now it's an active link. If it isn't when you click on it... I guess I haven't done my job of keeping links up to date (but then... I'm building a biplane... not a web master). Do a web search and I'm sure you'll find it. I'm "enjoying" reading the book. Not a relaxing book to enjoy, but a book to enjoy because of the information in it and the knowledge I'm gaining. Electrical... another area of life's learning I would have never explored unless I was building this biplane.
My mention of "Hell, I can just draw up something that looks like it's gonna work" in the above paragraph was meant to have a follow on sentence... "Just send it over to someone who knows the stuff and have them check it out, or work it out for me." But, again... not my style. I was telling a few friends last night, when they asked how the project was going, that I was reading up on electrical wiring, blah blah blah. He said, "Not something I would read." I said, "Me either, but I'm reading for the knowledge of understanding my biplane." I said, "When you look at my finished plane you'll see the completed product; the pretty surface of my work. I see all its parts and pieces, the work I put into the windshield and the instrument panels, the stringer stand-offs and how I used a laser level to make them all perfectly straight, the multiple time I have made many of the parts to pass my inspection and getting them past my "good enough". Reading up on electric I'll be able to craft my electrical map and be
able to visualize it; see the road map of the wiring when I look at my finished project.
This all started when trying to figure out which size, and how many breakers to use. Designed and cut a side panel for the breakers, head set plugs and 12 volt charging plug. Didn't know what size breakers, for which components... and I wasn't going to plow forward with the panel without knowing... So here I sit reading.
March 18 - 30, 2018 Still...
reading.
All this "still reading" crap I'm writing about could be put to better use? Yeah... not really. It's just something that I'd rather not do, but I want to do. If not now, when ?
I'm reading, but not reading... I'd rather hold the book against my head and have some type of osmosis happen. I need to follow this all the way through. Can't push it off again. Did that in the beginning with this and made a few "guesstimates" which kinda worked but kinda maybe needed more attention paid towards it. If I worked it all the way through the first time I wouldn't be here now writing about not having done it the first time.
I'm thinking... while working through this reading stuff I can continue on with the fitting up of the sheet metal skin patterns. I kind of jumped off of because I was working the sheet metal for the back cockpit and saw that I needed to put in a few side panels for the breakers... which lead to... where I am now.
Tonight I'll be reading more... and possibly cutting/fitting up the second of three top sheet metal skins? Yes?
Now if I were a plant... all this osmosis stuff would be second nature.
April 1 - 21, 2018 I now remember why...
why I never became an electrical engineer.
I'm still picking my way through this book on electrical for the homebuilt airplane...
I've spent some time looking at the instruments I'll be putting in the panel. In the beginning of the build I had visions of old instruments. Now... not so much. I'd rather have a new, reliable instrument that I'm looking at than one that may be accurate. So, it looks like I'll be buying new stuff and put the stuff I bought off ebay, back on ebay. Other than the mag switch and the tach... it all goes. AND, if I hook up the tach and that is giving me problems... that goes too.
Looking through all the available options for instruments panels is a little overwhelming. For the most part I'm looking at the Westach product. I'll need to do some research to see how they size up...
April 3, 2020
For my progress (or lack thereof) on the electrical system... click on over to my "electrical stuff" page.