Mantua, New Jersey
Original Site:
September 2004
E-mail: usav8or@yahoo.com
The Radical Radial Driver's seat.
December 5, 2015 Squeezing in the project...
around the holidays.
Busy with the Christmas decorating this weekend: today my house and tomorrow my Mother's house.
I did manage to squeeze in some riveting (get it... squeeze) ??? Well actually it wasn't actually squeezing them today but had to squeeze in that joke. I match-drilled the top and bottom frames onto the seat backs. Took a little over an hour to do.
After match-drilling I went up stairs and... put up the tree.
December 6, 2015 Blind...
riveting.
On these larger projects... it's always more of the same. Or, at least for awhile it is.
oh yeah... a twist to riveting tonight. Because it's now boxed in, I couldn't see quite a few of the beginning rivets that I squeezed in. So... I had to set up the squeeze by looking at how the one part of the squeeze die sat on the head of the rivet to try and make sure that it was centered. And here I thought just squeezing the rivets was challenging.
Sometimes the project pushes us to think outside of the box to learn...
no image available
December 7, 2015 A date that will live in infamy...
not so much for the biplane project.
We remember this date for the attack on Pearl Harbor and all the lives that were lost; our entrance into WWII.
I'm forever grateful for the women and men who have fought our battles and have given their lives for us to live free. Let us not forget them...
Today isn't so memorable for the project. It was a day of cleaning and prepping for riveting the "L" flanges on the co-pilot's seat back. If I had soaked the paper pattern with the mineral oil before going to work I wouldn't have had to work so hard, and long, at getting it off tonight. I thought that both this morning and yesterday morning but failed to get it done...
Tonight the process wasn't so quick. Some spots it came off without a hitch others... not so fast. It was just a matter of time... waiting for the mineral oil to begin its magic. It was a matter of a long time. Like, an hour and a half of time.
Got through that and then went down to the basement workshop to start fitting up the "L" flanges on the backside of the seat back, like I did for the other one. Cut the 45's for the two vertical pieces and then fitted up the top piece with angles to fit those 45's. Sat back for a few minutes and am undecided if I want to finish up with the bottom one or wait until I've riveted on the sides. Thinking now... I should get that as close as I can so that it's an easy tweak to fit instead of challenging myself with trying to get close to the right angle without being able to overlay the cut "L" onto the un-cut "L"... which is a piece of cake fitting.
There's a lot more twist with the metal on this seat back. It's the reason I thought of putting on the L's... need to flaten out those twists and curves... the bonus was that it finished off the look on the edges of the seat backs. nice...
December 9, 2015 Next...
Finished up the first seat back tonight. More... centering and squeezing. That technique of squaring up on the rivet head seems to work better than trying to center the rivet die on the barrel of the rivet... at least for me.
I'll need to go back and re-do a few of the rivets but I'll leave that for another day.
oh wait... ! I need to figure out something for the corner covers.
December 10, 2015 One down...
One to go...
Running head first into getting the second seat back all riveted up.
Worked out of the house today so... I had time to work on it before work, during my lunch break and right after work: the quitting bell rang and I headed down to the basement workshop.
It's great working on the second of anything... 'cause you've got it all figured out.
Knew what I wanted to do and how to do it. Set up the flange guide on the drill press... used the centering drill to start the holes then went back with a number 40 bit and drill, and deburred as I went along. Over the course of two work sessions I did both long, uprights. Match-drilled both to the back of the seat back.
Still needed to fine-tune the fitting of both the top and bottom flanges on this piece so with both side flanges in place I checked to see if the fit was good: both needed a little shaving.
With nice tight fits I was ready to rivet the sides on (by the way, I didn't match-drill the top and bottom... I'll wait to do that after I rivet the sides on)
With all this riveting... looks like I'll be wasting some time filing down a few more -5 rivets.
December 11, 2015 Sometimes it's hit or miss...
until that one thing happens...
Unusual lunch today... ate the tips off of 135 rivet barrels. Looks like I'm set for rivets for this seat back.
After dinner I continued working on the rivets for the second seat back. I don't know about this riveting. Kinda seems hit or miss no matter how paitent I am with setting up to make sure the squeezer is centered and squared on the rivet.
I like eyeing up the work from one side: I put the piece in my Black and Decker Workmate (a big vise with feet) so that it's upright and the cup-side of the squeezer is on the left side. I'm working along and when the squeezing starts to get far away (as in... I'm eyeing up the rivet and squeezer closer to 22inches away) my squeezing arm probably moves when I'm going from looking at the horizontal alignment to the overhead alignment. I'm thinking that this may affect the squeeze... So I think, to steady my hand and the squeezer so that it doesn't move off of the horizontal level I eyed up... I'll hold it against the bottom of the opening (pressing it down on the hole) while I check out the overhead alignment.
Did all that and squeezed. And... you can tell if you're getting a good squeeze just about from the start of the squeeze and... I was getting that good squeeze feeling. Hmm !? What was that all about ?
Set up the next squeeze the same way. And... Hmm !? same nice squeeze. Started doing that for my alignments and I saw that I was getting one good squeeze after another. Gettin' cocky I put the rivet squeezer on the head of a rivet, did a quick alignment and squeezed.... a bad bad rivet. Yeah... works when you do your due diligence. Don't get cocky, Jer.
Continued with the rest of the rivets and I'd say 90percent of the rivets were good squeezes. Sorta like golfing... well, not as bad as golfing, but... a good rivet squeeze keeps you coming back and trying for that perfect one again. Like the proverbial perfect golf hit from the tee.
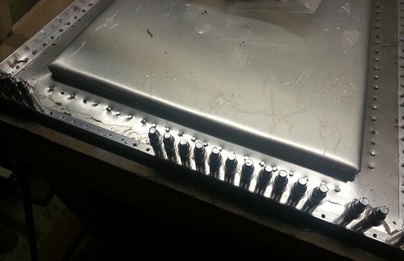
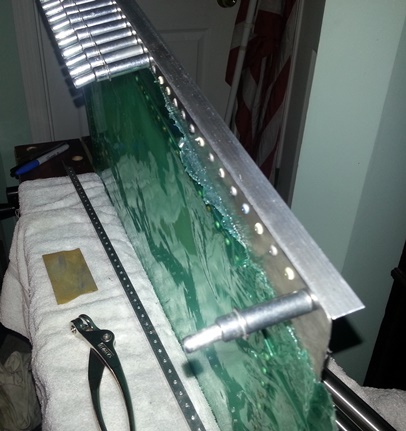
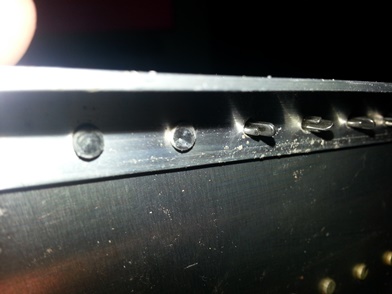
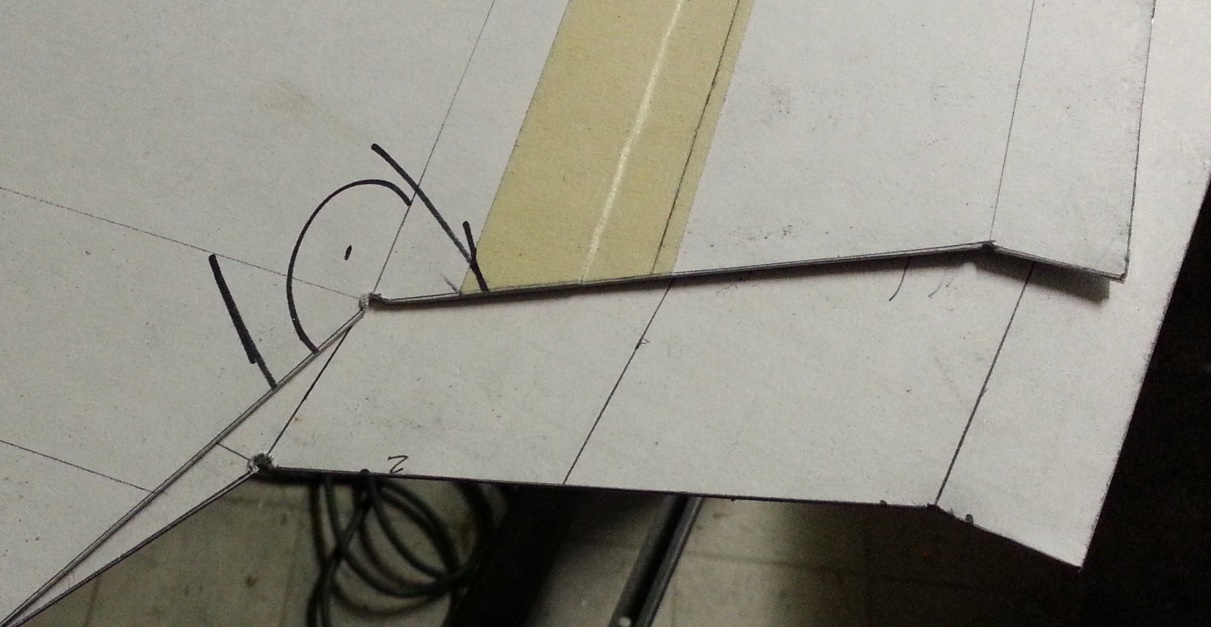
Wavy edge of seat back. The reason for the "L" flange.
Click on image for a close-up.
December 12, 2015 Riveting...
eeessssssh !
On the home strech, er "on final" in pilotleze (pilot talk), with the seat backs.
Took what I learned last night and did a bang up job with most of the rivets. Some of them still need drilling out and re-doing, but not on the scale as was seen before. Gotta give those metal airplane builders credit when banging rivets. If there are 10,000 rivets in an airplane how many rivets are they actually having to squeeze or bang ? What is the percentage of re-do's ? With that many rivets, what's the percentage of a metal, kit-built airplane getting completed? The drop-off rate has to be high; that's gotta get pretty boring... just riveting.
Also, a metal, kit-built airplane; how many different tasks in the first 80percent of the build keeps your interest up ? Hey, I've never built one, but... like I just mentioned, is it all sheet metal, aluminum structure and rivets ? I'm getting tired of just writing about it.
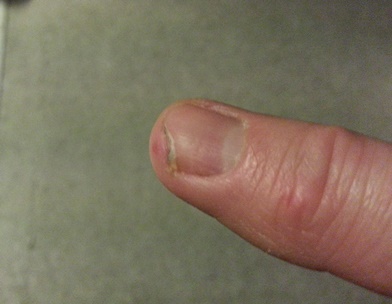
okay... with knowledge in hand I squeezed the entire length of the second vertical "L" flange on the co-pilot's seat. Almost two hours. Some of this time riveting is time that I'm spending smoothing the edges of the rivets I filed shorter; hitting the barrel edge with sandpaper. Funny thing... the nail on my pointer finger of my right hand was looking kind of odd: like I chewed the corner off real close. Wasn't until tonight that I realized that it was from me sanding all those damn rivets. I've been sanding my finger as well as the rivets. (yeah... whatever, Jer)
Above mentioned sanded finger.
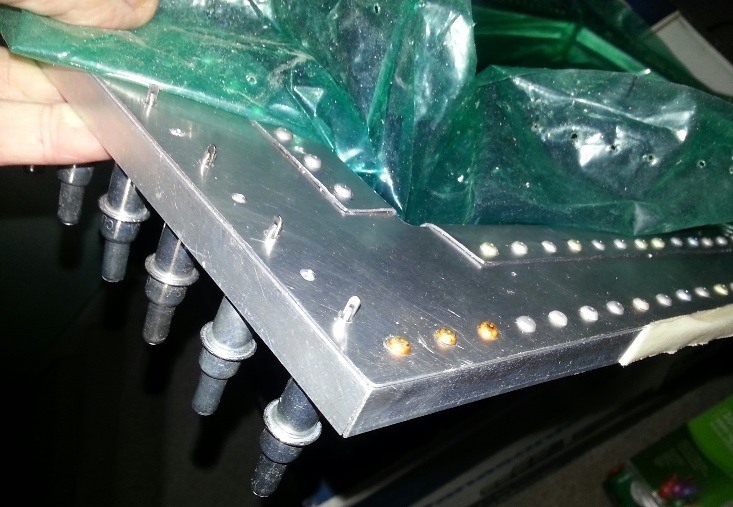
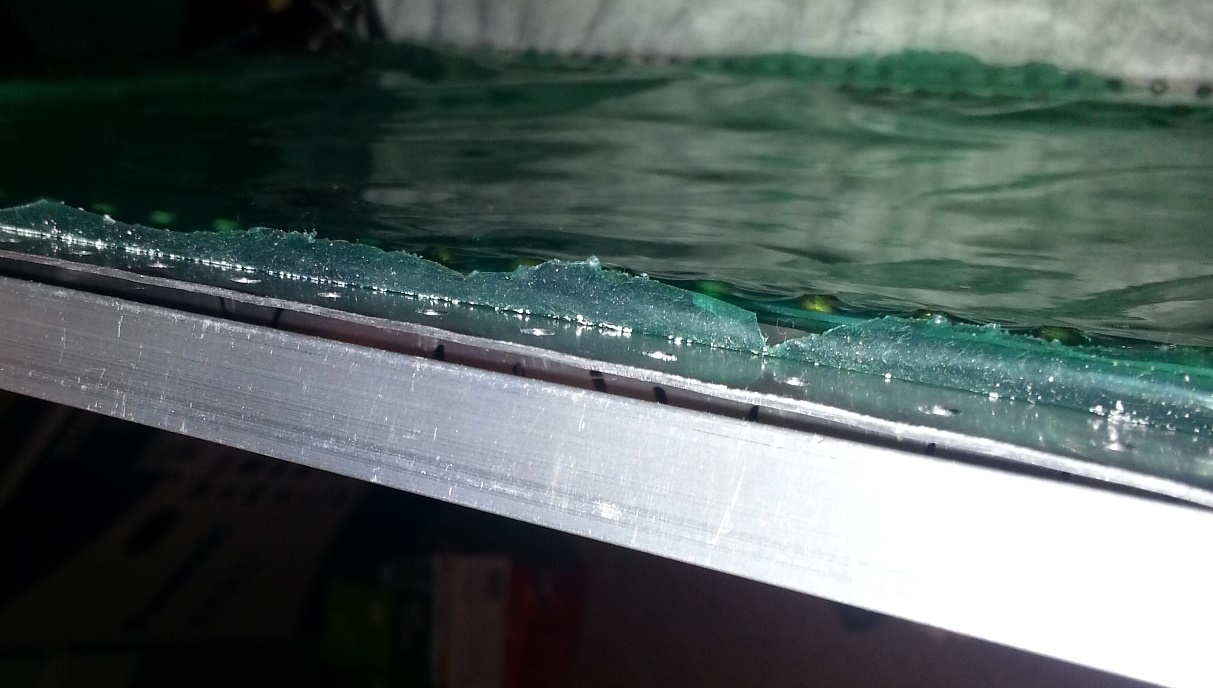
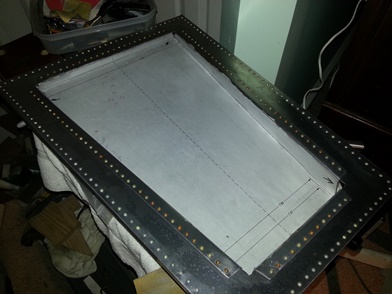
Second vertical on second seat back.
Nice looking squeeze.
December 13, 2015 I need the biplane...
it needs me.
Just one more time... A few sessions today.
okay... so maybe... A few more times.
The first hour and a half I glued the hole spacing patterns to the top and bottom seat back flanges, used the centering bit to start the holes then went back and drilled all those holes. As I drilled I deburred each of the holes on the underneath edge (otherwise the burr would lift the piece off the working surface and cause the drill to go in at an angle).
Broke off the build for awhile and did Sunday's things... came back in the evening and match drilled both pieces to the co-pilot's seat back. Deburred... and it's ready for riveting up.
I was thinking today... every once in awhile I write about how I'm doing the same thing over and over and over again. Not complaining... 'cause I love doing whatever I'm doing on the biplane. But, Truth be told, the project is almost childlike (each of these smaller projects a learning stage). It's a give-give situation; a symbiotic relationship. The biplane needs you (to complete it) and you need the biplane (to complete you). Kind of funny how that all works out.
December 14, 2015 Use the Force, Luke...
Use the Force.
Let me tell ya... I was killin' it tonight.
Finishing up the second seat back was the plan and man was I ever. Needed to squeeze the rivets for the top and bottom "L" flange on the second seat back. Every-single-squeeze-was-beautiful... until the very end of the first line of rivets. A few of them began to bend over a little when squeezed. Not sure what the hell happened there.
Finished riveting on that first flange and started the second. I started killing that one too... Every-single-squeeze-was-beautiful... until the very end of the first line of rivets. A few of them began to bend over a little when squeezed. Not sure what the hell happened there either. Was it the longer reach ? Don't think so...
The Force... Learning from the past squeezes... something had me going there tonight and it was beautiful. Would put a smile on your face... it did mine.
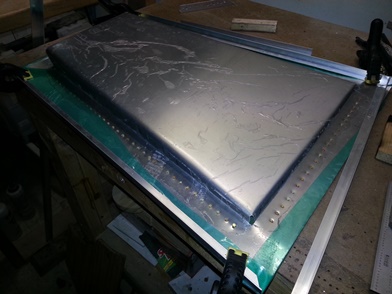
Nice rivet squeezing. Click on image for close up.
Still needs the pattern cleaned off of it.
December 15, 2015 The cookie man...
cometh.
Did I do anything on the biplane project tonight ? Yeah... but not much.
IT's THE COOKIE SWAP !!!
That time of year... and I'm the only one that can make these for my house.
A lot of traffic tonight coming home so I didn't get home 'til close to 7PM. Changed and ran with the pup... grabbed a real quick bite to eat then started making oatmeal cookies. Yum !
Didn't get done with those until close to 11PM but wanted to do something on the project. Needed to clean the paper pattern off the front of the second seat back. So... this morning I swabbed it down with mineral oil to break-down the glue. Pulling it off was easy... piece of cake. One issue: there was a build up of glue in a few places that just didn't want to come off easily. Wasn't going to fight with it so I gave those spots another good covering of that mineral oil and let it set overnight.
So... other than making a few dozen oatmeal cookies and a little seat back cleaning... not much was done.
December 16, 2015 Not to pat my self on the back but...
these look pretty damn nice !!!
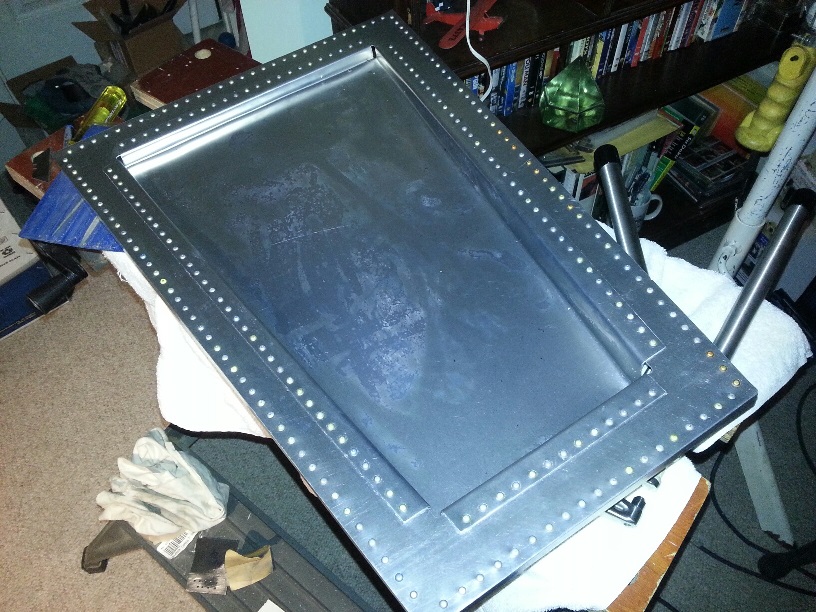
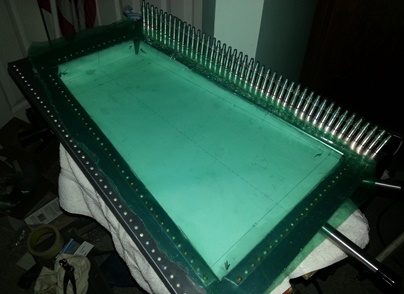
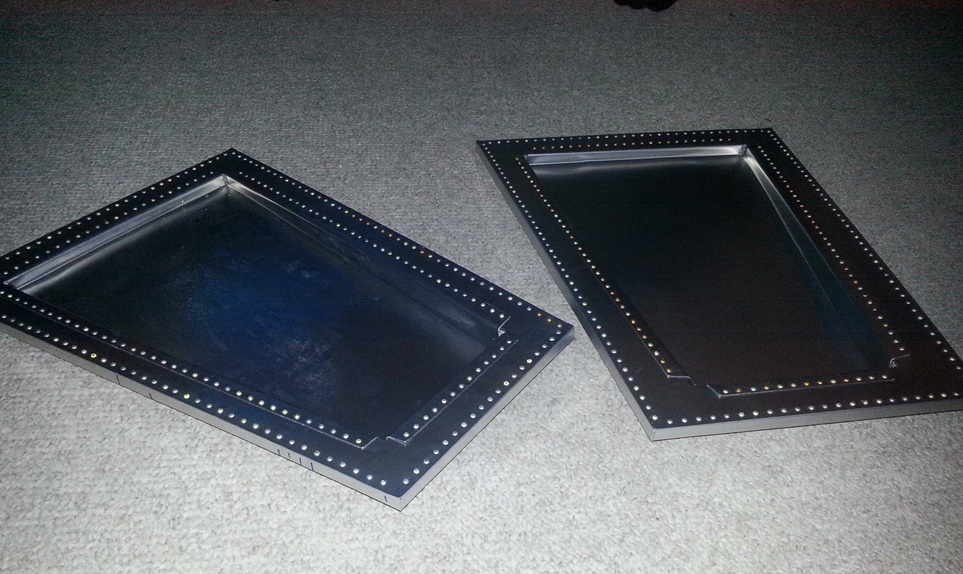
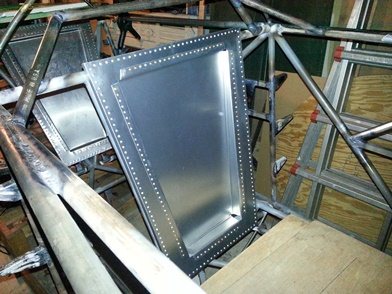
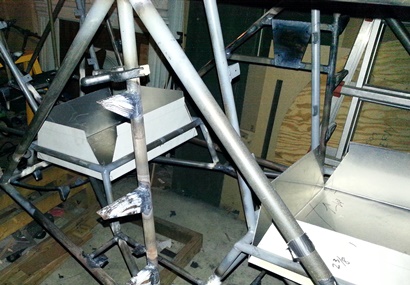
Started off the night by cleaning off the residual glue from the second seat back... then took a few photos of it in the biplane and on the floor.
Have to admit... these look pretty damn nice !
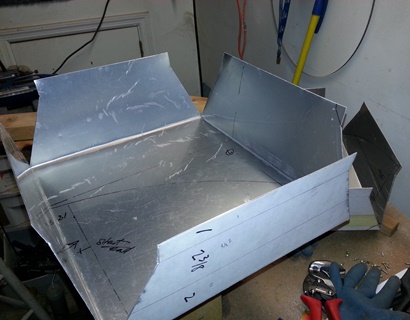
Had more daylight to burn, per se, so I took the seat pan pattern out to the garage workshop to confirm that it'll fit in the plane still... and it did. then... Back up to the dining room to get the .o40 aluminum sheet. Cut out the blank and went down to the basement workshop to spray glue the pattern onto the blank.
Grabbed both the left-handed and right-handed snips and started snipping it out. Still need to drill the relief holes and then bend and fit to the pilot's seat frame...
December 17, 2015 More of the same..
but still movin' forward with the project !!!
Since the pattern I used on cutting out last night's seat pan worked I needed to draw up a new one to use on cutting out tonight's work.
Iterating last's nights work; basically the same as what I did last night with the added... drawing up the new pattern. Cut the pattern just outside the lines. Kind of mindless. (By the way.. most people get this wrong... the first time you repeat something you iterate... the third and so forth times you reiterate. Got it?) Need to drill the corner relief holes on both than file to the lines.
Was thinking... when I looked at the fuselage last night. There ain't a whole lot to be done on it still. Get that firewall attached with the associated front aluminum skins then the instrument panels and... I'm pretty much there. It's gonna be kinda sparse in the pit's but hey, that's what I want. and... I'll be keeping it light.
December 18, 2015 Crap everywhere..
it's slowing me down !!!
Clean up time ! Well... after I drilled the relief holes at the bends and filed both seat pan blanks to the cut line then I needed to clean up the edges. Filed the first seat pan forgetting that I had a nice straight-edge deburring tool. Started on the second one and suddenly remembered that I had the tool. Spent the next 20 minutes looking for it. Just about gave up looking for it figuring it's gonna take me more time to look for it than to take the time and file of the slag from the filing.
I have a few days off between Christmas and the new year... I've got to get re-organized: 20 minutes to find that deburrer tool, case in point ! Kind of runs in cycles... get workin' on the project and put all my time into working on it instead of cleaning up afterwards. Gotta change that... but probably won't.
Click on image for close up.
December 19, 2015
Just make it..
Just make the decision.
With these two seat pan blanks cut out and trimmed it's time to start bending them up. Two of the sides... not a problem. The other two sides. Problem.
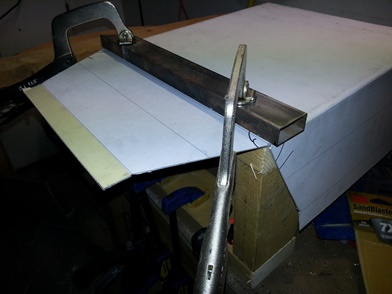
For the first two sides I used the Black and Decker WorkMate. Clamped each side down and banged it over. Now with the two opposing sides banged over I couldn't do the same with the other two sides. Would have been simple and fast just to make a quick jig but noooooo... I wanted to find something that I could just use: something that I wouldn't have to create.
Spent a few hours doing just that... looking. Finally made the decision to make a simple jig to make those bends. Quick and easy when you have, or, create the right tools.