Mantua, New Jersey
Original Site:
September 2004
E-mail: usav8or@yahoo.com
The Empennage... looking to build the tail section..
June 19, 2014 Daylight...
left to burn.
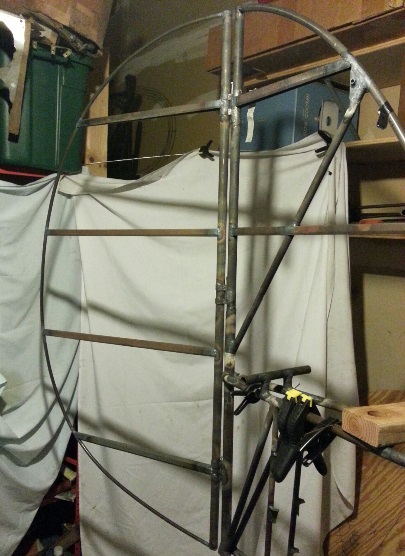
More work on the rudder. Time to put this piece to bed.
Same stuff as the last time; cutting, notching, trimming, and grinding...repeat until I fit the remaining two metal ribs up to the rudder.
Still have plenty of time to finish weld these to the rudder frame. Been there... doing it again. Started welding them while the rudder was still connected to the tail post... what a pain in the arse. Un-bolted it and laid it across the fuselage, making sure that I didn't overhang too much of it while welding (to prevent a possible warping of the rudder frame... better safe than sorry). Finished welding up all four, re-bolted it and WAA LAA. The frame didn't shift a bit.
I have a tough decision to make. What to do next on the biplane? Actually, on second thought... I'm working on the fuel tanks. Need to complete the upper one before I can resume work on the upper wing center section.
December 26, 2014
Making another list...
that I really didn't want to check twice...
As usual... had the day after Christmas off. NJDMV was open so I stopped by to re-new my month-expired drivers license.
With business taken care of it was time to have some fun... over to Woodstream Ct. to work on the biplane project.
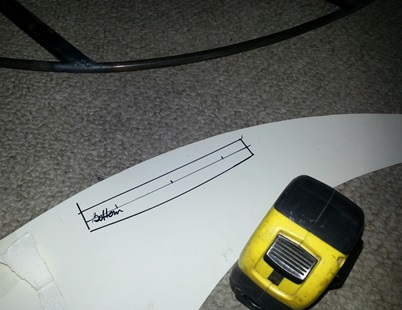
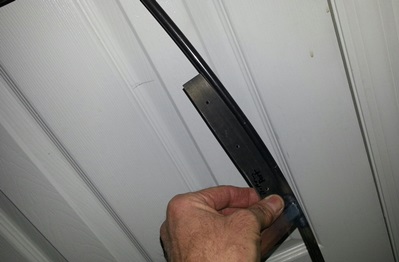
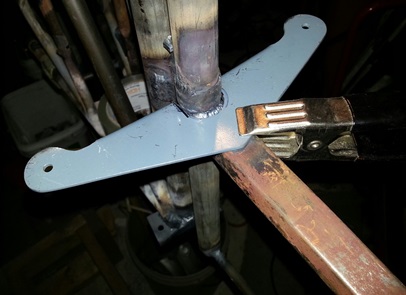
Just a lot of little things left to make and attach to the fuselage. Pick one... any one... and I'll make it. Pulled the mounting bracket for the rudder trim tab out of the air... Check the plans; it's 3/4inch x 6inches. Made out of .o32 4130. Took a piece of display board over to the rudder... drew the trailing edge to fit the curve of the rudder. Marked 3/4inch out from both ends and drew a straight line to connect the two. Measure and marked for three holes.
Found a piece of 4130 and traced the pattern. Marked the hole locations. Cut the metal. Ground down to size. Drilled the location holes. Filed and sanded the cut edges. Ready for welding on the rudder.
The next idea that landed on my lap was the trim/servo tab schtuff. I could have sworn that I took inventory to make sure I had everything I needed but... not so. Looked over the plans again to make a list of all the tubes that I needed to complete the trim/servo schtuff. As I looked them over I saw a notation that Hal said to change something from 3/8inch to 1/2inch. The note said it was mentioned in Hal's builder's notes. For the life of me I couldn't find those notes... and I know I have two sets of them. (I actually took 1 hour off the time I spent on the project today because I looked for these notes). I finally gave up the search and tried figuring it out. By looking at the various parts that need to be reamed and the parts that fit inside of said reamed part... I figured it out.
On the plans (page 14 of the Standard Skybolt plans) it says to ream the 5/8inch tube to 3/8inch. That's ain't so. There's a end tube, that is welded onto the 3/8inch tube that needs to spin inside of that 5/8inch tube. And... that tube is 1/2inch. So, ream it to 1/2 not 3/8inch. I need to order a few pieces of tube to make this trim/servo tab AND thinking it all the way through... I figured out I needed to purchase a 1/2inch reamer. I'll order these up this weekend. Maybe, hopefully I'll have these for next weekend.
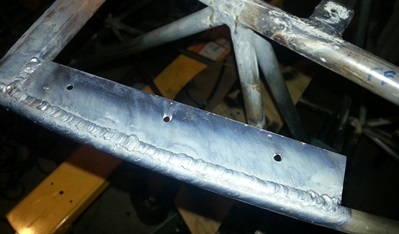
oh... yeah... here's a few photos from the making of the mounting bracket for the rudder trim tab. Still needs to be welded on...
Note: All this stuff for the trim/servo tab needs to be on the stabilizer's page. Click here...
December 30, 2014
Stop looking at it !!!
I had the rudder trim bracket in my hand... I knew what I was going to do with it but I just kept looking at it.
well, actually... It was more than a stare. I was visualizing how I was going to jig it so that the bracket would be flush on the left side (per the plans). I can understand thinking things through, but come on, Jer... do more than just stand and stare. and yea... It happens a lot.
Twas a simple thing to do... jigging the bracket for the rudder trim tab. Jigged it. Welded it up... all done.
February 21, 2015
False starts and snow flakes...
are slowing things down...
Had a few false starts today...
Before getting into my false starts I took a look at the sway wire brackets. 'cause for some reason I looked at the CADs for the Delta Skybolt and saw the layout of where things need to go and the brackets were different than the ones I had on there.
AGAIN... I go through the whole exercise of making sure what was on the plans is what I have on the biplane. It's all convoluted... The Delta is different than the Radial, but the CAD is drawn up for the Delta. And... the Radial's plans kinda contradict themselves. You need to look at when things are drawn up to kinda understand what the final product should be hanging on your Radial Skybolt.
The brackets I have are the ones that need to be on it but I would change the shape of the rear sway wire brackets if I were going to do it again. But... I ain't gonna change the ones I have up on there, I'll just cut down the inside legs (which don't need to be there). BUT (heads up)... look at the new CAD layout for positioning of the sway wire brackets on the Delta 'cause
that gives you a clear picture of what bracket needs to go where.
Anywho... (back up to about an hour earlier)
Stopped by Kmart to pick up some display board. Thought I'd treat myself to start seeing what the sheet metal would look like on the front part of this beast. Ya know... take a brake from all the little parts and pieces. I went out to the garage and saw that I had to cut down part of the cross piece on the pseudo-firewall so that it would lay at the right height (now that I have the front sway wire brackets in place the 2x4 I have on there is resting on top of them). After cutting down that 2x4 and re-attaching it to the pseudo-firewall, I stretched a piece of monofiliment line on the center line from station 0.o to station 24.o. Found the small square to make sure the center line on the psuedo-firewall was lined up with the center of the fuselage... and started to square it up and thought "What the heck am I doing?". I'm wasting time playing with this right now. I've got to make that firewall first THEN start playing with it.
That was my was my first false start. Started looking over the plans to see what else I needed to do. On the first page I looked... The rudder horn was starring me right in the face. Find it, notch it, weld it on... Knew where it was but couldn't find it. Got tired of looking for something that I knew where it was but it wasn't. (get it?) This was my second, well... kinda but not really false start.
Went out to look at the fuselage to see what else I could do on it. The tubes for the fairleads jumped out at me (the rear ones are welded on parallel to the longerons, but when you think about it, and look at how the cable needs to go, it needs to be angled down (like they show on the plans... DUH !!!), BUT before figuring out the correct angle to have it at I needed to get that rudder horn welded on the rudder.
Okay, for shits and giggles I looked in the same box I thought it was in but when looking in there the first three times today it weren't (sic)... but now... it is. Well, at least I have something to do before the snow starts coming down at 1PM (other than trying to figure out what to do).
Some grinding needed to be done to the opening on the rudder horn. And, I didn't rush this... it's just a small thing, but when I go and push through something to get it done thinking "What the heck... grind a few big chunks out of this and it'll be ready in no time." I usually end up having to remake the piece. So... a nibble here and there. Check it. A nibble there and here. Check it. And so on and so forth... Got it to fit real nice. Clamped it in place and decided to grab a breakfast bar for lunch. Went into the kitchen and saw a few flakes of snow falling out of the sky. A few minutes later I heard the DJ say it was coming down pretty hard outside the studio (and I knew it was blowing in from the west). Didn't want to chance taking my time to weld it on today and having to skate back to Lombard Street so I packed everything up and called it a day.
Brought the Radial Plans home so that I could see what flange goes where so I can continue working on that the next time I head over to Woodstream Ct.