Mantua, New Jersey
Original Site:
September 2004
E-mail: usav8or@yahoo.com
Making.... The Radical Radial Fuselage Fuel Tank.
February 17 - 22, 2019 I'm not building.... the fuel tank!!!
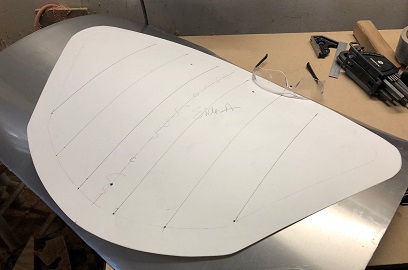
I'm not building the fuel tank at the moment... I'm making the pattern for making the end-caps.
I've learned quite a few things when making the end-caps for the main fuel tank.
1. Don’t practice with the piece you want to use.
2. Don’t practice with the actual tank form.
3. Make form/jig with hardwood (oak)
a. Make deeper than the 1/2inch or 3/4inch depth of your side on the cap
4. Practice on scrap (oak, and aluminum)
Steps
1. Make form/jig
2. Drill pin holes (3)
3. Make built-up side able to be used on both sides
(screwed or bolted)
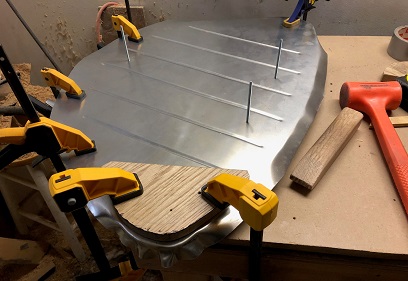
4. Clamp blank onto form/jig
5. Mark shape of cap
6. Bead side (keep beads 1inch in from sides so that the piece can be clamped)
7. Drill holes for pins (holes are already located in form/jig
Insert pins (3/8”? Ľ”?)
8. Begin bending/shrinking
9. Make several tucks as you begin the process
Not too many tucks
10. Anneal
11. Bend/shrink
12. Anneal
13. Bend/shrink
14. etc
added notes:
15. Stop shrinking when it hardens. Anneal again.
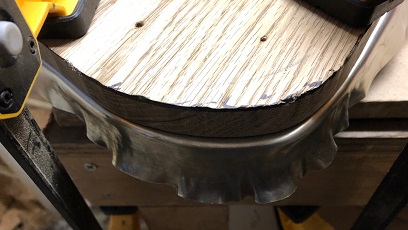
Don't keep pushing the shrinking. The hardened aluminum will begin to deform your form.
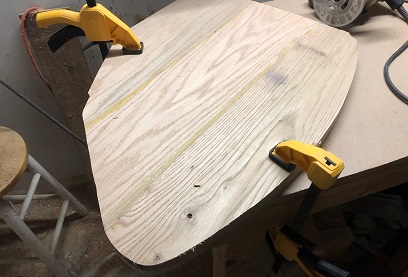
The form/jig that I am making... the sides where the bends are will be deeper than the 3/4inch that I need. I found that the 3/4inch particle board form (that I used to make the jig for the entire main fuel tank) crushes after a few test pieces are made. That's bad on my part. I should not have used the final form piece for making my practice pieces. That... along with I should not have used the aluminum blank that I want to use on my actual tank.
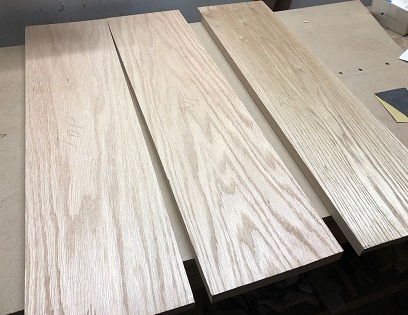
Since I need to make a form for just for the tuck shrinking, why not make it from something that's a little harder (a lot harder) than the particle board I now have for the form... thus, I went out and spent $50.00 on two pieces of oak board to make the jig.
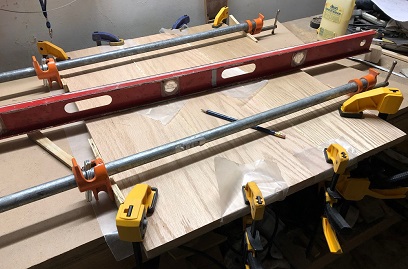
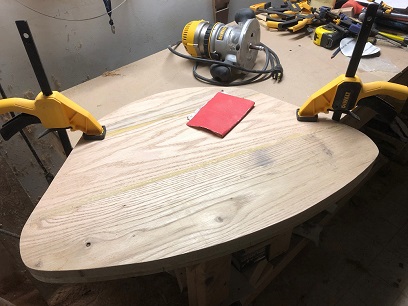
Okay... cut the one board down, glue, and clamp overnight. Not the next day... but the following day I route the shape of the main form using the form from the main fuel tank (the particle crap board). by the way... I only used it because of its stability in not warping, and in the 11 years since I made them they haven't warped. I haven't done it yet, but I'll be making a removable second layer to the form to make the corner 1 1/2inches think instead of just the 3/4inch thing (this is what I had mentioned earlier that I was going to be doing). It needs to be removable so that I cn use it for the end-cap on the other side of the main fuel tank. Remember... it needs to mirror the one I'm doing now. You can't just flip it over and use the other side of the form (the corners may not be perfectly aligned... it is handmade).
Like I said, I haven't made that second layer yet. I'll be doing that over the next few days. I'll also make a test form for the corner to practice on.
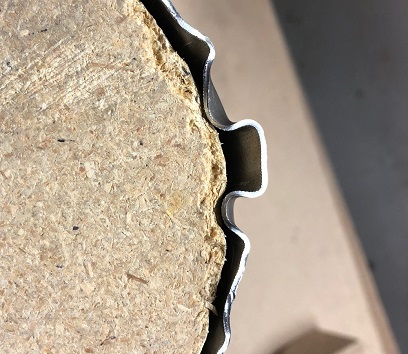
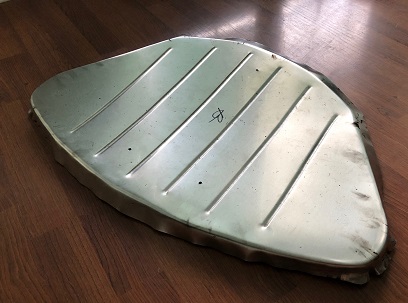
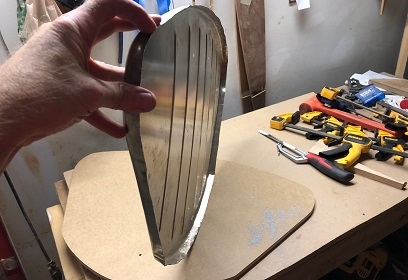
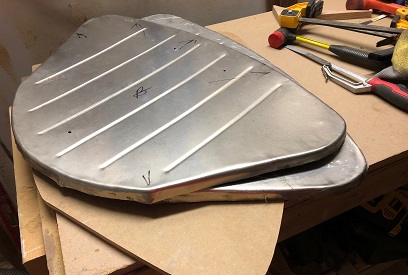
Here are a few images of the last test piece I made (you'll see that it crushes the particle board... not allowing me to finish the tucking.
The repair...
February 23 - March 3, 2019 I'm not building.... the fuel tank!!!
I still haven't started working on the fuel tank
Went out an purchased addtional material to make the pull-apart fuel tank end-cap former; the one I've been messing around forever.
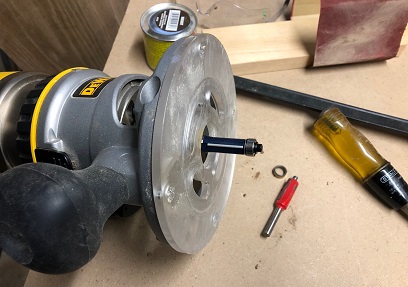
All is going along smoothly until yesterday. Had the bottom frame (for the extra depth) screwed onto the main form. Started routing it... going along fine until it's a little rough pulling it along and DAMN! what the hell? Turned off the router and saw that the bearing on the Bosh bit blew apart. Not a big deal... BUT when the bearing blew out it started to chew into the main form which also allowed the bit to cut into the bottom form. DAMN!
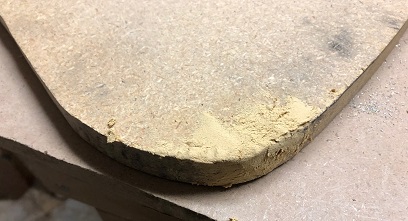
Okay... I know, I think, I have another bit just like it. Found it in no time... it... does... the... same... damn... thing! The bearing blew out and in doing so, it chewed up more of the main form along with the piece I was routing. DAMN! It was a Bosh bit too... They're about 10 years old, but DAMN! both blowing out on the same day? So, I set about repair all the damage that was down with a can of wood repair putty that I have. It needs to dry an hour before working on it again. Spent the day going back-and-forth with layering up the repaired area. Between each re-putty I would sand down the area. Saturday I went out and purchaed a new Bosh bit with bearning... Sunday I routed the rest of the shape (with no problem at all).
Spent the rest of the day drilling the holes (with a 1/4inch bit, fostner bits, and step bit. oh... I also routed an extra corner out of the oak for practicing a few times on before going back to the actual form I'll be using to tuck shrink.
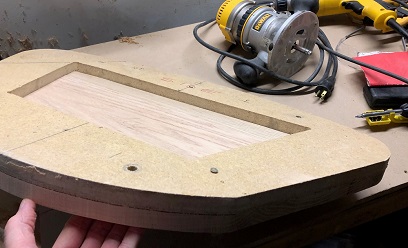
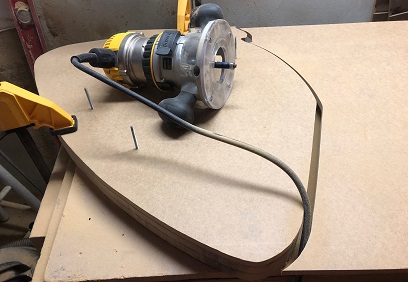
Particle board jig used as pattern to make oak form.
March 4 - 8, 2019 Breaking bits.... not making tanks!!!
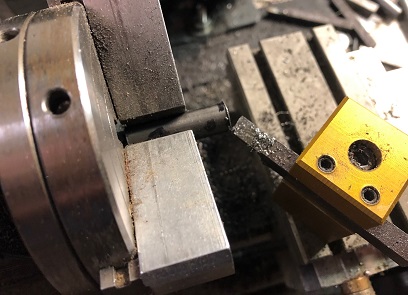
I failed to mention it... but last week I worked on the eight bushings that will attach the straps to the fuselage... the ones that will hold the main tank in place. A lot of rough cutting, reaming, and using the micro lathe to cut to size.
Spent time this week, not a lot of it, using a few standard bits, and a few fostner bit to inset where the bolts will go that hold the upper and lower end-cap forms together. That's it! Not a lot... but a little. Very - Little.
Blown-out bit and new bit
Second layer of form routed. Finally.
Fostner bit drilling. Love this bit.
March 9 - 16, 2019 started (yes, with a small "s").... making the tank.
F'n Eh!!!
After a bit of work on the form (more than a bit of work)... I was ready for my first (test?) end-cap.
The form is well through through. I figured out what needed to be done based on the tests that I did. Also, wanting to use the same pattern for both end-caps, I needed to make it able to be mirrored, thus the bottom piece that can be unbolted and placed on the other side.
Drilled the holes for the alignment pins which keep the aluminum blank you are working on basically lined up in the same location; replacing it after pulling it off each time to anneal.
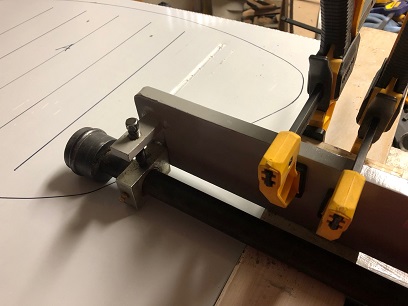
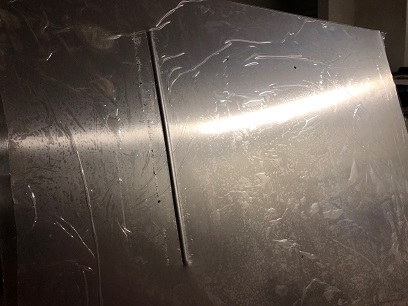
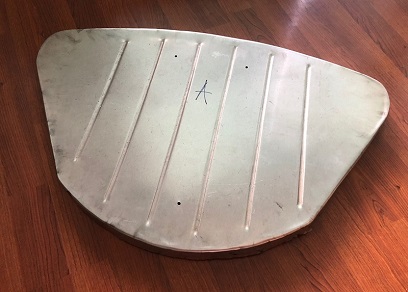
More practice on the bead rolling to figure out the number of turns to make so that it's not too tight where it shows the edge of the roller; aka a mashed line from the edge of the roller ('cause the rollers aren't perfectly squared up... it ain't that expensive of a bead roller apparently). The beads are nowhere near the depth that Bill, from the biplane forum, mentioned were on the Christen Eagles' fuel tank, but my search pulled up no available bead dies that I could use on my roller. These beads are giving the front and back additional strenth from sloshing, and that is my whole point of doing it. No HARD acro with this biplane... so, the additional strength is going to go a long way.
With everything ready I moved on to using that blank I cut out oh so long ago. The one thing I dislike about that blank is that it was cut from a rolled sheet of aluminum. It wants to keep its shape. I'll give this a go to see how it goes. I need to buy another sheet for the other end (a flat sheet) so... I may just buy a few extras and use this as a practice piece?
A few practices with how much to tighten down on the aluminum blank with the set screw. Ya see... I need to start the bead inset off the edge of the blank... can't just tighten up the bead roller and send the blank through. After a few experiements I determined that I need to hand-tighten the set screw until it touches the aluminum then three full turns with the wrench... That puts as deep of a bead as I can with this roller die without harming the aluminum otherwise.
When rolling the beads on it... I have some wiggle. Not a problem other than "there's a wiggle". I might make an adjustable jig that will keep the lines straight as long as I keep the one edge up against the jig... Just a thought. But, as you can see from the photos, those lines don't look bad at all.
Right now I am at the point of having rolled the beads on the one end-cap blank, cutting to a rought one inch over hang for tuck shrinking, and banging down the one corner. Ended it last night because I didn't want to start the annealing/shrinking process. It was getting late in the day and...
March 17 -23, 2019 I love what I'm doing.... I always do.
It NEVER fails... I always love doing what I've hesitated to do! ALWAYS!
Hesitation from... not thinking I have all the knowledge that I need to have to do it correctly? Hesitation because I don't want to screw up the pieces that I have? Whatever the reason... once I get on it, I enjoy the learning process. LOVE the learning process.
A friend of mine, Mike, offered to let me use his shrinker... that was after I learned how to do the tuck shrink method of shrinking. I said, thanks... but then all this learning would have gone to waste. So, I'm sticking with shrinking the metal on the corners with the tuck shrink method.
More practice on an "actual" piece... the shape of the tank. Worked both corners while making the bushing for the tank strap supports/holders. Learned a lot... and looking good. The length of the tuck-shrinked edge ends up being .75. What you see is 1.5inches of length. Half of that will be cut-off... leaving a nice smooth tuck-shrinked edge.
Just ordered up (3) sheets of 5052 H32 from Airparts. Should be here this coming week. Looking forward to getting the end-caps made and get the tank welded up!
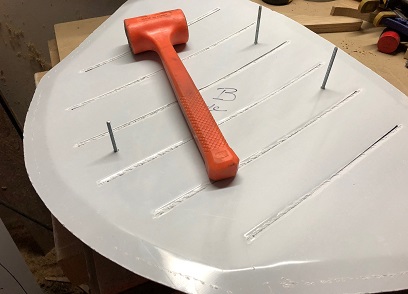
Hammer time... begin working second curve.
Damn close!
Eight bushing for tank straps.
March 24-30, 2019 I'm on a roll (get it???).... first beads.
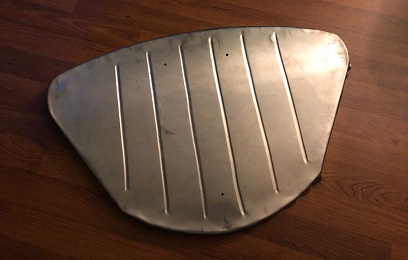
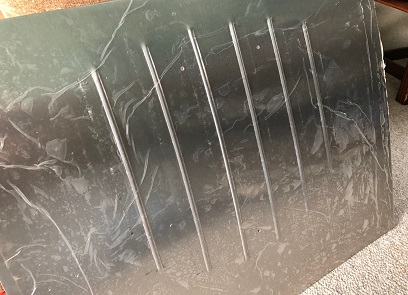
Finished up the test blank... as you can see in the photo below. A lot of learning on that piece! Still a little rough looking... but that's the beauty of it. It's HAND MADE.
Ordered up three pieces of 5052H32 .050 aluminum blanks, 24inch x 48inch, from Airparts (Aircraft Spruce didn't have the aluminum in flat sheets). Ordered a few clecos, aluminum cherry rivets and T-88 from ACS. A few days later I received the sheets and started working on it...
Drilled the alignment holes for the jig. Traced the shape of the end-cap (no reason to, but did anyways...). Aligned the pattern for marking the beads and marked the blank. Trimmed excess aluminum from the end of the blank. Ready for beading...
Made the jig to keep the blank straight while running it through the beader. Cut and glued up the idea I had. Tried it the next day... still needed wood on the lower part of the jig (aluminum wanted to slide under, not good). Made the modifications and glued it up.
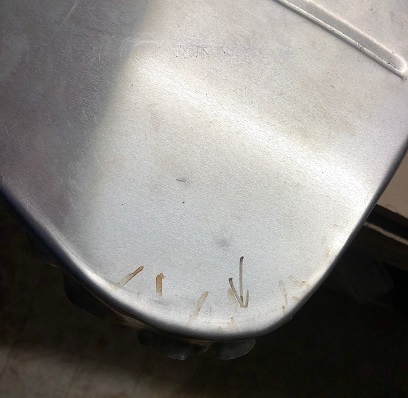
Came back later that day and started rolling the beads. Note: one side of the aluminum had a protective sheet of plastic - I used some of that carpet protector I've used in the past to protect the other side of the aluminum, that's why it looks so distorted in the photos.
The bead rolling jig did just as it was supposed to do... give me a good feel for how the blank was rolling through the beader. Keep the blank up against the board and I get a nice straight bead. If you had a helper you could have them "steer" the blank through the beader... I didn't have one.
My original design for the bead roller jig needed to be modified slightly. I needed more area for clamping (the original didn't allow me to raise the upper roller to slide the aluminum in and out of it because the clamp was in the way), and I needed additional wood below the original wood straight-edge. The aluminum wanted to slide under the edge.
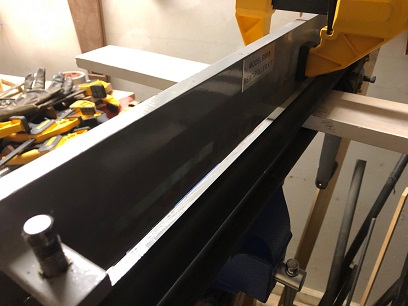
Bead roller jig
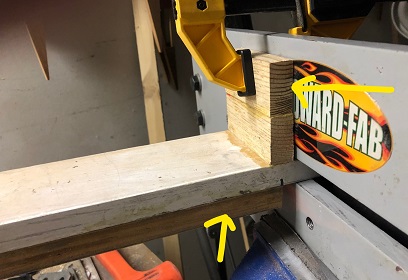
Modified jig. Arrows point to the additional wood needed.
March 31 - April 6, 2019 Working on the first.... last end-cap.
A little over 5 hours spent on the project this past week. Started tuck shrinking the final, first end-cap.
I'm now working the piece until the aluminum isn't moving easily... instead of trying to force it to move. This means a lot more annealing, but it's a lot easier to do and the hardened aluminum won't damage the form if I'm not smacking it with the forming block!
April 7 - 13, 2019 Finishing the first last end-cap.... and starting on the second, last end-cap.
AGAIN... A little over 5 hours spent on the project this past week. Finshed tuck shrinking the final, first end-cap.
All that I need to do now on the first end-cap is trim the edges to length. Thinking of 1/2inch instead of the original 3/4inch. We'll see...
Onto the second end-cap. Cut the sheet down to size and then positioned the form on the blank for drilling the three alignment pins. Set the form angled for the best use of material... not sure why because I'm only using it for the end-cap (habit I suppose?). Went to mark the blank for the beads I will be putting in it and the angle I have the end-cap on the blank is about 10 degrees off from being square with the edge of the aluminum blank. I'm using that edge to keep the beads going straight. DAMN! Shifted the form on the blank and drilled again... not looking pretty, and there are a lot of extra holes in the piece now. DISCARDed the blank... that's why you always buy an extra whatever... for times like these. Prepped the third blank for making of the second end-cap... it's ready to be rolled.
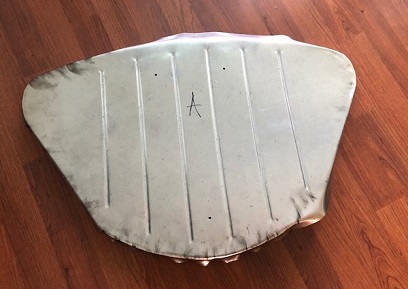
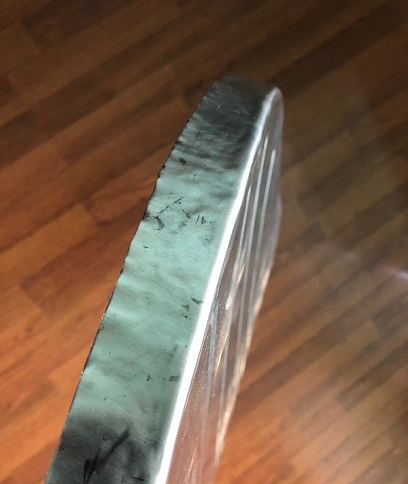
First end-cap ready to be trimmed.
Edge of first end-cap. Pretty hammer marks.
April 14 - 20, 2019 Work on the second end-cap.... almost there.
A repeat of the first one... but I did figure out something else, I think. Instead of just hammering away adjacent to the metal... start pushing it down with the wood block you are using. I think this is working better. Actually... I was kind of doing it all along, but when I really started working the "push" it seemed to be shrinking the metal better.
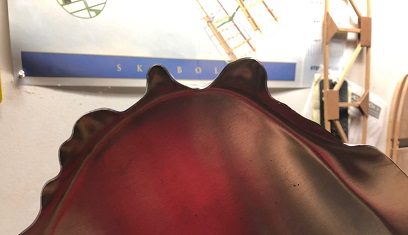
Below... a few pictures of the second end-cap in progress.
May 5, 2019 Almost finished.... so I can get started.
Finished tuck shrinking the second end-cap. Then... off to the Home Depot for 1/2inch of something. Wound up with 1/2inch mdf.
Routed the mdf to the shape of the end-caps to use it as a jig for timming the ends to 1/2inch. Rough-cut both end-caps to just over 1/2inch. Will now need to file down to 1/2inch depth. Looks like I have some additional annealing and tuck shrinking to do to get some small waves out of a few areas.
Getting closer to being able to start putting this tank together...