Mantua, New Jersey
Original Site:
September 2004
E-mail: usav8or@yahoo.com
more work on the...Radial Fuselage.
October 27 - November 2, 2019
Its looking more and more...
like a plane.
Feeling good.
Looking good.
Back to a semi-regular work schedule on the biplane. Still... it's hard with the 1 1/2hr drive from work. Get a run in. Grab some dinner. It's at least 8PM before I get to start on the biplane most nights. Ahhhhh... such is the life of a airplane builder, eh?
It was a week of fitting and tweaking. More work on the stringers... ya know, the pieces that give a shape to your biplane.
Continued work on riveting on the remaining anchor nut plates. Then on to fitting up of the already match-drilled stringers. Got to the belly stringers and for some odd reason, the front hole on the outer two stringers aren't lining up by a long shot. I'll need to re-do those outer two. Glad I purchased a few extra pieces of stringer material... it's not cheap ground shipping them, even just a few.
Stepping back from the project... and its looking great! Love what the stringers do to it.
November 4 - 8, 2019
working towards Excellence...
in life, and on the biplane.
Some things in life... ya just can't re-do. Or maybe even re-wind and start over.
When working toward excellence, you don't always achive it the first time even though you always put your best foot forward with good intentions.
My biplane project on the other hand... I can re-do as many times as I'd like to achive MY excellence. And looking at the amount of hours I have on this project so far (4740 hrs.), you can see I have done plenty of that. The belly stringers a case in point.
I'm not sure what happened but the forward attach points on all three belly stringers are falling short of their intended connections. Like WTH?!?!?! did they shrink? The center one of the three was close... so maybe keep? NOT!
I have the outer two completed; port and starboard. Now... the back connections on those two I've been pondering. The first ones I did I notched out for the stab wire attach strap. Looking at them now... I'm not liking it.
After going back and forth about whether I should cut them just short of the strap... or keep them extended the full length, I finally decided to keep them the full length and have them hit the bottom of the strap (they just didn't "look" right falling short of the strap). I'll place a piece of rubber between the strap and the stringers. I'm also thinking of putting brackets there to bolt them so the stringers don't move (not that they will with the fabric tightly streched over them.)
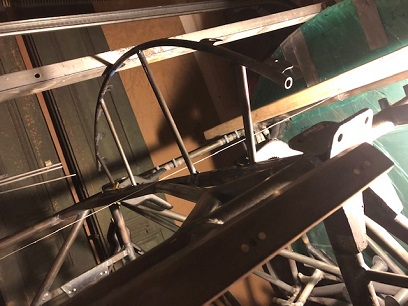
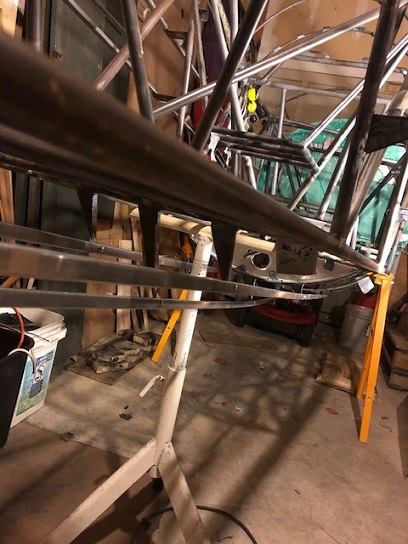
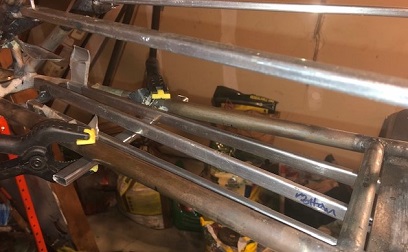
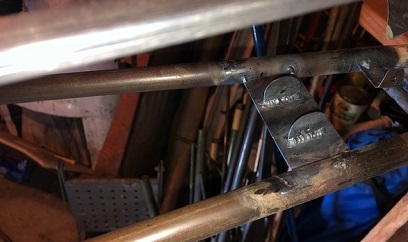
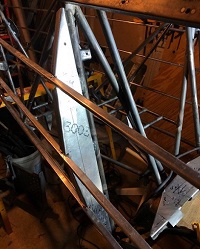
Belly stringers attached to stand-offs.
Figuring out where/how to connect the rear points of the outer belly stringers.
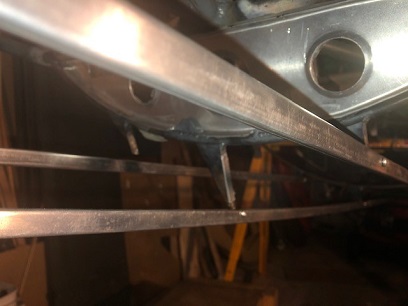
Point of contact; stringer and strap.
Rilke writes...
I want to unfold.
Let no place in me hold itself closed,
for where I am closed, I am false.
November 12 - 16, 2019
The challenge...
there's always a challenge.
Side bar:
I cleaned up my work space a few weeks back (using the word cleaned up loosely) and it's that much more enjoyable to work on the project. Easy to move around, or should I say easier to move around. Drop something... and I can pretty much find it right away.
Back when I was building a boat... in my teens, I read in a book that no matter what you do with the boat make it nice and clean looking. They were referencing the supports that they were putting in to hold the keel straight. Did it need to be nice looking? No. But it was going to be around for a while and making it presentable made working on the boat more enjoyable... I was assuming at the time. Makes sense to me now.
Anyways...
More work on the stringers. Moving right along.
The challenge, which I didn't originally think I had any of on this part of the build (not really... just sayin')... was the port and starboard belly stringers. I originally had them notched to fit under the stab wire attach strap. Happy at the time. Not happy with it now.
Going back and forth on whether to end it before the strap, or keep it as it is, or do something to keep it the length it is now but not notch them. Decided to keep them the same length... allow them to hit the bottom of the strap, and make new tabs to attach them to a little bit further back than they are now.
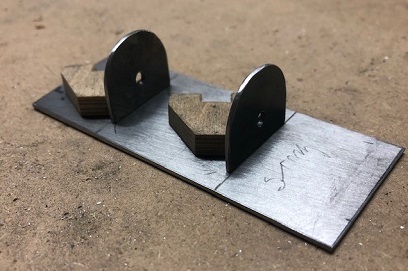
When I started playing around with the two belly stringers... figuring out the specifics of how I was going to do it, I saw that I should have some type of "plate" to support the ends of the stringers (there is a little bit of down pressure on the two because of them hitting the bottom of the strap. Took rough measurements for the plate that would support the stringers (I'll have it at an agle to match the angle of the stringers instead of them hitting just the front edge of the plate.
Marked a piece of .050 4130 for the job. Cut, filed, and sanded to size. Needed to cut off the existing two tabs, then file down the weld left from the tabs before sizing up the new piece. Done, and done!
It's all a part A connected to part B connected to part C connected to... Logical progression will allow all the parts to fit together perfectly.
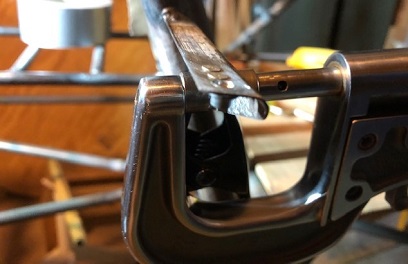
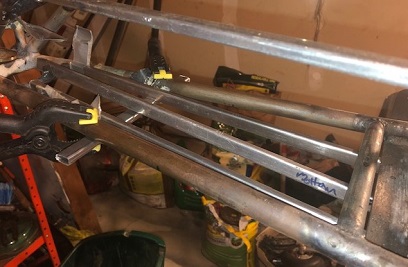
Notched stringers. Decided not to notch now.
Stringer hitting strap.
Kind of where I want to go with it.
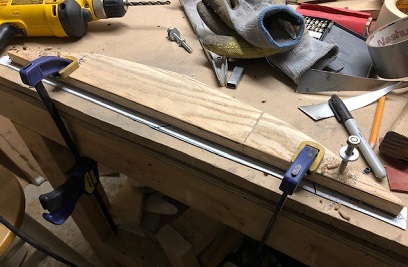
Rough cut with marks for stringer support plate.
Need to cut down these tabs.
Almost there.
November 17 - 22, 2019
Tony Bingelis...
would have been disappointed in me.
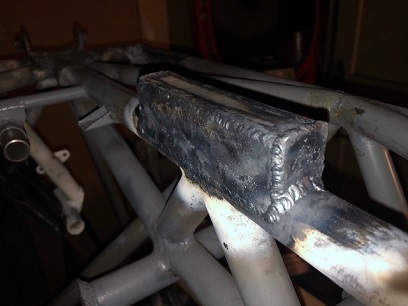
It's actually smaller than it looks. And it ain't that heavy!
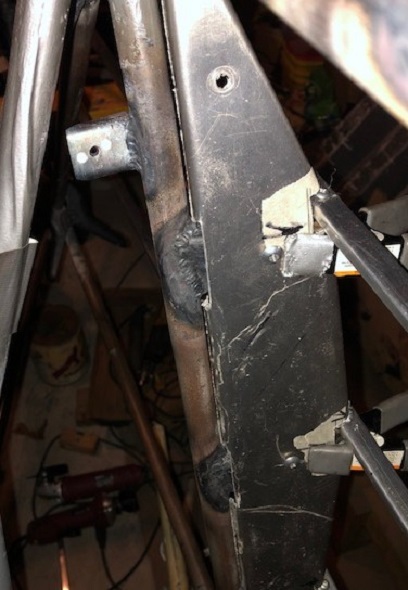
The week was spent working out the details and crafting the back mounting bracket for the port and starboard belly stringers. Man... did I ever spend some time on this. That's my M. O., though.
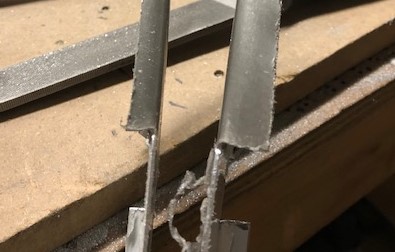
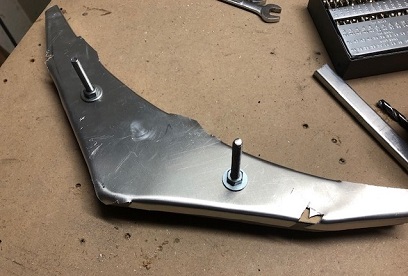
Decided to mount just two vertical tabs on the base plate instead of cutting down the two tabs I previously made. The base plate it supporting the weight of the down-force (from it bending around the stab attach). Crafted the two tabs out of the same .050 material I made the base plate out of.
My brain must not have been in an "airplane" making mode when I first made the tabs. I made them square. No need for that... later I thought, er, realized. Tony B would have been disappointed if I had kept them square.
The next day I made amends for my grevious mistake. Taking about an hour (yeah, and hour... drew up on CAD, printed pattern that I then traced onto the existing tabs, ground down close to lines, file, sand)... I curved the upper portion of the tabs. One was a little off... and I started to pack up things thinking I'd just get to it tomorrow. Then my mindfulness kicked in and said... why wait until tomorrow when you can do it now. Stopped in mid-step and corrected the slight imperfection.
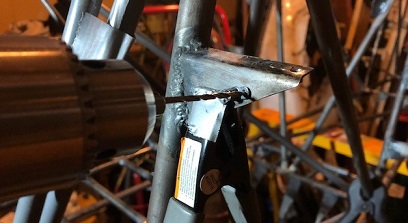
The stringers will be coming up at an angle so I needed to figure out that angle. Got out my level and saw that the lower longerons were at 7 degrees. Placed the level on the stringers in the postion I wanted and saw that they were at 12.5 degrees. Made a few marks and was finished for the night.
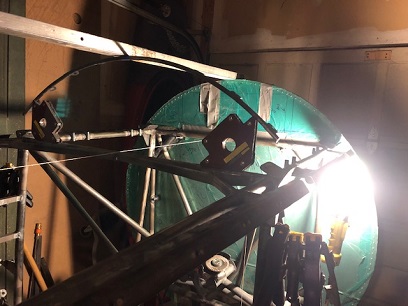
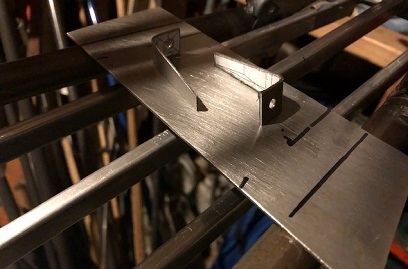
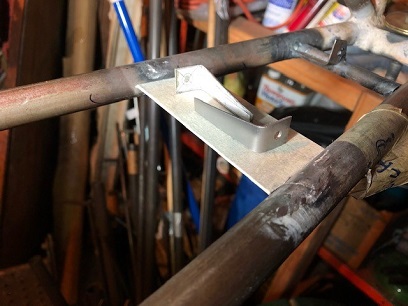
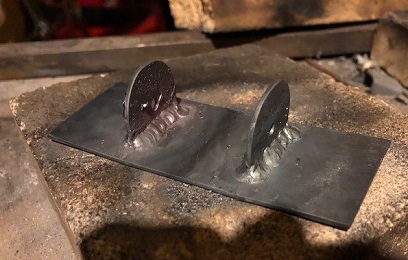
Next day welded the tabs onto the bases plate. The following day I fussed and messed around with getting the actual mounting bracket in the correct place and at the right angle. Tacked the front of the base plate in place then tweaked the angle of it... tacked the back, tested one of the belly stringers to make sure things were good, then welded the lines port and starboard on the top of the mounting plate. I'll need to turn the fuselage on its back to welded the bottom lines on it.
Looking at it now I might have made the width of the mounting plate the same width as the tabs. It actually looks a lot larger in the photo then it is. My thought, up front, was to have a decent amount of area that the stringer would hit to relieve whatever load was being placed onto it.
Update: December 14, 2019: Welded the underside of the mounting plate for the rear stringer attachment... for the belly stringers.
February 15 - 21, 2020
The Joy of....
making things over again, and over again.
and the real kicker... over again?
Belly enclosure time! Tweaking the fit on the existing one and I end up making two additional enclosure pieces that fit up against the belly's stringers and fabric covering. I ONLY NEED ONE!
I was notching away... and got to the point of not liking the look of it. Made a replacement and then saw where I would improve upon it slightly... so I made a third. All that, and the notch tweaking of the third took three entire days.
Do I like making things over... HELL YEAH! It's that "working towards excellence." And the real kicker... I might to make a 4th! Yeah... tell me about it. I see where I can make this just a little bit better. (it's an enclosure, Jerry... nobody is going to see it!)
February 22, 2020
Be DAMNED! with perfection....
you'll never do it in this life.
Give me Excellence... any day.
Yeah! call me crazy! I made a fourth! If you looked at it you wouldn't see one damn thing different between the two... but oh... you would be oh so wrong. The shape of it is slightly different; the bottom angles are about an 1/8inch in, the notches are slightly different than the first second and third. I look at it and I almost cry.
Would the first second and third iteration have worked... I'd say the second and third. But my biplane is a reflection of me. I'm far from perfect, but I'm always striving toward my excellence.
February 23 - March 6, 2020
The beauty....
of every moment.
Not to get religious... the build, for me, is a spiritual experience. I've grown ever so mindful... experiencing each moment. I've grown into that "Zen" tagline that I first put on my site... not knowing at the time why I placed it there. or, Maybe I did?
Reading "The Book of Awakening" this morning... a random page that I open to. (A Zen approach to it.) It happened to open on the "Forward" and I'm thinking... that's not a page to be reading for my dose of inspiration... but thinking about it, I decided to read it with the same approach as I did all the other pages on all the other days... since 2011.
Towards the end of that "entry" I read these words, and I quote... "Most sacraments are acts of breathtaking simplicity: a simple prayer, a sip of wine and a piece of bread, a single breath in meditation, a sprinkling of water on the forehead, an exchange of rings, a kind word, a blessing..." the miracles of every day.
I consider myself lucky to be able to work on my project. These moments are sacred. My experience from the build, and flying... I live a more mindful life. I take in each moment that I can, not allowing my thoughts to steal the "now" that I am experiencing.
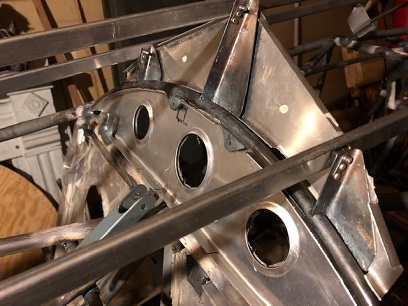
The past two weeks have been all about getting the encolsure panels mounted to the fuselage. A lot of effort has been put into doing this. A lot of benign tasks... that needed to be done: match-drilling the machine screw holes in the enclosures to the holes in the mounting tabs/brackets, match-drilling the holes for the anchor nut plates into the mounting tabs/brackets, riveting on the anchor nut plates. Repeat. Repeat. Repeat...
There's satisfaction in performing every task on the build... and right now (Friday 3/6) I'm squeezing rivets and enjoying it. There's that little puff of something that comes off the rivets when you first apply the pressure. That little guy is putting effort into taking on a new shape.
Don't allow the "monotony" of a task take away the beauty of it.
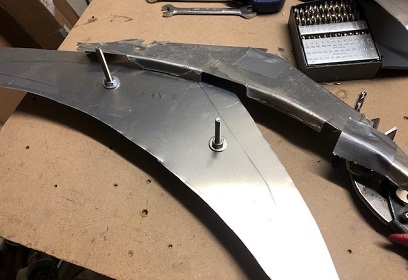
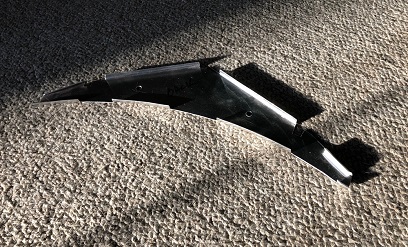
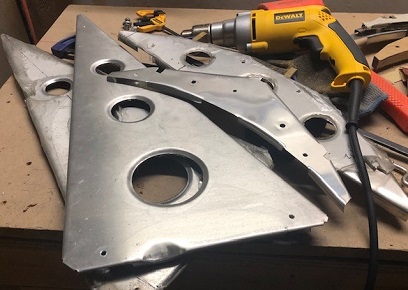
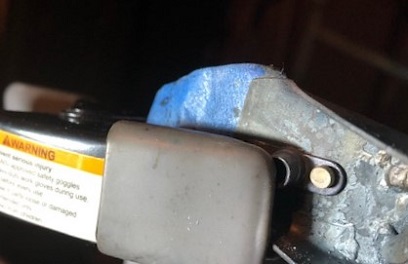
Four enclosures ready to be attached. Note: dent in the two larger pieces are on purpose. This allows the tube to nest
inside of the enclosure.
The squeeze.
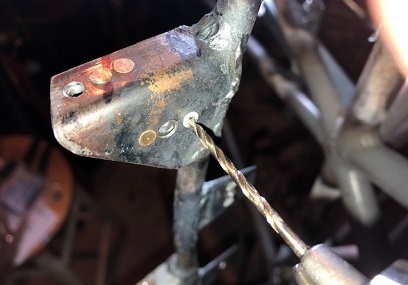
Drilling out a "bad bad" rivet.
March 9 - 13, 2020
Enjoying the build....
every moment.
Got to thinking about last week's post... Don't allow the "monotony" of a task take away the beauty of it.
I enjoy the hell out of this build. LOVE every moment of it... the initial learning of doing something new, the beauty of creating something to the best of my ability, learning from a mistake and re-making it one two maybe three or four times.
There's a mindfulness about the entire process... at least for me. I'm out there, and I'm THERE. Just like when I fly. Nothing else occupies my mind except the present moment. Focused on the task at hand.
More of the fun stuff...
Working on the attaching the enclosures. You'd think it'd just be a matter of screwing them on, eh? But not with a scratch-built biplane. More drilling of holes in the brackets and stand-offs to accept the anchor nut plates. Anchor nut plates that need to be riveted on after they've been matched-drilled for the rivets.
And more of the reminding myself to not get ahead of the build... The side enclosures were made at the same time as the other enclosures. And we saw what happened with the belly enclosure once I had the stringers in place. It needed to be modified. And such is the case for the side enclosures.
I took the time to attach the side stringers on both the starboard and port sides. Re-fitted and re-notched the starboard side enclosure. Fits fine... it just looks a little disheveled; bang marks on it where you shouldn't see bang marks, etc. You ain't gonna see it, but I'll know what it looks like underneath of that fabric that I'll be glueing to its surface. Spent a little over two hours making a new one from the adjustments I made to the first one. I also hammered the new one out of ..050 aluminum instead of the original ..032 aluminum. It needed to be a little stiffer than it was (in my opinion.) The new one is ready to be test-fitted.
Match-drilling anchor nut plates.
Pretty obvious I'm squeezing a rivet.
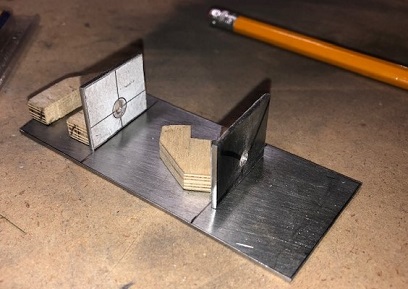
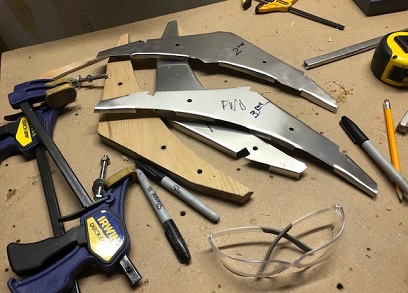
Match-drilling the form to the blank.
The blank.
Left to right... form, new enclosure, old enclosure.
March 14 - 16, 2020
Pretty straight forward....
'cause I've been here before.
I've got this... I've got it...
2nd side enclosure re-made. This one for the port side. I'm a machine I'm telling you... A MACHINE! The firt re-make of the starboard enclosure is near perfect. It's plenty stiff enough now. The original ones were pretty flimsy. They would have looked okay, but I was afraid of them twisting out of shape, or rather, not holding their shape because of where they were going.
The second side enclosure just a mirror of the starboard side enclosure. Made it easy. NOW I need to test it out on the fuselage.
March 17 - 25, 2020
A multitude of smaller builds....
before completing THE build.
A little bit more work on the side enclosures before they're finished.
Filed down the sides of the enclosures to a reasonable height. Tested them on the fuselage. They fit, and I match-drilled them in position. Spent about an hour filing off the slag I created when filing down the sides. Finished! and ready for the fabric.
Filing down the sides...
Port side enclosure.
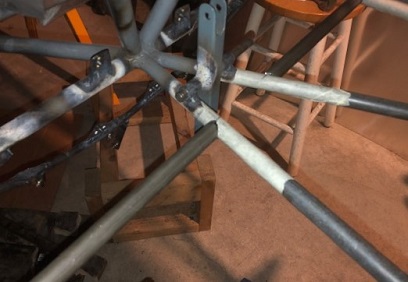
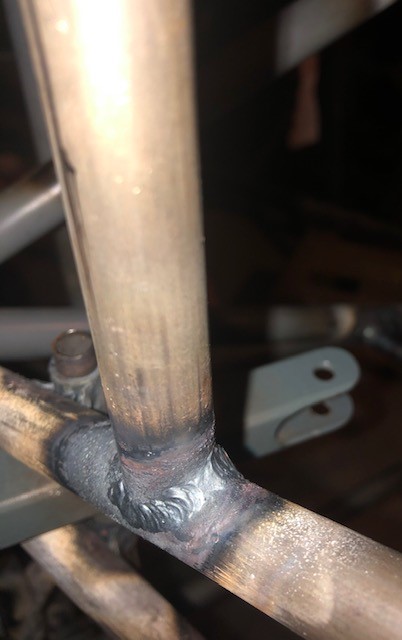
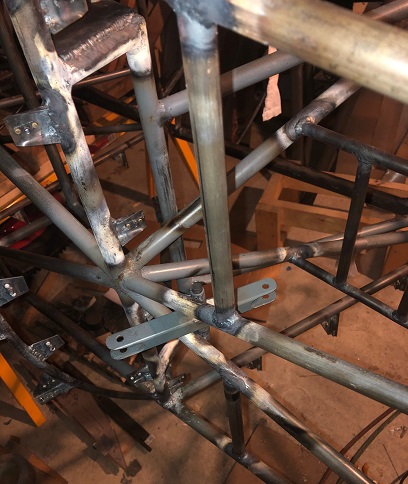
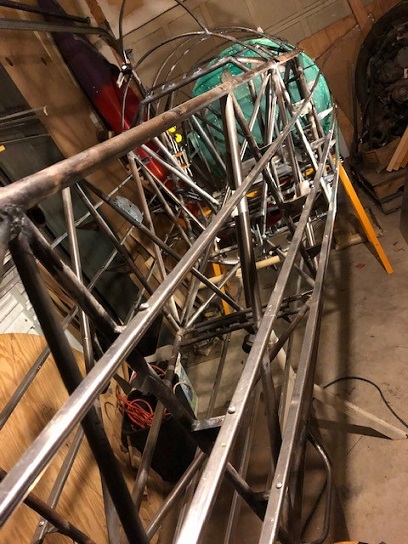
next... I placed the turtledeck back in position on the fuselage so that I could eye-up the shoulder harness routing. What I had isn't working so I planned a new stratgy... Instead of the anchor points far back in the fuselage (routing the harnesses under the turtledeck) I decided to weld a few tubes about 6inches back from the pilot's chair back. These are welded into the bottom of the fuselage. Spent a few days cutting, notching and welding them into position. Still need to flip the fuselage to get at the other half of the tubes for welding.
ha! Worked on the biplane again before uploading this post. Welded the other half of all four tubes. They're ready for action!
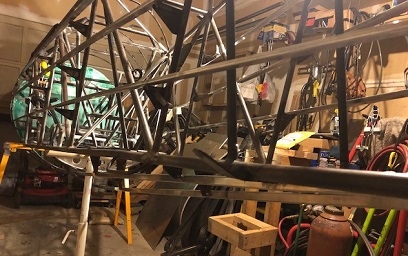
Looking at the fuselage and it looks like most of the "big" stuff has been completed on it. Now a multitude of the little stuff... routing and connection of throttle, brake lines and brakes, running mixture and carb heat, securing the battery and its wiring, fuel lines and entire system of tank/header tank, cushions for seats, material on enclosures, ... yeah THAT 90 percent done and 90 percent to go...
Notched and fitted.
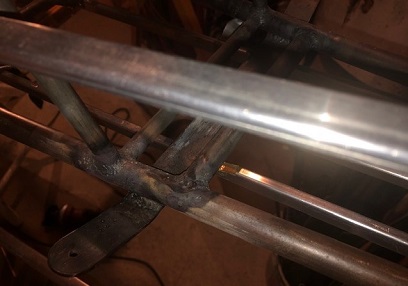
Welded on...
COVID-19 :: Needs mentioning. There... I mentioned it.
No, really. A lot is being said about the virus... some "the end of the world" thinking... others "we've got a long row to hoe" thinking... and still others "we'll get through this by sticking together and fighting our way through to the other side" thinking. Me... I'm with the last group of thinkers. We're a tough species to knock down. We'll come out of this... the world will come out of this, better from it.
See you on the other side.
January 10 - 15, 2022
Thought bubbles....
and the truths they speak.
With the engine mount completed, it's time to move onto making of the cowling for that beast of an engine, the 300hp Jake! (and to be up front about it... I'm waiting on one piece of square tubing for a re-do of the landing gear rubber pad mount. Wasn't happy with the way I welded that on either)
I did the first round of patterns for the skins a while back. Started putting them on and found that the top skins weren't that "straight" line that I thought they were. I could have sworn they were...
I sat back and started doing the thousand mile stare just thinking of the work that laid ahead of me to re-do the one former that was too low. I had to snap myself out of it! If I sat and stared long enough I'd convince myself to either move on to another project leaving this to be done some other day, or I'd spend a few hours just pondering something that didn't need pondering.
So... off it came. (That was easy: said in a thought bubble) I spent the next three hours filing off excess weld slag from the fuselage. And spent an additional 3.nine hours getting the existing former aligned, straight, and tacked in place. (That wasn't easy: said in a thought bubble) I'm THERE now with this re-do. I wasn't finding the answer to holding the former at the right height and in place until I remembered two "arrow" magnets I had. BaBAM! Perfect solution to my question. The first time I tacked them into place they were low again??? Weird! Second time a charm.
[side bar] All this talk about thought bubbles was brought about by me currently reading, for the second time, Michael A. Singer's book "The untethered soul." It makes you aware of that "person" inside of your head and their insistent chatter. by the way... A great read!
With the GREAT success and happiness of completing the engine mount on New Year's day, I've had a few small set-backs to keep me focused on the build, and not celebrating yet.
Fun with magnets!
The two center tubes are temporary.
January 16 - 22, 2022
Re-do's....
on the "To Do"...
And, one lonely bolt.
Forward movement with the re-do of the forward-bottom belly former. Aligned and tacked. Cut off! Aligned and tacked again! The first time I aligned and tacked (spending a considerable amount of time doing it...) it fell short AGAIN. Thus the re-do of the re-do. Now it's DONE.
With the former in the right location I welded it on and checked off that re-do from my to-do list.
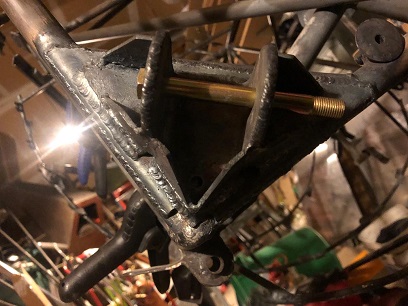
The second re-do to do is the landing gear pad tube. Received that tube in the UPS delivery the other day... Cut it to length, welded on the end-caps, then did my own thing of welding on .o40 4130 sides to the piece. Instead of welding the 1inch square tube to the 1inch round tube like I did the first time, I welded sides onto the length of the land gear pad tube then welded that into place. A lot better weld "connection" I would think. Although, when cutting off the 1" square tube from the fuselage... all the welds were solid. The way I did it... my peace of mind.
Okay... with that re-do off the to do, I was ready to stop re-doing and get doing.
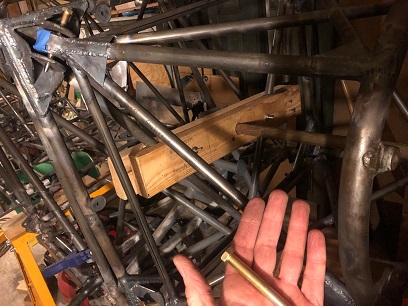
I'm still waiting on the wheels and brakes from MATCO (can't wait for them to arrive!)... and I need them before I can hang the engine. But... I thought I would attached the engine mount back onto the fuselage before continuing on with the fitting up of the skins. I had a feeling it would be a little difficult to get all four bolts in, and I was right. After an hour of working on it... I'm left with one shiny bolt in my hand. You GOT IT! The fourth and final bolt.
Revised landing gear pad tube.
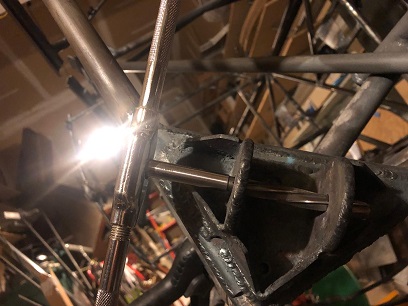
Reaming mounting brackets for engine mount.
Yep... it fits!
I just had a thought... I need to attach the firewall to fit up the skins, so I better do that before I get this last bolt in the engine mount (which means taking out the three and starting all over again).


 And more of the reminding myself to not get ahead of the build... The side enclosures were made at the same time as the other enclosures. And we saw what happened with the belly enclosure once I had the stringers in place. It needed to be modified. And such is the case for the side enclosures.