Mantua, New Jersey
Original Site:
September 2004
E-mail: usav8or@yahoo.com
more work on the...Radial Fuselage.
October 4 and 6, 2017
Rymes and reasons...
or lack thereof.
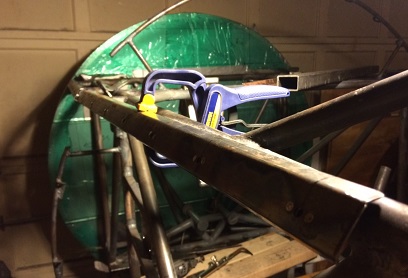
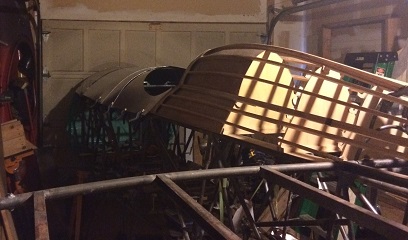
Working through the port side-rails; trimming them down and welding them on.
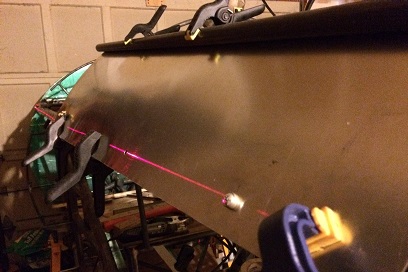
Work on the second one... after measuring, fitting and trimming to size... I lined it up with the laser line using the sheet of aluminum (the pseudo skin). Looks good. Tacked both ends. Looks good. Clamped on the ol' straight piece of tubing. Looks good. Tacked it every 2inches and un-clamp the tube. Not so good.
DAMN ! What the... ???
There is no ryme or reason with this... I'm going to need to cut the tacks and do something to push the side-rail out straight.
The project progresses as usual... (as of late)
Before tacking in place.
October 8, 2017
The second third times...
a charm.
Working on the port side still...
Needed to un-tack, re-align, check... un-tack the re-align again before getting out most of the bow in it. It being... the second port side-rail.
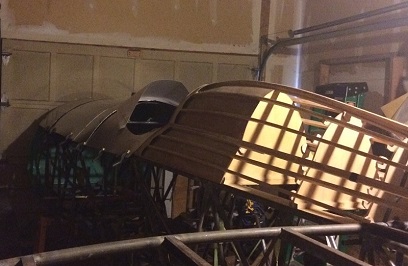
Started aligning and notching the third port side-rail. Looking good... it's up on the fuselage, locked in position and marked... ready for trimming down.
October 14, 2017
A chance...
to work on something new.
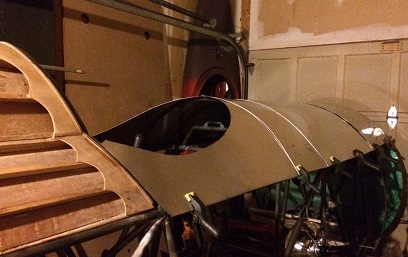
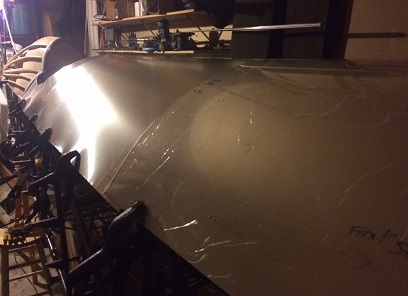
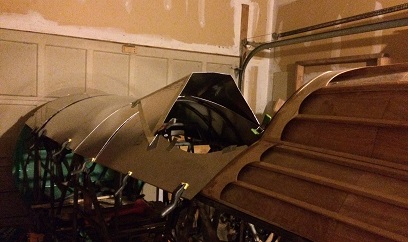
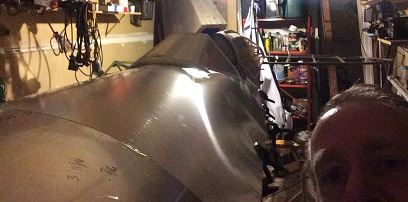
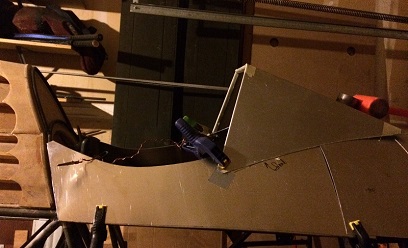
Started working on the sheet metal skin.
All four forward pieces have been roughly fitted up. I tried making the rear pit skin fit up over the shell over the instrument panel but didn't really work? Cut it down and did in two pieces. Maybe if I lay the actual aluminum over in that place and cut it based on that instead of a display board (thicker paper) pattern it may work ? I'll try on my next go-round.
Basically wanted to fit the pieces to get a see how the upper section looked and to start figuring out the rear windshield.
The windshield I had created isn't working as well as it originally did when I did the mock-up in paper. Starting to refine it now...
The nose on this thing is loooooong. You need to add an additional 44inches to what you see. I'm only covering up to the firewall right now.
October 16 - 20, 2017
Designing the windshield...
a milestone for me.
WOW ! Wow...
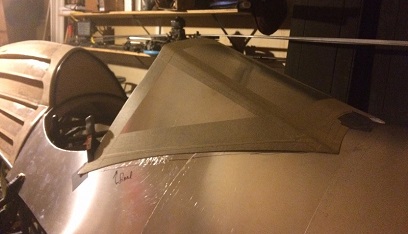
I've actually started making the windshield for the biplane. Wow... For some reason this was a milestone project.
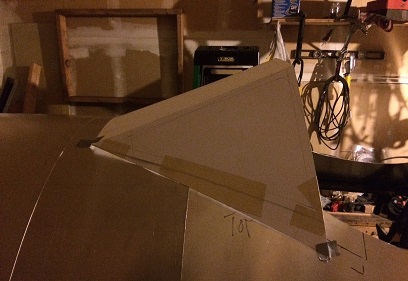
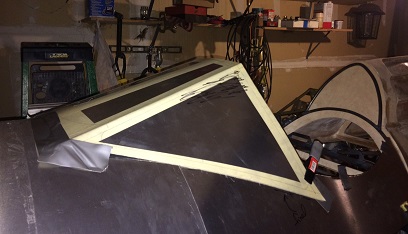
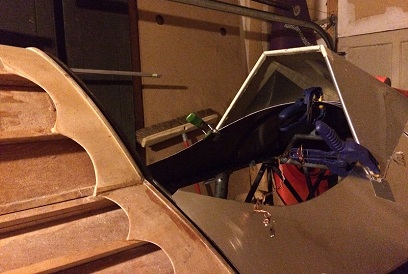
With the sheet metal skin roughly in place I have started fitting up the pattern for the back windshield. The inital pattern I had didn't quite work for me. Made a modification to that and it looked pretty good until I compared it to a few others out there. It looked a little too short and too stubby.
Modified the pattern and made it two inches longer and the side panels a bit wider. Also made the front top more narrow than the bottom. The pattern is ready to be transferred to a piece of the sheet metal I have for a real test... also will allow me to figure out how I want to attach the plexi to the piece and how I'll be attaching the windshield to the sheet metal skin.
First pattern...
New pattern... final look.
October 27, 2017
Making it...
hard ?
WOW ! Wow...
The amount of time I'm spending crawling along with the windshield. DAMN ! (just get on with it...)
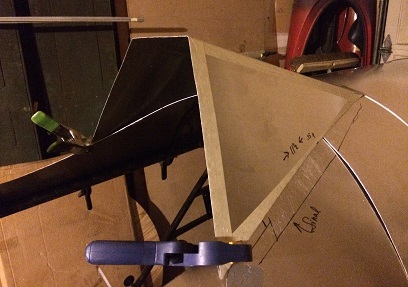
I'm not sure if I'm making it hard on myself; the front panel of the windshield is 7inches and the bottom is 11inches. Right? Wrong? Not sure how it can be wrong... maybe more difficult to work with. Anyways... Paper pattern looked good. Transfered to aluminum sheet metal pattern... looks good but needs adjusting. But what type of adjusting?
Looked at a few of the pieces that some of the guys on the biplane form did and kind of got an idea. But... I'll modify them slightly.
It looks like I need to cut some curves in the design to match the curves of the fuselage; both the front and the sides. Also need to make the bottom edge of all three sides more meaty (I'll keep the same size and just make the frame on the bottom 1inch instead of 1/2inch). The design I came up with, still to be tested, has the curve on the front, partial curve starting half-way back and moving forward (with the back part remaining straight).
In theory, this design will still force me to put a bend in the sides to make a better fit, but giving me the "look" that I'd like to have?
October 30 - November 3, 2017
Making it...
just trying to make it...
WOW ! Wow...
Repeart...The amount of time I'm spending crawling along with the windshield. DAMN ! (just get on with it...)
Actually, I'm not sure why I'm even writing the above. It's been the same throughout the entire process. Make a test pattern... maybe another... heck, maybe one more, or a few more. I'm just trying to make my vision. And if my vision takes a few iterations before I'm happy with it... I'm fine with that.
And so it is with the rear windshield. I've like the shape of it for the past few iterations but not happy with the fit. Even though I'm thinking I will need to put a curve to the front and ths sides of it to get a real close fit... there still wasn't enough metal to get a close fit without forcing it to be close (understandie?)
More playing with the last iteration to see how the next iteration would need to be modified for a better fit.
I think that this one is it.
After writing this I thought about my reference... "just trying to make my vision". Vision/windshield... get it?
November 6 - 10, 2017
Drawing it...
again and again.
Slow progress on the back windshield.
I'd like to CAD this all out so that everything would be perfect... but there isn't a place around here that prints out DWG's or any other CAD related files. And... my printer only prints on standard paper. It's great for the little parts but not something that is 33inches wide x 19inches high.
Okay... I thought. I'll work out the curves and print them out in pieces and glue them in place for "perfect", identical curves. That wasn't working either.
Anyways... this was all after finding the piece of .040 3003-14H. From one of the members on the biplane forum, I found out that that is the material (although they use .050 material) for the windshield on a few Stearmans they've restored. If I had to buy a piece I'd buy the .050. But I didn't, so I used the .040. It's stout enough for my instrument panels... and it looks like it'll be stout enough for the windshield.
Transferred what I had from my last sheet metal windshield iteration... took about 1 and 1/2hours to draw it up on the .040 aluminum blank I had. Looked at it the next day and realized what they were saying about the "90degree folds on the back of the pattern for the rear capture of glass". It wasn't to hold it in position... it was to finish off the back.
With this epiphany... I drew it all over again. Kept the one on the one side to take measurements from...added the additional 1 1/4inches to the back edge... and NOW I think I'm ready for cutting it out.
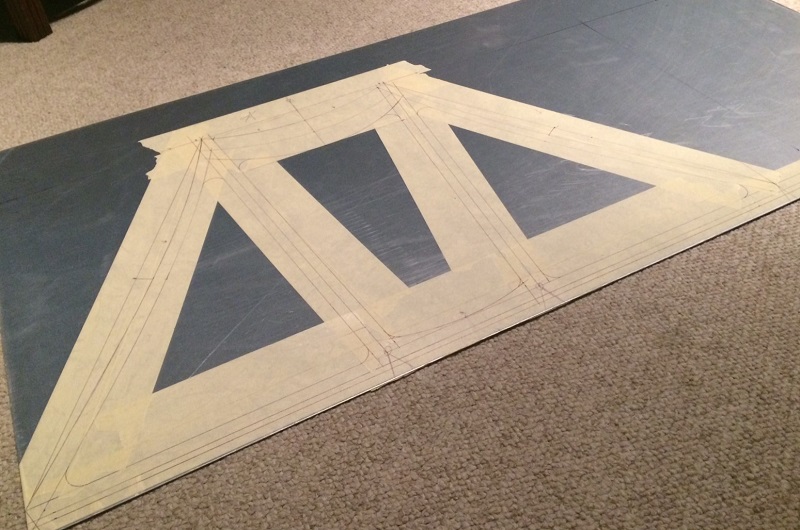
Final pattern.
(Click on for larger image.)
December 24, 2017
Wow !
WOW again... as in DAMN, it's been a while.
Still...
more, slow progress on the back windshield.
I've worked on it a few days... from my last post to this post. Not many, grant it... but it wasn't a complete stoppage of work.
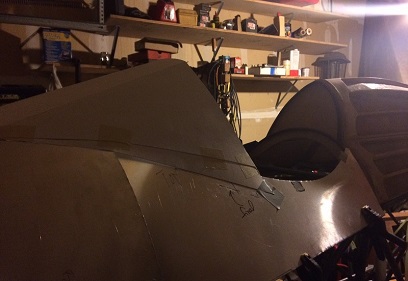
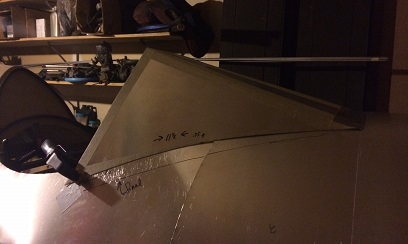
Made a few more test patterns... and then one final one I was about ready to cut and bend. Found out I drew it up wrong and had already started to cut... before that discovery. But, kinda, sorta in the back of my mind I'm thinking "Is this symetrical?" That's it... just a thought kinda, sorta in the back of my mind. You would think I would act on this. Maybe I did in thinking that taking my time drawing this thing out each time I was getting as close to symetrical as I could. But I can do better...
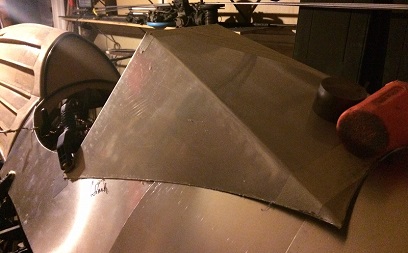
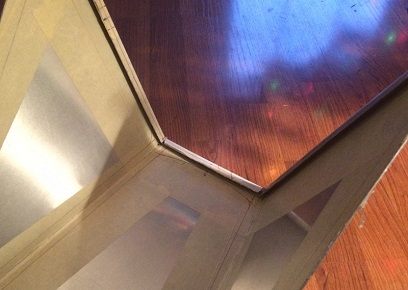
A few shots of the final test piece before the story below. All the hammering and bending was done by hand/hammer.
With a little bending, she'll work out fine.
Inside shot showing lip to hide edge of Plexi.
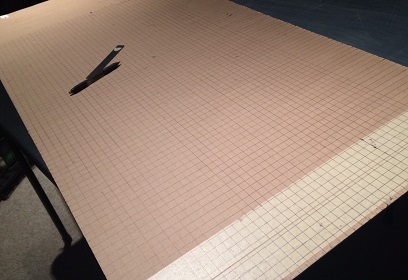
Today, Christmas Eve day, I decided that I would take the time to measure and strike the lines to make grid on the piece of aluminum that is to be the back windshield. Took a lot more time than I would have like... but no more time that I thought it would. The time I'm spending on this will help to kick that "kinda, sorta in the back of my mind" thinking. At least I hope it will.
Tomorrow morning, or tomorrow night, or if I'm not feeling like it... the day after Christmas, I'll draw up the back windshield and start moving forward on the biplane again.
Merry Christmas... and ThankYouVeryMuch.
December 28, 2017
The never-ending...
WOW's
more...
Still... more, slow progress on the back windshield.
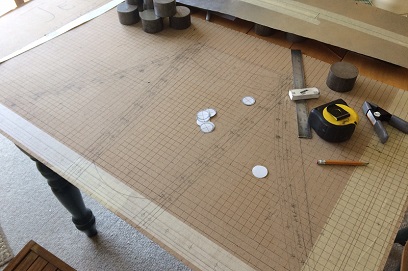
What the heck. I know where I want to be with this and it's just taking forever to get there. Taped off the grid so I wouldn't be drawing on it (thank God for that). Spent all day on Wednesday fighting my way through drawing up the windshield, again. All day, mind you... the sun had set awhile ago and I was glueing on the spacing for drilling the holes when I discovered that I drew the one back-edge 1inch shorter than the other. There were so many lines on it by that point and said f-it and stripped all the tape (with markings) off the gridded alumium.
Fast forward to today. Decided not to put the masking tape on it 'cause I knew what lines needed to be drawn and the measurements they needed to be. I believe it was the third mark I put on the board... and it was in the wrong place. I discovered it right away, but still... get where I'm going with this. No... I didn't f this one up. I just took my time with it.
Three and a half hours later and it's ready for drilling and cutting out...
January 1, 2018
Getting there...
and getting wacked !
Work completed on the project - December 31st, but I'm writing this New Years day.
Looking back I kept a pretty good head of steam going up until about the last month of the year. Kind of stalled out there... things going on, the typical "life getting in the way" things.
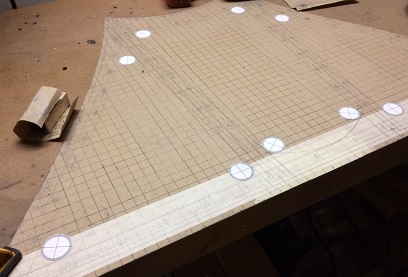
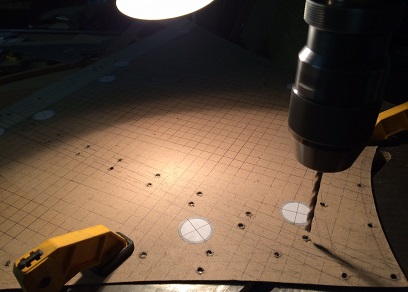
Finished off the year by cutting, filing and sanding the overall blank for the rear windshield then drilling ALL those holes in it; 96 of them to be exact. Each one of them; centering bit, change out to a #9 drill bit, then deburr. Times that times 96. Spent 3 point 5 hours on it. Still need to drill the 1 and 1/8inch holes for the corners of the window openings then connect the dots by cutting out the windows.
Looking forward to getting to the wings and other things this year?
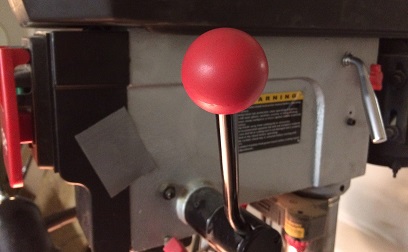
oh... and by the way, always wear those safety goggles. Today I almost "lost" my eye... While drilling the holes in the aluminum sheet, I was up close looking at where I was placing the centering bit the one time and I let the feed lever slip out of my hand. The ball on the lever whipped around and smacked dead center on the left lens of my safety goggles. Not sure what would have happened to my left eye but it wouldn't have been pretty.