Mantua, New Jersey
Original Site:
September 2004
E-mail: usav8or@yahoo.com
No work has been completed on the upper wings. It may not
be until the fall/winter of '07 before I get around to starting
them. Yeah right... it's now February of 2015 and I'm just working on it again ?
September 24, 2014
Putting it all together.
Or, at least trying to...
Spent a good part of tonight looking at how to put together, and what rivets to use... to make this fuel tank.
Back when I first started thinking about making this tank I researched it and saw what Ward did and posted on the Biplane Forum... was real nice. Just sent him an email asking about what rivets he used.
I've got all the pieces, just a matter of putting it together.
Update: February 16, 2015
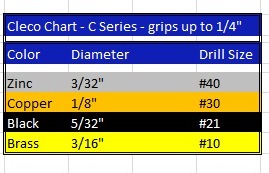
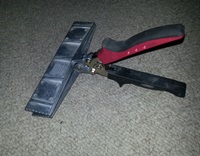
This cleco chart will come in handy:
February 10, 2015
Hesitation...
It's just a passing thought.
There's no hesitation (almost) anymore. It's more of just a thought and then I move forward with whatever task would have normally had me stop dead in my tracks...
So with no more than a passing thought I started back working on the upper wing fuel tank. Had an idea of how I was going to align and clamp the baffles for match drilling and clecoing... threw it out to the forum guys and got an answer back from Knight Twister. Said he's done it like that in the past. He didn't use rivets he rosette welded spots along the baffles and ribs while holding it all together with cleco. He then welded over the celco holes.
Still up in the air about riveting or just plain welding it together, but I did get a pretty good start on getting the top/front clecoed to the baffles. Had to be pretty creative with some of the clamping but you'll figure it out. For the center two baffles I needed to use one of my pipe clamps (one of those big ass long clamps) to keep them in position.
As of today I've left my options open for riveting or welding. I've left some of the pre-drilled holes on the upper wrap alone; aka I didn't match drill them. I left them for a future decision... whether to match drill and rivet or left for a rosette weld.
Three hours worth of work:
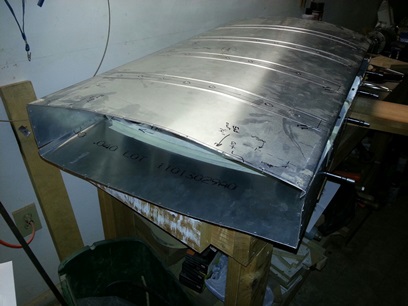
All the parts for the upper wing fuel tank.
First cleco set...
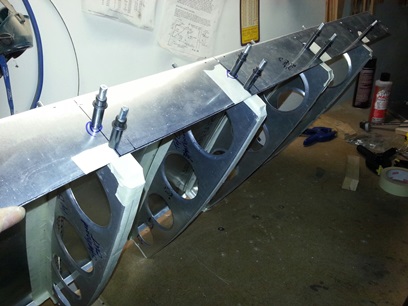
First two baffles clecoed.
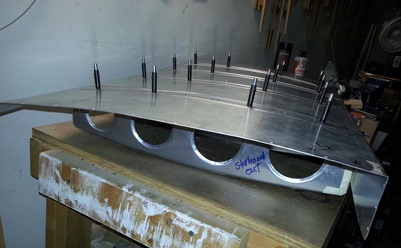
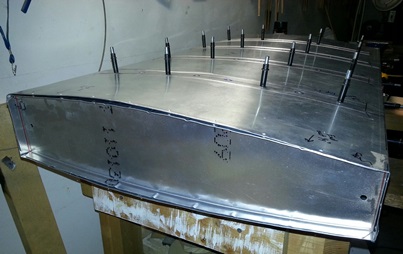
All four baffles clecoed to top skin.
A shot from the top.
February 12, 2015
I should have hesitated...
just a little bit longer.
More work on the upper wing fuel tank. First thing of the day was to buy some stuff for that Valentine Day's dinner I'm going to cook up for Andrea. Shopping pushed back getting started on the project by about one hour. Got my start at 7:15PM. I know... 'cause I always write it down.
My headline above... it's not that I should have hesitated a little bit longer, I should have wrapped my head around which way was up and which way was forward. I inadvertantly clecoed the baffles on backwards. Front is back and back is front. Not a problem, just a matter of flipping them, drilling and snapping the clecos in place. It just placed an additional 1.6hours on the build... that's all. Yeah... that's all (said sarcastically).
The good thing. I took half the time of doing it 'cause I've been down that road before.
With the baffles in place, AND facing the right way, I fit the bottom in place for a look-see. And the look-see looked pretty good. Just a little tweaking of the bend on the one vertical (maybe both verticals, but one I am sure of). I'll need to pick up one of those hand seamer to form the bend in the aluminum. Lowes or the Home Depot should be able to take care of that problem.
Bottom skin in place.
February 16, 2015
Didn't want to hesitate...
so I bought me a new tool !
Wind and a few snow squaws kept me away from the project this past weekend. oh yeah... Valentine's Day did too.
Another "blizzard" is suppose to hit us Monday night into Tuesday afternoon. Changed "work on the biplane night" from Tuesday to Monday. (yes).
Had that "issue" with un-bending part of the smaller returns and straightening them up. Asked Andrea if the one at their place was borrowable (wurd?). She asked and it was broken. so... Stopped by the Home Depot to see if they had a hand seamer. Walded into the "tool corral" to take a looksee but knew this wasn't the place to find it. Saw one of the guys that worked there, an older gentleman, and asked him if he knew where the hand seamers were. Surprise surprise... he knew what I was talking about and knew where they were. First one he showed me was only about 3inches wide. Asked if there were any larger ones... walked down the aisle, turn the corner and walked to the aisle where they have all the aluminum for gutters and there on the shelf were a few beautiful hand seamers with 6inch wide clamp. (just what the doctor had ordered). Scanned it to check the price ($54.95). It is what it is... the sole purpose of buying the hand seamer is to help me with bending a few flanges. BUT... I'm just beginning the sheet metal work and all the interior stuff s so who knows how much I'll be using it. Anyways..
I had enough "Home Depot" gift cards and anassortment of other half-used gift cards to bring the price down to a palatable 6 dollars.
Moving right along with the upper wing tank. Tonight... cleco the bottom side to the baffles. Most of the holes from the other side actually matched up to the bottom skin. Having done this twice before it was a non-event. Still had time left to burn so I decided to see how the side ribs looked in place.
Image of the inside of the tank.
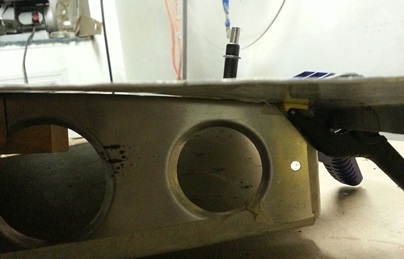
Test fit of end rib.
Moved to the smaller clecos (3/32) for securing the end ribs. Drill... cleco... drill... cleco... drill... cleco... You get the picture; same as what I've been doing for the past few days.
Click on image for larger photo.
I look at these photos, and the actual pieces as I build them, and I amaze myself all the time.
February 19, 2015
Flip flopping...
the ends too !
Kind of knew it when I was doing it (so why did I do it?) but continued doing it anyway. Well, to be fair to myself, I thought I saw a few fuel tanks made the way I was doing it. But, after researching it for the past two days I've determined that there may be a chance that the tank may crack and leak. Based on this conclusion, I've decided to make it the way that I've seen all of the biplane guys build them (including Steen Aero). Spent about an hour flipping the end ribs and drilling/clecoing them together.
Next... Need to figure out where the flanges go on the tank. But, why do it here when I can go back to Lombard Street, spend some time with Andrea and figure out where each of the flanges go. Half-way home I realized that I need the plans to figure this out. DAMN !
February 21, 2015
Just another step...
before forging ahead.
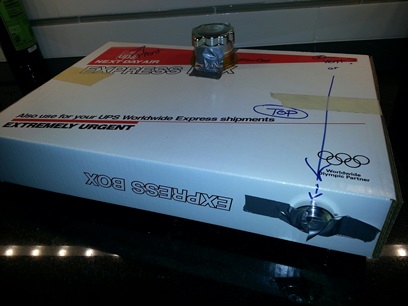
When moving forward into new territory, I (an you should too) usually (not always, but I should) make a test piece out of something less expensive than the final product being made...
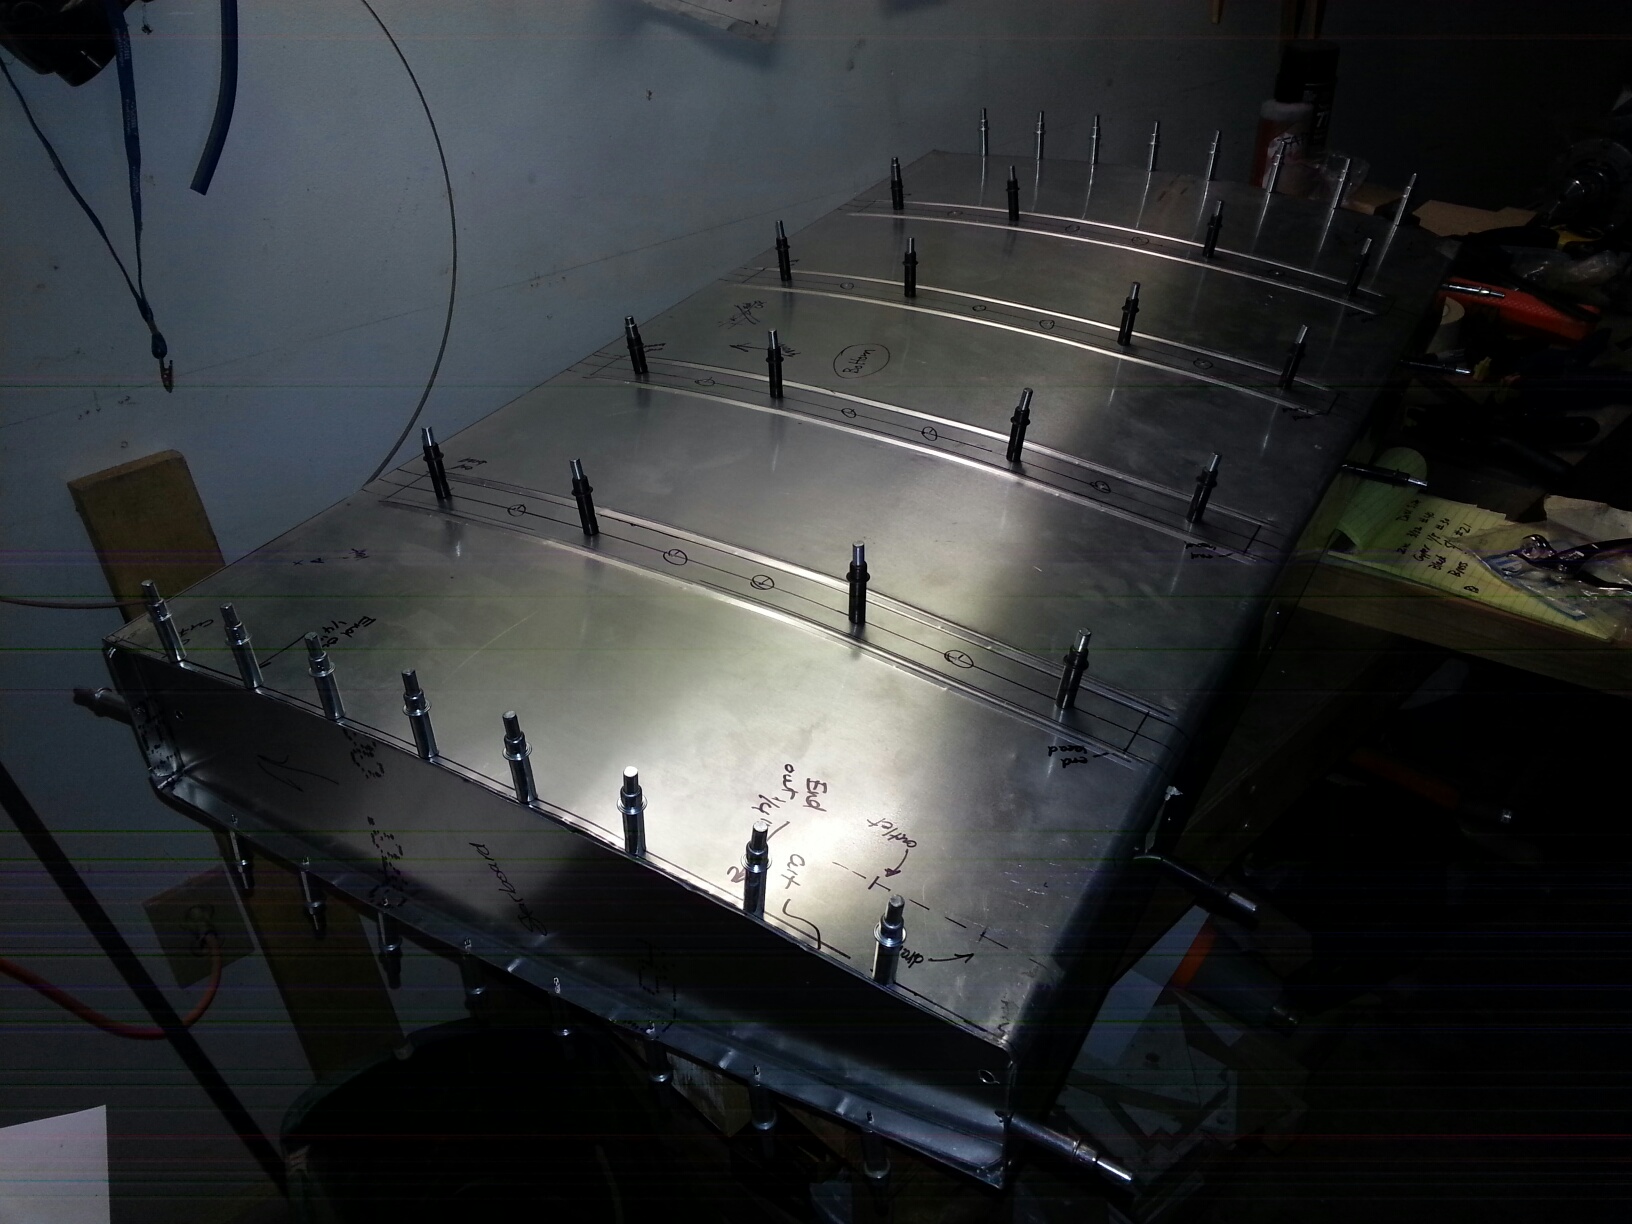
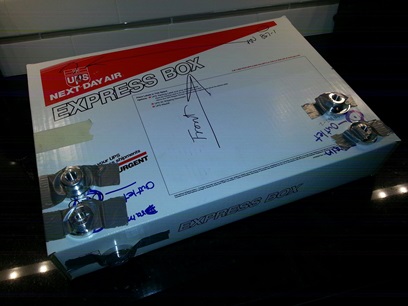
Took a look at the plans when sitting at the kitchen table at Lombard Street... figuring out what flanges go where on the upper wing fuel tank. Nothing hard to do, but why waste my limited time on Woodstream to lay it all out on a UPS box, right ?
Here's a photo of the top and bottom and where I'll be putting the flanges. I like all their locations except the vent line. I think I'll be running mine from the back to the front (with the outlet coming out the back-end of the tank). Tony B. shows it like this in his fuel tank and it kinda makes sense. There is usually an air pocket at the top front of the tank, whereas the back-end is lower and always has fuel (especially when it's in three-point).
oh... I had a question about the finger strainger screwing up into the flange that it goes into. It starts to thread and then it meets up with resistance. I was thinking that this is what it's suppose to do (it is suppose to keep fuel from leaking out past the threads) but wanted to be sure. AGAIN... I threw my questeion out to the biplane forum and got a response back from sizmo (thank you, sir): "That's the way pipe thread works. Throw some fuel lube on it and screw it together"
Top View
Flange on the back is where I'm think the vent line will go.
Bottom View
Two drain lines and two fuel outlets.
February 24, 2015
AND another step...
before getting it welded up.
Spent part of the night working on getting the upper wing fuel tank ready for welding up... Took a bit more work than what I had planned; all that tape I had put on the edges of the ribs took a little bit of time taking off. I'm thinking the entire time that I'm wasting my time, but it's a necessary part of the "build".
Instead of riveting the tank together and welding over the rivets, one of the guys on the forum suggested (what he's done in the past) is to enlarge a few holes along the lines and rossette weld those spots and then weld over the cleco holes. I'll let you know how it works. Next... flare the vent tube and fuel lines; drill the holes for the flanges, and fuel fill opening.
February 28, 2015 STILL Cleaning it up... and more figuring it out.
Deburring and well... deburring.
Not the metal working man that a lot of RV guys are... I didn't have the tools for deburring. Well, not all the tools. I had the basics (and I better get more 'cause I'll be working the sheet metal on the skins of the biplane). Well... acutally, I only had one. The Shaviv tool with a single blade (and a replacement for that blade).
That blade didn't work so well on getting rid of the initial build up of "slag" from when I drilled the holes. For that step I used a razor blade. Yeah, not fast... but I wasn't looking for fast if it had the possibility of screwing up those holes. There were quite a few holes that needed to be worked on.
I wasn't riveting these so spot on wasn't the purpose. With that said, I want to do the best that I can with these pieces (as those before them). The purpose of getting rid of all that slag was to allow me to fit the tank together without the separation the slag would make between the parts AND I didn't want any of that excess material hanging around with a chance of it breaking off and clogging the fuel system.
My pictorial essay of the steps is below. One step I didn't show was cleaning out of the slag on the baffles. The holes were so close to the side of the baffles that I couldn't get the Shaviv tool in there to fully clean the hole. What I did was use sandpaper to clean the remaining slag out of the holes after I had cleaned out most of it with the razor blade. Not that pretty (a light scratching of the material), but worked like a champ.
With the deburring finished I moved on to figuring out the location of the vent line.
I originally wanted to have it exit out the back (like Tony B. had in his books) but the spar is there. After looking at the drawing I'm thinking of having it exit the bottom of the tank close to that same back location (back-right) so that I can then run the exit tube down a cabane and out of my face.
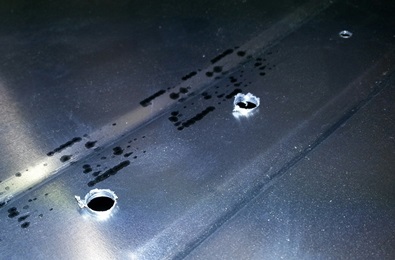
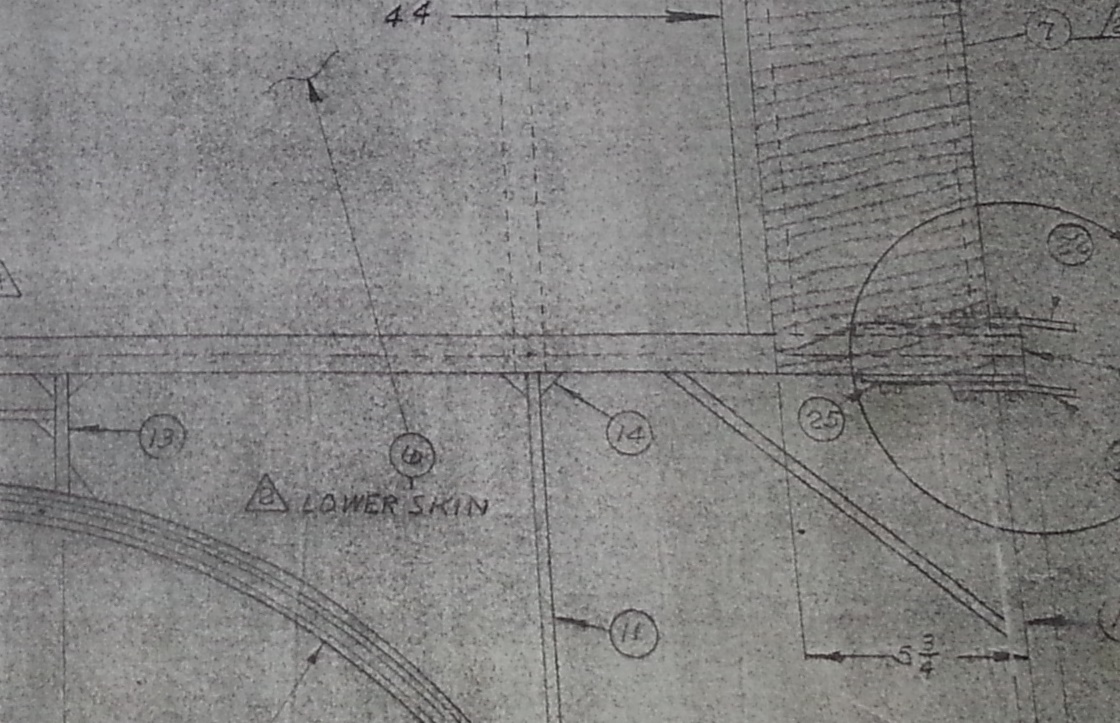
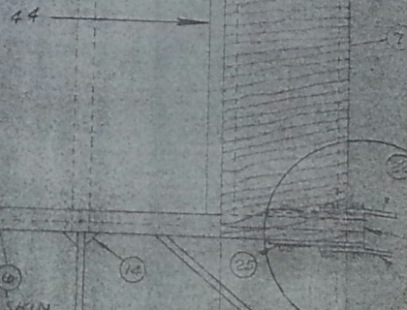
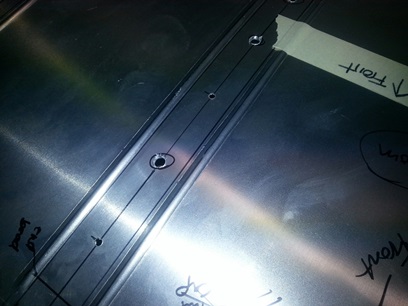
Below are a few drawings explaining what I'm talking about. The first drawing shows the upper wing section (all the wood pieces). The large cavity is where the wing tank goes. When you click on the image it shows a close-up of the lower-right side of the cavity; the area where I was going to have the vent line exit out the back of the tank. No can do; the spar is there.
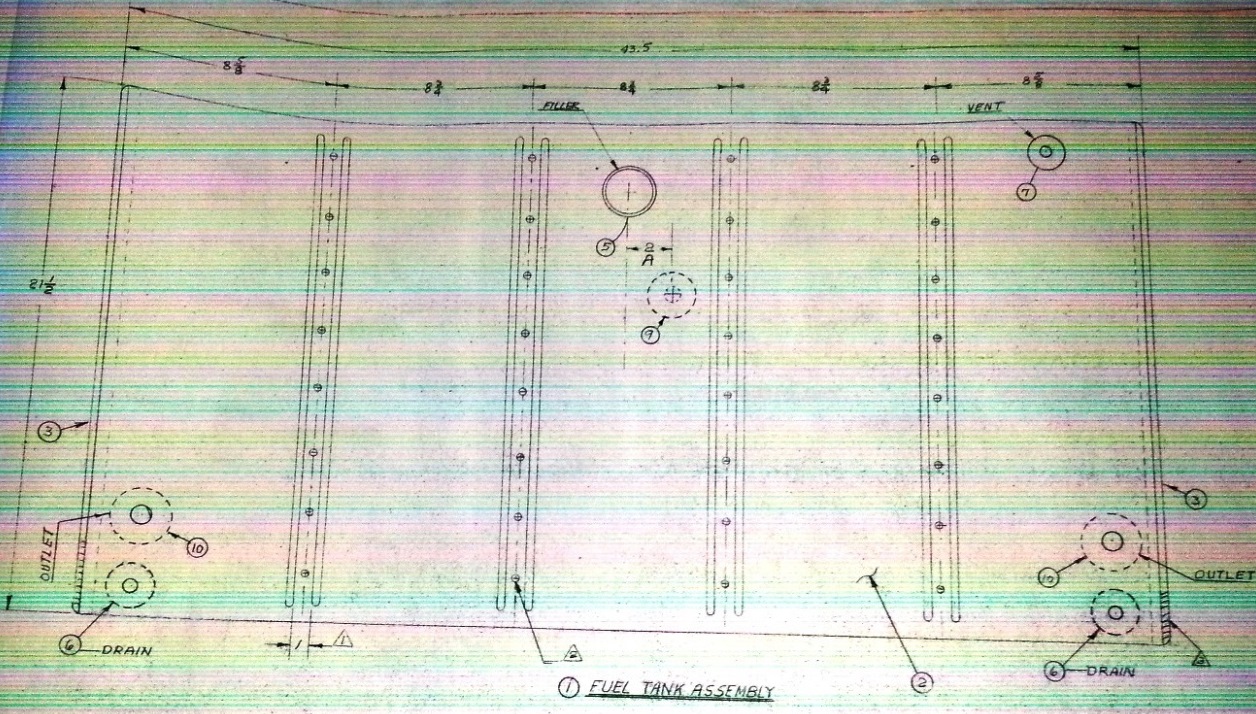
This image shows the overall fuel tank drawing for the upper wing. (click on it for a larger image). Location 7 is where Curtis is saying to have the vent line (out the top?). I'm going to be putting it in the area of location 10 and having it exit the bottom of the tank.
March 2, 2015 Inside and out...
systems and all.
Working with aluminum (banging out baffles and ribs, and bending skins and drilling holes)... it's a learning curve that I've picked up on fairly easy. Oh, sure, there are a few little mistakes with drill holes but they won't be seen unless you tear apar the upper wing fuel tank. AND those "mis-drilled holes" were because I flipped the end ribs on the tank. I JUST looked at the photos tht JimW had of his tank and he made it just like I originally had it made... but now I've flipped those ribs around and have a few extra cleco holes that will be visible to the gas inside the tank.
Looking at the upper wing center section plans and the fuel tank plans and the stuff Tony B wrote about fuel tanks... My original thought was to have the vent line coming out the back of the tank. Glad I compared what I wanted to do (following what Tony B. wrote) and the construction of the upper wing center section! The rear spar is where I wanted to have the vent exit. NOT GOOD ! And having it exist out the sides, on either side, will have it going through one of the inboard rib assemblies which I don't want to go through either.
This leaves either the top or the bottom of the wing in which to exit the vent line. And I'm thinking the bottom-rear of the tank... close to the right-side where the one drain and fuel line sits. I'm thinking... BUT, even though I can't place it where Tony did in one of his tanks, I'm taking his idea and having it run from the back top to the forward top; when you're in a climb the fuel won't come spilling out if the vent opening was a short tube in the back and it won't come spilling out in a dive if the vent tube was a short piece in the front. Doing it the way Tony explains you may get a few drops of fuel coming out of the vent but nothing to talk about.
Tony Bingelis' books are a must if you are scratch building from an older design. Heck... these guys were building (bi)planes for themselves. I don't think they intended others to build (I could be wrong). But when people see a sexy little sport plane they say.... "I've got to have one of those." After bugging the designer for years they release the drawings for the (bi)plane that they used and it pretty much leaves everything for you to design except for the basic structure of fuselage and wings. And THAT's where Tony's books come in... he details just about everything you would ask someone.
Right now I'm figuring out flairing of 1/4inch and 3/8inch tubing for use with AN867-1's 2's and 3's. What bushings and nipples to use with each. Finger strains and fuel valves... A whole lot of stuff I didn't think I'd need to know to build a biplane. The nice thing is that I will know this biplane inside and out... systems and all.
March 3, 2015 Figuring out the flanges
on the inside.
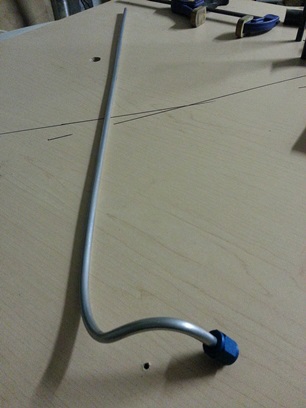
Ya know... I'm still trying to figure out this upper wing fuel tank (fuel tanks period!). I don't have a tube bender and when I went to the Home Depot to get one... they didn't have what I needed. So... I hand bent it. Not the thing to do 'cause it doesn't look very pretty. But... I did it.
Spent most of my night thinking about this... This and looking at the turtle deck and the trim/servo area; need to adjust the opening in the tail cone because the trim/servo horn is where the backend of the tail cone's floor is. The back, sides of the tail cone are in the way too! eeeeesshhhh !!!
Here's an image of the 1/4inch (inside) vent line bent up. More research and this will probably be a 3/8inch line and I'll have a tube bender to bend it this time.
March 4th update:
Okay, so I have the vent line bent and I'm looking at the plans and I'm looking at Tony B's books and I'm... I'm trying to figure out how the heck the internal vent line connects to the flange/bung. Nothing says anything about it. I finally go back to the forum and post something and the guys don't really know what I'm talking about with the flange/fuel tank. okay... I knew Ward built some kick-ass fuel tanks from scratch and he has the Firebolt plans. Took a look at a thread he posted and saw that it looked like he welded the internal vent line to the flange/bung (I think that is what the drawings were saying that he posted and it looked like a photo he posted showed it also).
Kinda remembered that I had a fuel tank question emailed to him a while ago. Took a look in my in-forum emails and saw nothing. Did a search on my Yahoo account and found... a question about the vent line from a year and a half ago. Not this question specifically... Sent a new email to him asking about welding the vent line to the back of the flange/bung and asked him if he could send a snapshot of the area on the Firebolt drawings.
Emailed, Ward about his fuel tanks. He got back to me pretty quick. I assumed correctly... he welded a 3/8inch line to
the inside-side of the flange and inserted it through a 3/8inch hole then welded the length of the inside vent tube, with tack welds, to the top-inside of the fuel tank.
Looks like bending that 1/4inch piece of tube was just for shits and giggles. When I return from Tortolla I'll be bending up the 3/8inch vent line and get on with getting it welded up...
Time Count:
As of today I have 76 hours of time put into building a fuel tank... this fuel tank.
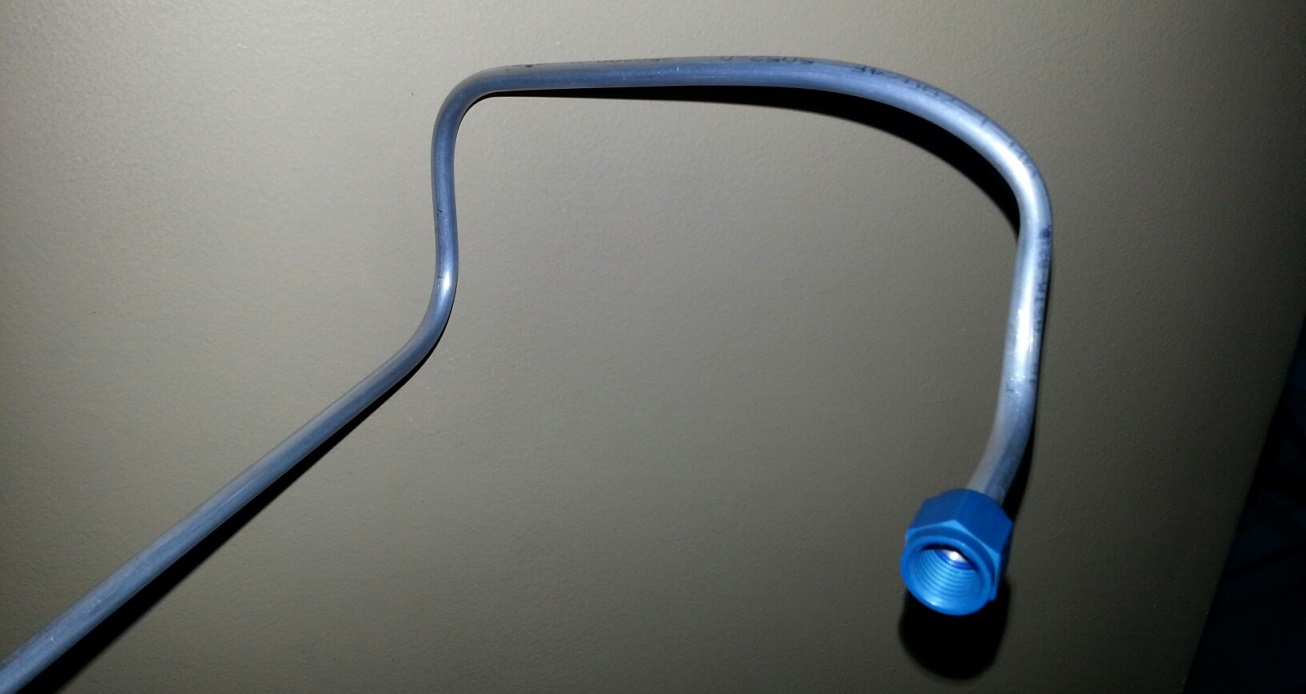
April 2, 2015 Nice... smooth..
bends.
I was at Lowes picking up some fine, finer and more finer sandpaper to make the trim/servo handle look real nice and I thought... I wonder if they have a tube bender for smaller tubing (unlike the Home Depot). Found one that will work on 1/8, 1/4 and 3/8inch tubing. Cost: $15.95. A lot cheaper than the $41.00 from Aircraft Spruce but thought what the hell... if it doesn't work I'll bring it back. Saves me on shipping too.
Just looked at the Aircraft Spruce tube bender again... looks like it does a lot more than the $15.00 I got. It locks the tube into position AND can bend 180 degrees with one pull of the handle. DAMN ! I just may be purchasing the one from Aircraft Spruce.
anywho...
what I wanted to tell you is that it works great...you can see the nice bend that the tube bender made compared to the hand bending I did.


 Had that "issue" with un-bending part of the smaller returns and straightening them up. Asked Andrea if the one at their place was borrowable (wurd?). She asked and it was broken. so... Stopped by the Home Depot to see if they had a hand seamer. Walded into the "tool corral" to take a looksee but knew this wasn't the place to find it. Saw one of the guys that worked there, an older gentleman, and asked him if he knew where the hand seamers were. Surprise surprise... he knew what I was talking about and knew where they were. First one he showed me was only about 3inches wide. Asked if there were any larger ones... walked down the aisle, turn the corner and walked to the aisle where they have all the aluminum for gutters and there on the shelf were a few beautiful hand seamers with 6inch wide clamp. (just what the doctor had ordered). Scanned it to check the price ($54.95). It is what it is... the sole purpose of buying the hand seamer is to help me with bending a few flanges. BUT... I'm just beginning the sheet metal work and all the interior stuff s so who knows how much I'll be using it. Anyways..
I had enough "Home Depot" gift cards and anassortment of other half-used gift cards to bring the price down to a palatable 6 dollars.
Had that "issue" with un-bending part of the smaller returns and straightening them up. Asked Andrea if the one at their place was borrowable (wurd?). She asked and it was broken. so... Stopped by the Home Depot to see if they had a hand seamer. Walded into the "tool corral" to take a looksee but knew this wasn't the place to find it. Saw one of the guys that worked there, an older gentleman, and asked him if he knew where the hand seamers were. Surprise surprise... he knew what I was talking about and knew where they were. First one he showed me was only about 3inches wide. Asked if there were any larger ones... walked down the aisle, turn the corner and walked to the aisle where they have all the aluminum for gutters and there on the shelf were a few beautiful hand seamers with 6inch wide clamp. (just what the doctor had ordered). Scanned it to check the price ($54.95). It is what it is... the sole purpose of buying the hand seamer is to help me with bending a few flanges. BUT... I'm just beginning the sheet metal work and all the interior stuff s so who knows how much I'll be using it. Anyways..
I had enough "Home Depot" gift cards and anassortment of other half-used gift cards to bring the price down to a palatable 6 dollars.

 Not the metal working man that a lot of RV guys are... I didn't have the tools for deburring. Well, not all the tools. I had the basics (and I better get more 'cause I'll be working the sheet metal on the skins of the biplane). Well... acutally, I only had one. The Shaviv tool with a single blade (and a replacement for that blade).