Mantua, New Jersey
Original Site:
September 2004
E-mail: usav8or@yahoo.com
The Radical Radial Turtledeck.
June 17, 2015 Too much thinking...
Need to get to work.
More work than talk... er, thinking... Worked out how to attach the stringer plate to the tail cone last night. Tonight... I work on it.
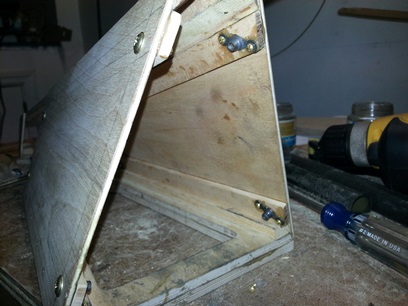
Stacked the pieces. Clamped them together and drilled with a slightly larger bit than the diameter of the 8-32 screw I'm using for securing things together. Drilled the first, all the way through all three pieces of wood then inserted an 8-32. Then the next and the next and the next. Keeps things lined up.
Did the other side the same way. Mixed up a batch of T-88 and went around and placed a dab of glue on each of the nut plate wings and screwed everything together to dry.
Not glued yet.
Watched the end of the Phillies... lose to Baltimore. ahhhhh... Walked into the garage work shop and started thinking of the things I need to do; "if I did this then I could do that." Over and over and over again.
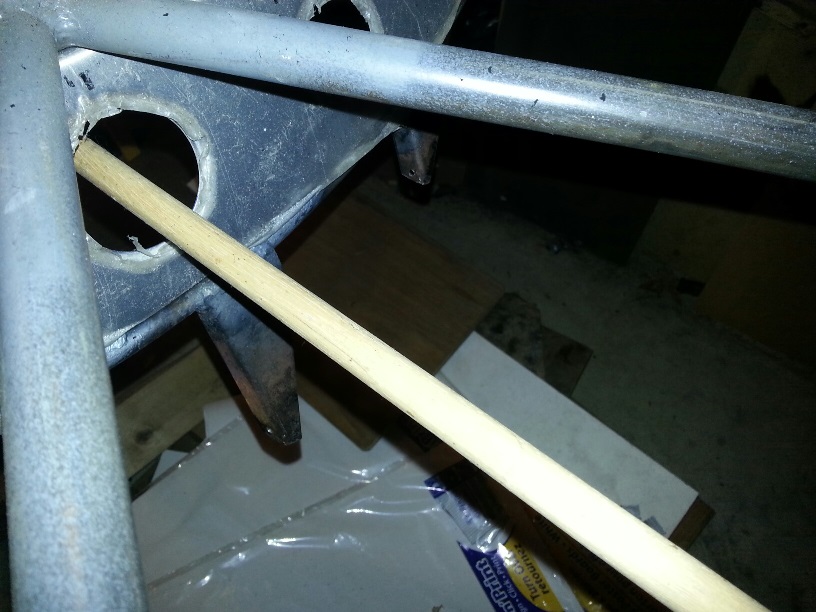
Not getting anything done like that... Decided to test fit the control system push rod from the control stick to the reverser (I wasn't thinking of the push rod when I made the aluminum enclosure) After putting it all together... My luck... It Works ! (Note: push rods are 3/4inch 4130, not 1/2inch wood dowels... the dowel is used to test the fit)
Click image for close-up.
June 18, 2015 A few brass screws...
and it's close to being finished.
Found a few #2 x 1/4inch brass wood screws at Lowes. JACKPOT !!!
Pre-drilled the holes in the openings on the nut plates. Mixed up a little T-88. Smeared the T-88 over the openings on the nut plates and screwed in the #2's. They ain't gonna move when I'm locking on the stringer plates.
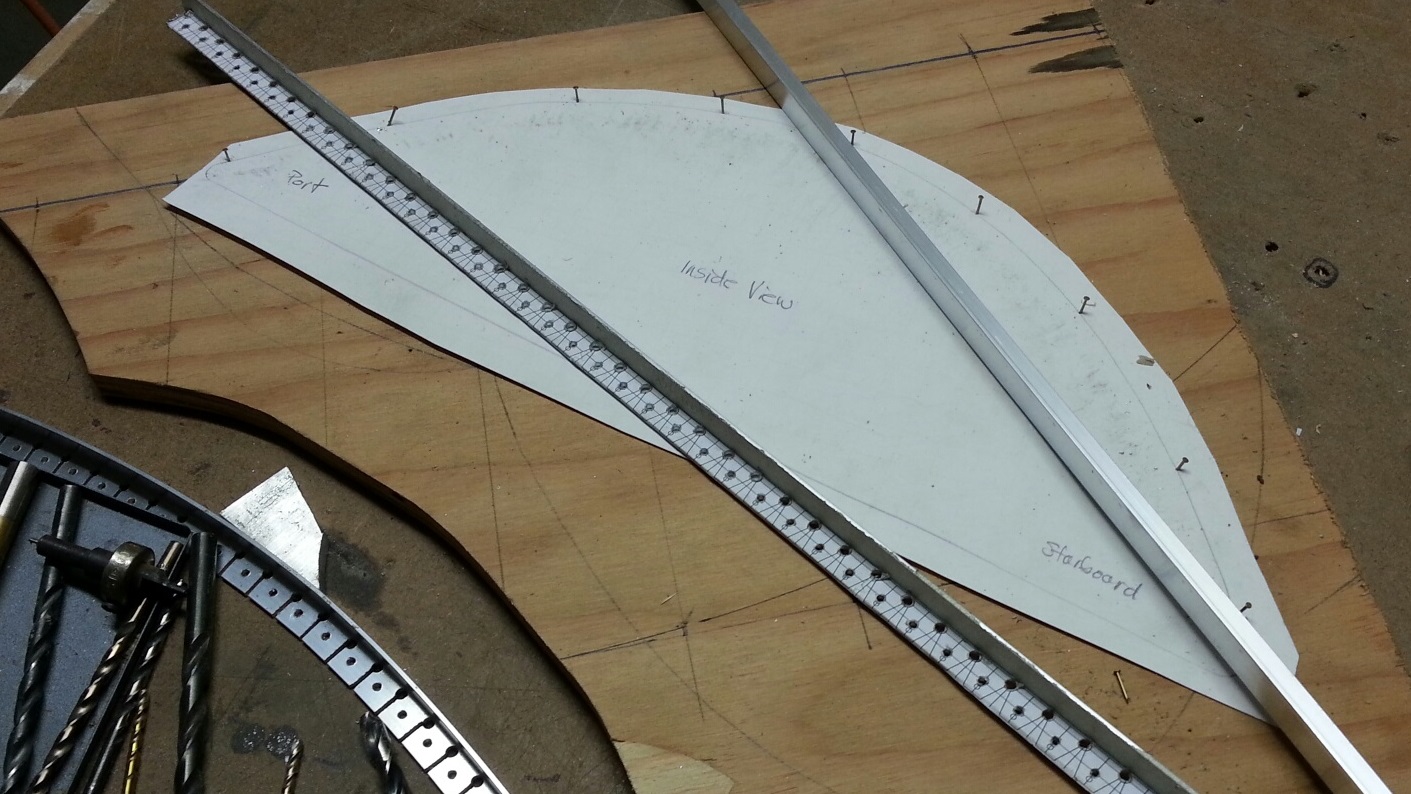
June 19, 2015 Measure forever...
before the cut.
Had about an hour before the Phillies came on tonight so I decided to walk out into the garage workshop and do something on the biplane project.
Wanted to get the stringers mounted to the back plate, or, at least get things marked up.
Well I got things marked up (first time it was the underneath plate... duh !). Quadruple checked things to make sure that things were where they need to be. That's it ! Next I'll need to cut the stringers to length then glue them in place.
I'll be cutting off the stringers 2inches in from the back and finishing off the ends with an angled cut.
The upcoming weekend looks like it's going to be a little wet. Hope to be able to get a run in between the storms that this tropical depression Bill is bringing through.
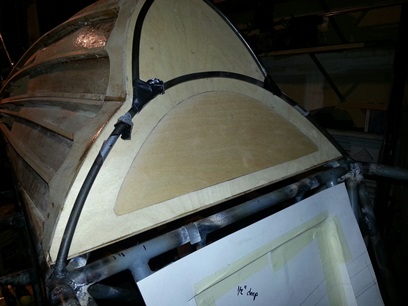
(Ya know what... looking at this photo, I may just need to look at the imaginary end-point for the upper and lower stringer to make sure that they're falling where I want them to on the tail of the tail cone.)
June 20, 2015 It's SO...
Well, damn close.
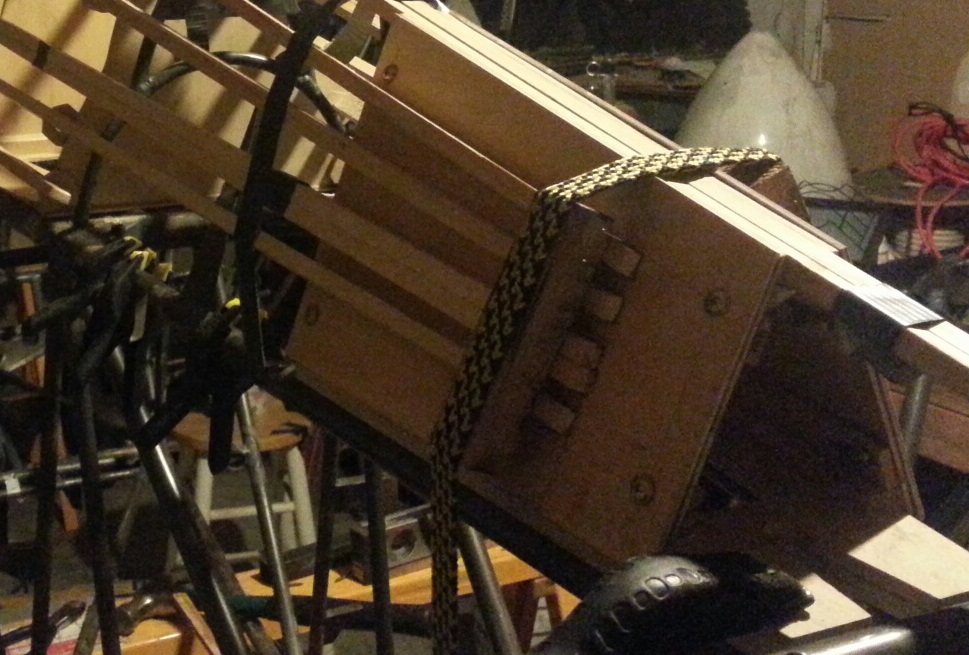
Yep... a slight movement of the upper and lower stringer to fall on the imaginary end-point was needed. Figured that out. Made my marks and set the stringers into position.
Drilled small holes to insert bronze brads, that I've had since the beginning of the build, to keep things aligned. Mixed up a batch of T-88 and slathered it on the backs of the stringers and locked them into place. I keep looking at the turtledeck-to-tail cone flow and I'm just not seeing anything I don't like. I'm pretty damn happy with the outcome... FINALLY.
I'll be finishing off the tail-end of the stringers with a point of some sort... maybe a buleet shape ? Kinda 20's retro ?
Click on image for close up.
FINISHED !!!
I'll be cutting off the stringers 2inches in from the back and finishing off the ends with an angled cut.
With the structure of the turtledeck finally finished it was time to start putting the hatch to the turtledeck together... no, it's not something I just started thinking about. I've been thinking about this for over a year. BUT, I've got to make a decision on it now. I was thinking of making it out of plywood but I'm afraid of it bowing. I could put stiffners on the back of it, though. I like the idea of doing it out of a different material... aluminum, with some round headed rivets. Maybe paint it and attach a "Radial Skybolt" plaque/sign in the center of it.
Need to order the material for that... so off to think other things through; the firewall (checked the firewall-to-upper former for alignment - CHECK), checked the forward landing gear and tailwheel - I'd like to square the bushing up on the forward landing gear (not much), thinking of the instrument panels, more enclosures, side panel for additional switches, how many instruments for the front pit (again)...
June 21, 2015 Getting...
so damn close.
Tweaking the tail cone... wanted a little extra support on the lower two stringers that are sitting at an angle to the plate. Measured, fitted and glued two small triangular corner blocks in place. Also... final file and fit of the four remaining trutledeck stand-offs. Glued them in place.
June 21, 2015 That...
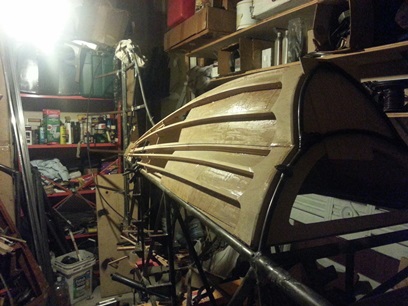
90% of the turtledeck.
"I still have more to do to me..." says the turtledeck ???
More to do if I want to give it a more finished look. Actually
it probably won't be seen once the fabric and paint is on.
But... it's something I gotta do !
It's the little things that count... they say. And so, I work
on the little things.
The ends of the turtledeck stick up approx. 1/4inch. And, I can't have them looking like that. First thought was to have some bullet-shaped end piece. Took the time to make all ten of those and decided against using them. Thought that I'd put the horizontal curve from front-to-back on the second set but leave off rounding them to look like bullets. Image to the right shows the rough cut "bullet" ends in the lower portion of the photo with one finished end at the top.
Here is the end results. All I need to do is epoxy them on...
July 6, 2015 Making more work...
of the turtledeck.
I look at tonight's work and ask "What can I do to make this better?"
A little bit of learning tonight making the frame for the turtledeck door. I'm happy with what I ended up with but I know I can improve upon it... Hell, I started making adjustments as I went along with making the piece.
Just under five hours and I'm asking that question. It's a good looking piece... but I can make it better.
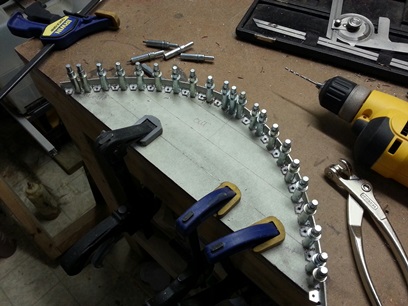
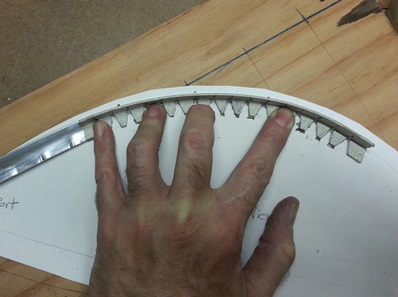
I originally thought I could set up a bending block like I did to make the leading edge of the stabs. The aluminum angle wanted to keep twisting which ain't good. Decided I'd try the notching method. Looked in the Skybolt manual to see the measurements that they had for doing something similar; 1inch spacing with a 90degree cut, no angle notches.
Started free-hand drilling of the 1/8inch relief holes and of course they all weren't the same distance from the vertical leg of the L-shaped piece of aluminum. After drilling a few I had the bright idea of setting up a straight-edge to keep the distance the same on all the holes. It worked for the remaining relief holes and all the pilot holes I made for the rivets. Made the 90degree straight cuts into each of the relief holes. Not real happy with that look. Also, the bend on the door frame is such that the tips of tabed sections are touching so... I ran a file through each of those cuts to open them up. Worked great... but I still don't like the look of the piece.
Tomorrow I'll re-make the piece using my drill guide the entire time AND I'll angle the cuts into the relief holes to give it a notched look.
Here's a look at what I did tonight...
test piece
Notched frame.
July 7, 2015 Turtledeck door frame...
the second notch 'round.
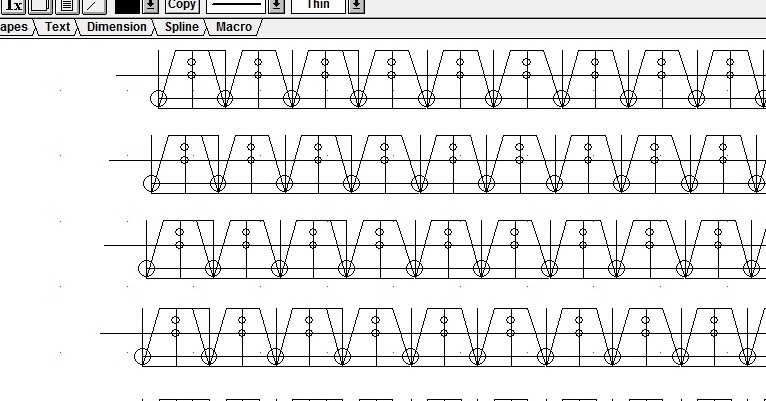
Cut a section of L-shaped aluminum and brought it in to work today to draw the marks on it for notching tonight. Turns out... my buddy Brian was at an appointment so I sat at my desk during lunch and drew it up on CAD. Saaaaa... weet !
It gave me a chance to work through the way that I wanted it to look and the way that would work best. After a few iterations I came up with the pattern below.
Click image for a close up.
Nice to be able to start working on the door frame without having to hand mark the L-angle for the drilling and notching. But let me tell you... there is one helluva lot of holes to drill in 20inches of aluminum; relief holes AND rivet holes.
Wanted to use a centering bit on all holes to keep the drill bit from wandering when drilling all the way through. No can do on the relief holes... the holes are too close to the upright on the "L" and won't allow me to center the centering bit. Took my time on drilling these out with just the bit... had a little wandering but not too bad.
The holes for the 3/32nd rivets had plenty of room to center that centering bit... just added more time to an already long process. Took longer but I'm happy with the centering results; no worry about wandering. Unlike last night's practice piece, I need to notch these instead of making one cut to the relief hole. I start notching the piece and I'm thinking, "Boy, this Harbor Freight bandsaw has been doing a good job for all these years. Didn't cost that much and it just keeps..." Before I can finish my thoughts the motor on the bandsaw starts to jump around a little. And then... a little more and then A LOT MORE. What the hell ???
The bandsaw couldn't have timed it any better... turn it off and opened up the housing that the belt and pullies are located. All I see is a shredded belt. DAMN ! And I ain't gonna cut these notches by hand. Looke like I'll be heading to Harbor Freight this weekend...
Glued paper pattern on "L".
A lot of holes !!!
July 8, 2015 Searching...
for that elusive part.
Called Harbor Freight... they no gots the belts for the product they sell. Surprising ? NOT !
Looked online for possible companies to buy it but turned up nothing the first few searches. For some reason, some how, I landed on the Grangier site. Just KNEW I'd find something here... and I did.
A transmission v-belt same circumfrence and thickness as what I had on there. It's GOT to be a lot better than the thing that came with the bandsaw and lasted about nine years. The bonus... it only cost $6.50 !!!
July 10, 2015 Now...
back at it.
Got it !: Received the belts from Grainger today and THEY'RE it ! The exact same belt that was on the bandsaw but a whole lot better quality. Bought two so I should be set for another 14 years.
That belt must have been fraying for a little while... it's one smoooooth running machine now.
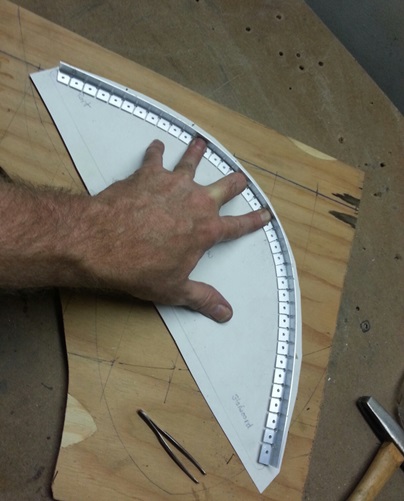
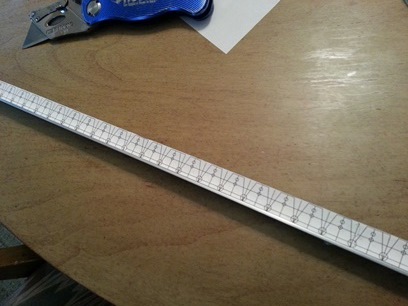
With the bandsaw fixed I set about cutting the notches on the L-shapped piece for the turtledeck door. (hey, did I mention how smooth the bandsaw is running ???) Once the notches were cut I took a small file to it to smooth out the cut edges. and it's... Ready for mounting onto the door's face/skin.
After cutting the door blank... I can see it's gonna take quite a bit longer to make this look good than just cutting a blank out for the face of it... but I'm not going to be defeated ! (I'm thinking I need to make a blank out of a good piece of plywood... one of those expensive pieces. Fit this up nice and tight to the door frame and THEN make my aluminum facing. yeah yeah... that's it)
July 11, 2015 More...
still to do.
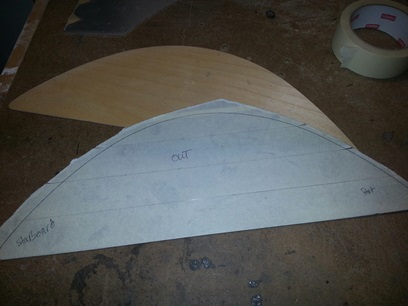
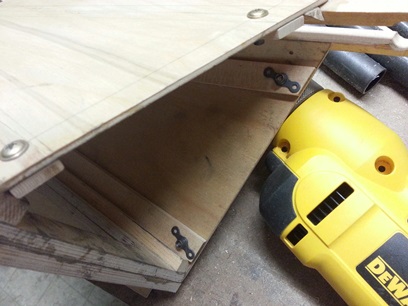
That 3/4inch MDF pattern is way too thick to get a correct fitting piece from it. Needed something thinner... something like a piece of 1/4inch birch. A nice piece of ply to make a nice pattern.
Birch ply pattern.
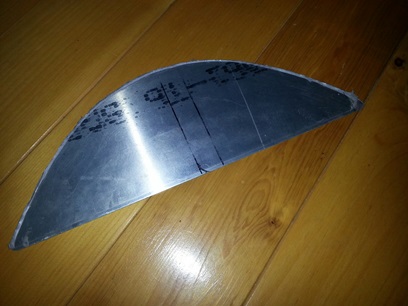
Used the ply blank to draw the pattern on the .o40 aluminum sheet then made a rough cut around the pattern... cause' I had to do most of it by hand even though I have a new drive belt on the bandsaw (the throat of the saw is only 4 1/2inches deep.) then trimmed close to size with the bandsaw. Started filing and sanding after that.
and... More filing and sanding.
More filing and sanding...
and More filing and sanding.
Twopoint eight hours and I'm still filing and sanding to size. Here's a photo of it so far... with more filing and sanding still to do.
July 12, 2015 Drill...
and clecoed.
Ahhhh... I've been waiting to do this for a while: just to see what it would look like.
Had some time before Jonathon's birthday party-get-together to work on the biplane project. It was all no-brainer stuff. Just a matter of bending and attaching the L-shaped piece I just worked all those hours on, to the face plate of the turtledeck door, that I just worked all those hours on. ohhhh... but that wasn't until I did some more of that filing and sanding.
A few pictures from today.
,
Now if I just knew how to rivet, I'd be set.
August 17 and 18, 2015 Bass...
ackwards...
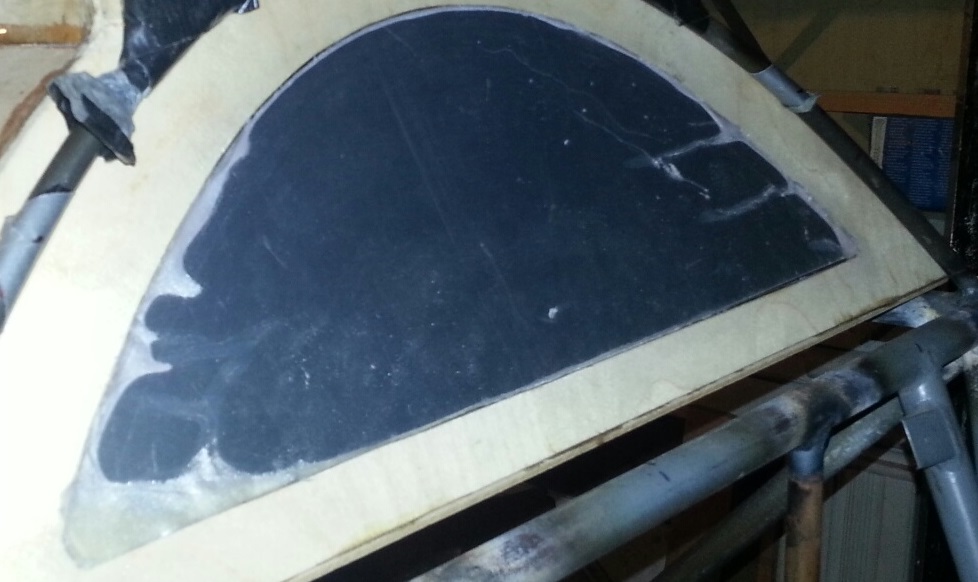
Ahhhh... flipped it when I should have flopped it.
Started fine tuning the fit when I discovered I had flipped the hatch lid around and the inside was pointing out. There is a slight difference in the shape of the opening and... it... just... wasn't... going... to... work.
That was yesterday. Today I made an entirely new hatch blank; traced the pattern, rough cut to size, filed, sanded and fitted up to the opening. Next I'll fit up the flange pieces and then cut a slightly larger hatch blank to overlay the opening by approximately 1/4inch. Should look pretty sweet. Need to figure out how I'll be locking this on... Time to look into Tony B's books to see what he says about it.
Click on image for close up.
August 19, 2015 Lots of holes...
again...
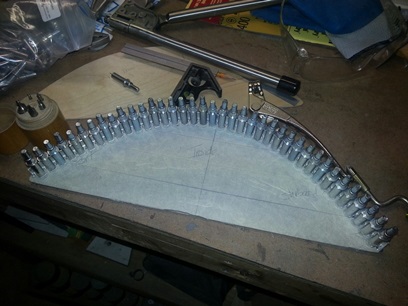
Repeat... Second time round and you'd think it'd be easier but it ain't for some reason.
Final fit of the hatch to the opening in the turtledeck. Two hours later I have the top flange match drilled and clecoed to the curve of the hatch cover. Boom !


 It's the little things that count... they say. And so, I work
on the little things.
It's the little things that count... they say. And so, I work
on the little things.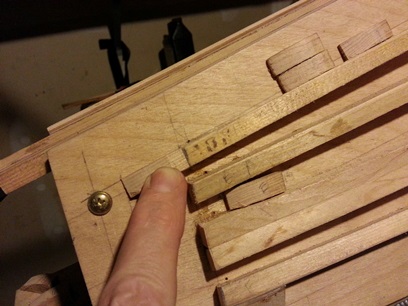

 Got it !: Received the belts from Grainger today and THEY'RE it ! The exact same belt that was on the bandsaw but a whole lot better quality. Bought two so I should be set for another 14 years.