Mantua, New Jersey
Original Site:
September 2004
E-mail: usav8or@yahoo.com
The Radical Radial Turtledeck.
April 2, 2014 Looking at the rear-end of a turtle-...
deck ...
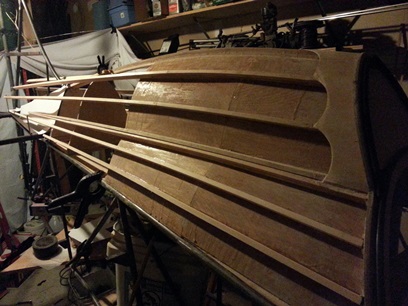
MORE work on the turtledeck. Took a look at the glue job on the final two turtledeck stringers. They are looking mighty fine.
After admiring that, I began to work on the back-end of the stringers; the area where they tie into the fuselage. There's a lot going on back there. First I needed to trim a few of them. Measured. Marked. Then brought them done to the basement work area to cut and sand square.
Back up to the garage work area to start playing with it... taping the ends in place to see where everything would start to fall. There's REALLY a lot going on back there. Not as clean looking as when I had that tail-cone cap to capture all the end... keeping them in line. After looking at it hard and long I took a break from it. Needed to get a bite to eat anyways...
Came back, after thinking about it all through dinner, and looked at it some more. The more I thought. The more I visualized. The more I knew... I needed to cap that area again.
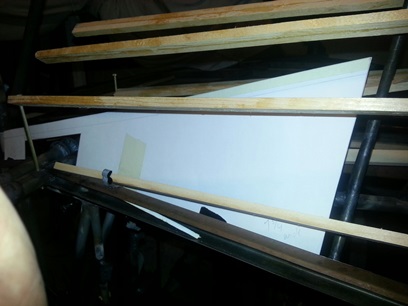
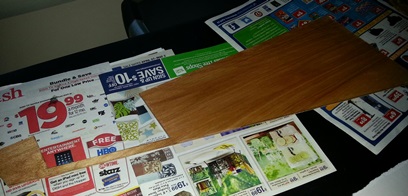
I have some display board from when I was making patterns for the formers. Cut a few pieces to start playing around with how it would look back there. I'm thinking... at least right now... that I'll cap it all the way up to the front of the vertical tail. I'll let the ends of the stringers feather into it. At least that is the plan right now.
April 3, 2014 Still looking for the ticket...
I'm having one of those moments... and it's not blonde or senior. It's happened in that past...
I'm working on a piece of the plane and it's just not seeming right. I'm just kinda fumbling my way through it. When I'm in those states-of-mind... what I'm doing is just thinking through it. I have every intent and purpose of getting on with it, but my decision on how I'm going to do it aren't set in stone... I'm saying they are, but I just have this feeling that I'm still not there yet.
With the turtledeck... I'm floating somewhere between having the entire length of the turtledeck stringers exposed or capping them with a tail-cone that goes up to the front of the horizontal stabs. Having it look "right" by attaching the stringers directly to the fuselage is just one royal cluster when it goes all the way to the back. I'm thinking (just this moment) that if I make a wood cap that will allow me to attach the stringers to it instead of trying to weld tabs in the back-end somewhere... I just may have the ticket I'm looking for.
Kinda have the cap go all the way to the front of the horizontal stabs but not be seen... the strngers would over-lay.
I can end the stringers before the point that they get to that cluster mess. Yea... yea.. I'm thinking... that's the ticket.
April 12, 2014 Before all is said and done...
another way of doing it.
I think I've got it figured out... for the second or third time.
Decided that my original idea using the metal stand-offs for the rear-end of the turtledeck just wasn't cutting it. The ones that were welded on the fuselage were for the original stringers and we know what happened with them. It was another one of those big decisions. I put all this work into something, and idea, and now I need to go back and say... it wasn't the best idea after all.
To commit myself to this idea I need to grind the stand-offs off the fuselage. (see above image)
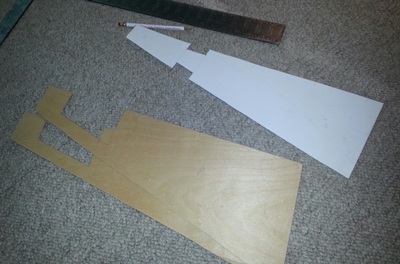
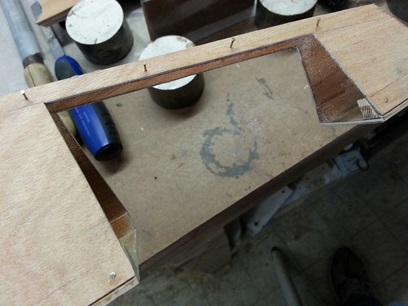
There's a lot going on back there with the elevators and horizontal stab attachments... so I needed something that would capture all of this and still allow me to attach the stringers. After thinking about it for a while. and After cutting a few different patterns. I came up with the following. This would enclose the horizontal stab and elevator connections and allow me to attach the stringers on with the same piece.
The paper pattern.
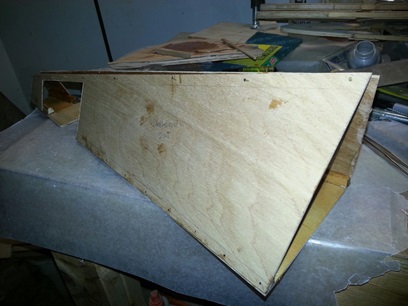
Tail cone: Sides rough cut. Bottom pattern.
I'll need to figure out where the stringers will line up before taking a blade to it and making the opening for the stringers to slide into. I've got the general design worked out. All I need to do is start moving forward and making small adjustments along the way.
April 16, 2014 I'm happy with the way it turned out...
the tail cone and the hair cut.
I was able to steal away some time tonight to work on the biplane... (it came about from me getting a hair cut where I've gotten it for the past 15 years... right down the street from my place in Mantua, NJ)
Felt good to work on the project. Real good. I'm working through the build of the new and improved tail cone. I think it's going to work out a lot nicer for attaching the turtledeck stringers to it than the metal formers I had originally welded on for that purpose.
A lot of running up and down the stairs again... drawing, cutting, fitting... drawing, cutting, fitting...
Got it to the point where I can fit the base of the tail cone on the fuselage. My last episode I had the sides cut to size with the tops rough cut. Now all I need to do is fit the two stringers going from the base of the vertical tail/tutledeck spine to the base of the vertical tailpost so that I can figure out where the tops of the tailcone sides need to be trimmed. After that it's just a matter of boxing the tail cone out and gluing it up. (I say that as if it's going to be a piece of cake.)
I'm happy with the way it's turing out.
April 17, 2014 I'm not happy with the way it turned out...
the tail cone that is.
Still happy with the hair cut, though.
I had a meeting in Jersey today. After the meeting I stopped at the place in Mantua to finish out my day. So... as soon as five o'clock rolls around I'm getting ready to work on the biplane !!! (I get so excited about some of the smallest things.)
Nice !!!
The tail cone sides were pretty much cut to size the other day. All I have to do now is fit the spine from the base of the turtledeck spine/leading edge of the vertical tail area to the area where it will meet up with the vertical tailpost. I fit the test spine in using an old piece of stringer (from the last time I did this). Took it to the sander to knock off the old lips (I was going to use for attaching them to the formers which aren't there any more). Took a file to notch the area around the support for the leading edge of the vertical stab. Took the sander to the forward edge of the spine to fit it up under and over (and around???) the ledge that it will be fastened to.
With that all said... I placed the starboard side in place so that I could mark it for trimming (the top). Made the mark. Made the cut. Sanded to the line. Put it back up against the spine and noticed that it wasn't looking as nice as I wanted it to; the top of the opening wasn't "square". It was "good enough", but we know... good enough isn't good enough. So... back to making not one, but two sides (if the first didn't look good... and I made the second one to match that first one... I know the second one isn't going to be any good without even looking).
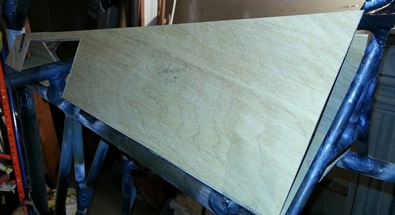
A little over two hours later and I have two sides for the tail cone that I'm happy with...
Here's the new starboard side.
Definition:
Pattern - \pat·tern\ noun A part that is no longer good enough for the project.
By the way...
I'm now happy with the way they turned out.
April 19, 2014 Same stuff...
different day.
Not really.
More work on the tail cone. Sides and bottom are cut so I need to bring this all together...
:side bar:
I find (you'll find) that I re-make quite a few parts and pieces on this biplane; twice or three times or... It's never the same stuff/different day. The only reason I'm re-doing is because "Good Enough isn't Good Enough." or, I've jumped a few steps ahead and when I came back around to the proper sequence I found that my great idea isn't so great any more. Which is fine. It's all fine.
I know the site line for a smooth flow from the turtledeck to the tailpost. I'll need to carry that on through with the top of the tail cone (aka spine). I already have the front
tab for the tail cone connection... so, I fitted up the front ends of the 5/8inch stringers (aka spine) to that front tab... fitted (with a round file) the 5/8inch stringers (aka spine) around the vertical
support of the leading edge of the vertical tail... then made the cut and fitting of the tail-end of these two pieces to the tailpost... laid the two tail cone sides in position to check for a fit.
A little under two hours and Waaaa-La...
April 22, 2014 Cleaning up...
a bad idea ???
Looking at the project tonight... I saw that there was more work here than just making and fitting up the tail cone. My past, great idea needed a little cleaning up first.
It was pretty rough where I had to cut off those two metal formers/stand-offs. So... I had to file and sand those four welds. And THAT took quite a bit of time... and it's now just close (didn't want to start cutting into the tube itself). Nothing like the clean piece of tubing... that it started out life as. It had to be done... so I need to just get over it.
With the empenage cleaned up I could now go about fitting up the tail cone. I have just about all the pieces, just need to figure out the corner/glue blocks so I can lock it up!
Figured out the angle; it was 65degrees (reminds me of BJ's website). Just need to decide on how I was going to cut that angle on the blocks. First try of taking them to the disc sander was doing it the hard way. (ended up un-precise, uneven and unuseable). Second try (which actually was my first thought) was to crank in a 25degree angle on the tablesaw and thread it between the guide and those spinning teeth (it's only 5/8inch square). Using my best judegment I cut the blocks extra long so that my fleshy fingers didn't need to get so close to those cutters. Worked like a charm (of course). BUT, the small, rear blocks needed a little more attention. They were about 15degrees steeper so needed a slight adjustment. They're close now and with the T-88... the glue will fill in the slight gap (like it's suppose to do).
I still need to make the slight adjustment to the rear, starboard side block before gluing this up (and probably some other stuff I haven't even thought about having to do with the tail cone... it's a work in progress).
These still need trimming.
Forward part of tail cone.
Rear end of tail cone.
April 24, 2014 Saving time...
with a few more glueables ???
My plan for the night is to glue the tail cone up. Just needed to do a little tweaking of the glue blocks and then I can lock them in with a little T-88.
Took the rear, starboard glue block and sanded an additional 15degrees of wood from it. Marked the base and tacked the bronze brads into position to keep those glue blocks from sliding around after they've been glued up.
(Changing it up)
Decided I'd get a few more glueable pieces ready before mixing up a batch of T-88. Not that I'm worried about wasting glue... but I might as well get my monies worth and with several things needing gluing up why be impatient ??? gluing bits-and-pieces when I can wait a little while and have a session of gluing (or at least wasting time mixing up small batches of glue.)
Both transition plys needed to be cut to the lines and sanded, trimmed and fitted to the turtledeck. They're ready for gluing up now. Well... actually they need a little fitting before gluing, but that shouldn't take much time at all. Decided to wait until my next session before mixing up the batch of T-88. It's going to take a little time to strap these transition plys onto the turtledeck after gluing.
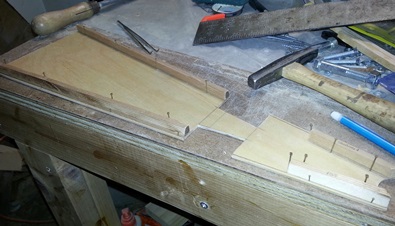
Glue blocks in place.
Transition ply trimmed and sanded.
April 27, 2014 Running out of things...
to glue... and I still gots glue !!!
Time to glue on the transition ply. But, First... I need to trace these on 1/16inch ply instead of the 3/32inch ply that they're now on. They're just not bending to the form of the turtledeck with the 3/32nd stuff. The first few transition plys were cut from 1/16inch... not sure why these weren't ? (yea... I have quite a few of those moments... apparently) My speculation is that I was cutting the tail cone stuff from 3/32inch and I just continued using it ???
It took a little bit more than a little bit of time to do. But... it's done now.
Mixed up a batch of glue and knocked out the glue blocks for the tail cone. Coated the back-side of both tans plys with the T-88 before fitting them up to the tutrledeck and gluing them on. Still had more T-88 so I sealed the back of the two sides for the tail cone. Had more glue but ran out of things... to glue.
Good thing about using T-88 to seal the wood is that you don't have to worry about keeping an area clean of the sealer 'cause it's the same stuff you're gluing with. Just need to do a sanidng of it and you're good to go !
Not too pretty, but you get the picture.
April 29, 2014 Too many things...
to glue... and I still gots glue ???
Yea, still working on the turtledeck. Spent 1point3 hours on it tonight.
Wanted to glue and tack the sides onto the tail cone. Started out sealing the inside of the base on the tail cone. Finished up on that and came to the conclusion that I couldn't glue and tack the tail cone sides on in place on the empenage... which meant... I couldn't glue and tack the spine in place tonight 'cause I couldn't place the tail cone in place once I tacked the sides to the bottom 'cause part of the base will now need to be cut before I can put it into position. It's meant to be cut but I was going to do that after... uhhhh... good thing I DIDN'T do it in place 'cause it'd be a bitch making those cuts while it was on the empenage. (run-on sentence yet ???)
I didn't think this all the way through before mixing up the batch of glue... way too much glue left over.
Got the sides glued and tacked in place... and now I'm letting it dry. I'll need to get a pack of Dremel cutting wheels before working on it again soes I have something I can cut that base with.
Sides of tail cone glued and tacked.
New port trans ply. Needs a little cleaning up.
May 1, 2014 Not much to say...
but I'm saying it.
Was able to spend quite a bit of time on the biplane tonight !!!
First line of business was to get the tail cone ready for attaching to the empenage. AND that meant that I had to cut out the section of the base that would capture the area where the elevator horns would go. Other than taking my time to cut it out and then sand smooth... not much to say.
Okay... so I got it cut, trimmed and sanded... Needed to glue and tack it to the spine. Hey, got that done too ! Just took a liitle doing to do it.


 I'm having one of those moments... and it's not blonde or senior. It's happened in that past...