Mantua, New Jersey
Original Site:
September 2004
E-mail: usav8or@yahoo.com
Building the Skybolt
aka Radial Engined Skybolt..
March 28 and 29, 2016 The mental part...
of moving forward.
ahhhh... I'm at a point where it feels like I'm moving forward. There's something about drilling holes for some abstract part of the plane (aka... drilling holes for the purpose of attaching anchor nut plates) that doesn't fill that spot in my brain with the thought of "moving forward".
now... start riveting on those anchor nut plates and it's a different story. And that, my friends, is where I am at right now. Been working on it for two days now.
Prior to starting all of this riveting I decided that I would only need to have a bolt every two inches (one was over-kill). Well... the first night I didn't remember thinking that thought and plowed ahead and riveted every single available hole with an anchor nut plate. This morning I was thinking about it and remembered. Tonight... it was every other hole.
With the smaller flanges (as compared to the ones I used on the firewall) the heads of the squeezer weren't able to center on the rivet (even with the shaved head that I made) and I was still able to get nice squeezes out of it. Must be my technique of applying pressure to the side of the barrel when it's in the hole that gives me those nice squeezes ???
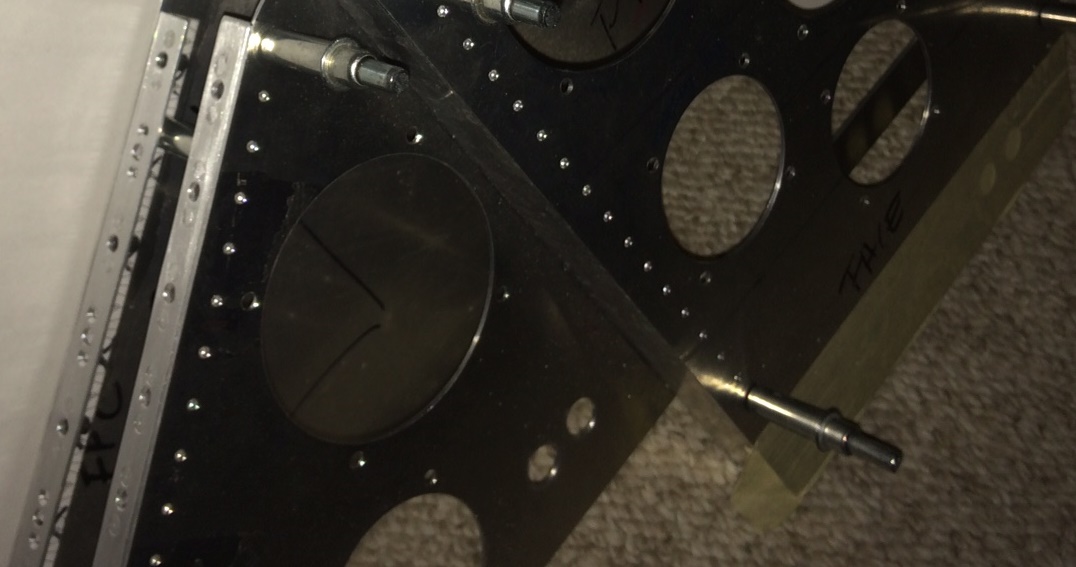
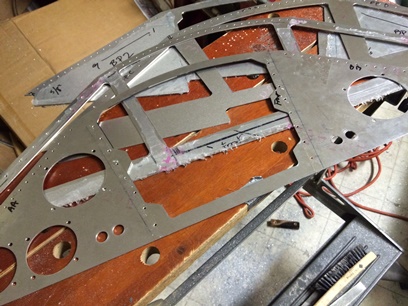
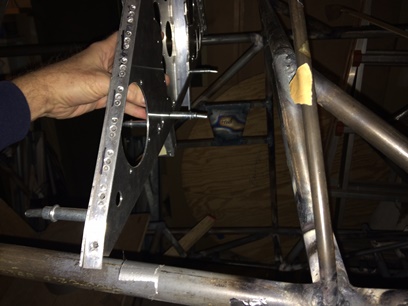
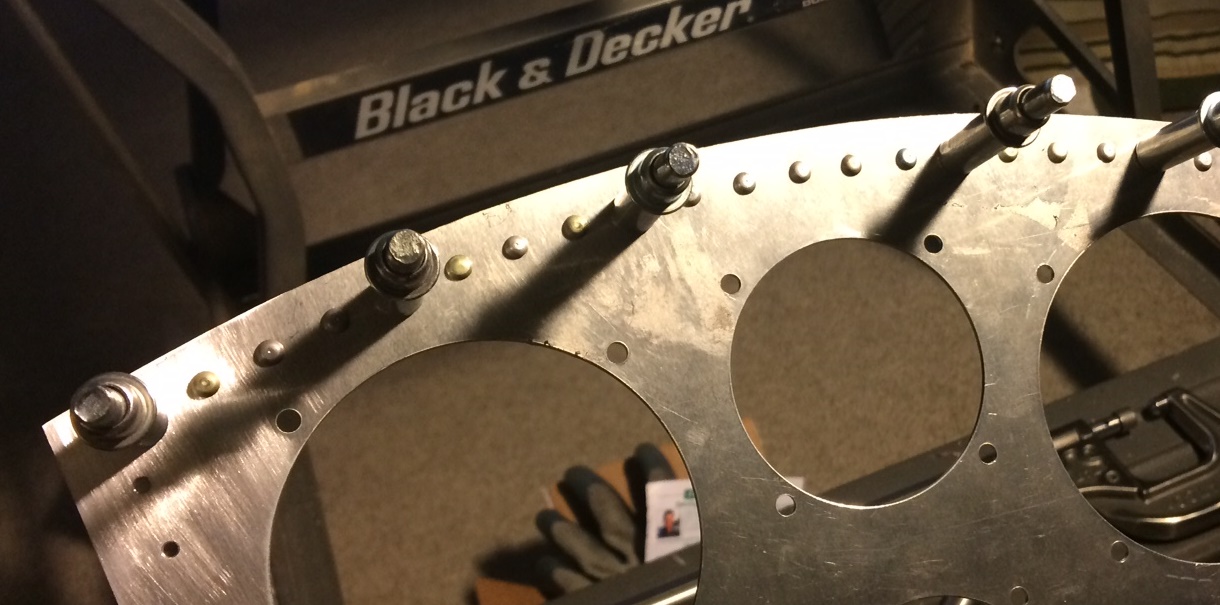
Here's a shot of some of that work... Fland in the front I have an anchor nut plate in every hole. The one just behind it... every other hole.
Click on image for close-up.
March 30 and 31, 2016 More... more...
more... riveting
More, more, more... reminds me of a disco song from the 70's. (More... more... more... How do you like it? How do you like it? More... more... more...)
Yeah, anyways... Well... I'm putting more more more... time on the instrument panels. I've been riveting away at these things while either watching/listening to the boob tube or listening to my iPod (when there is nothing on tv and that seems to be the case more more more of the time). Gives me a chance to be up with the pup more.
99percent of the rivets I squeeze I'm happy with. The other 1percent I'll need to drill out and re-do (not a problem). But... it's a real pain in the ass with squeezing these; the rivets are so close to the sides of the flange that I'm not able to center the heads on the squeezer. Pressing the barrel of the rivet against the hole opening seems to help a lot.
Three more done... three more to go and then the re-do's.
April 1, 2016 More...
then just a little bit more.
The last three flanges for the instrument panels... riveted up and, well, I still need to re-do a few (not many) bad bad rivets.
Not sure how all of this will pan out; putting it all together. For the front pit, the curved section of the panel worked out to be every other rivet. For the rear pit... not so much. There's an even amount of holes which throws off having one centered on the top and it goes down-hill from there. I may need to put in a few more anchor nut plates on the rear pit's curved section just to make it look right.
I'll need to play around with the aluminum covering to see how many rivets and where they need to be... on a few test pieces.
Thinking this through (again), I still need to route out the back panels on each instrument panel (lighten them up and for the front one... it needs to be open or the gauges won't fit?).
April 2, 2016 Re-dos...
then just a little bit more.
Went back and drilled out a few of those bad bad rivets. No biggie... a number forty from the top... drill slowoy through the center of the head until it pops off... then drill down through the opening in the rivet and you're ready for re-riveting.
Not too many of those to do before I was back... to riveting them again; aka re-riveting.
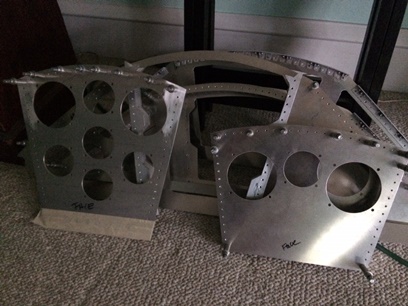
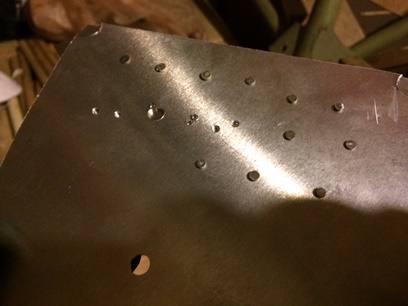
Before I rivet the flanges onto the panels of the instrument panels (really more like boxes), I wanted to lighten them up a bit. Also... give more access to the backs of the instruments. Kinda like what I did just behind the front panel's stand-offs... I wanted to open it up with large openings. If I need them a little stiffer I can always add small L-brackets to the uprights.
Spent the next hour drawing out the size of the openings then drilling the 1/2inch corner holes. Tomorrow... I'll connect the dots. Then file and sand smooth. THEN I can rivet on these flanges.
Click for close-up.
April 3 and 4, 2016 Filing...
I ain't got nuthin' else...
Spent the last two days cleaning up and filing the inside edges of the lightening holes... on both instrument panels.
No rocket science here... just putting in time with the file. Enjoyed my music to pass the time away.
Almost to the point of putting it all together... only things I need to do are; revit on flanges, test the alignment tool, use alignment tool on both caps for drilling bolt holes, fit and trim caps, design and create support for bottom of both instrument panels. Not much more to do, eh ?
April 5 and 6, 2016 A little too much time...
and nothing to show for it.
Over the past two nights I've spent way too much time thinking of how I am going to connect the panels to the plane; way too much time... Actually it was time well spent, but nothing to show for it.
Finally decided to just complete both of them and pull the trigger on how to do it AFTER they are finished. They're made to come apart and easily can be fitted up with a few flanges or brackets. Once they are complete... and maybe a little bit more done on fitting out the cockpits... it'll be a no-brainer.
April 7, 2016 Double flush...
and yeah, they were stinky at first...
Moving forward on getting the instrument panels finished... he continues to say...
A few things still need to be done to the panels before I can begin riveting on the flanges. Checked one of those items off the list tonight.
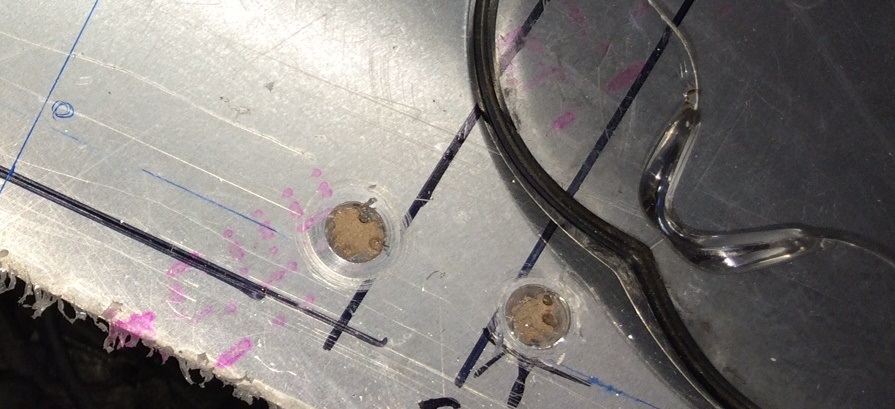
A few of the boo boo holes I made needed to be filled in. The consensus on the biplane forum was to double flush rivets and then shave down so that you won't see a rivet or a ring where the boo boo was.
First needed to under-counter sink each side of the offening hole so that the head of the rivet sticks up enough to shave it smooth without a trace... and the back-side of the hole so that I can shave it too and still have it held in place. Did a few test under-counter sinks with squeezed rivets and shaving. Got it to what I thought was a pretty good combination and started working on the "good" panels.
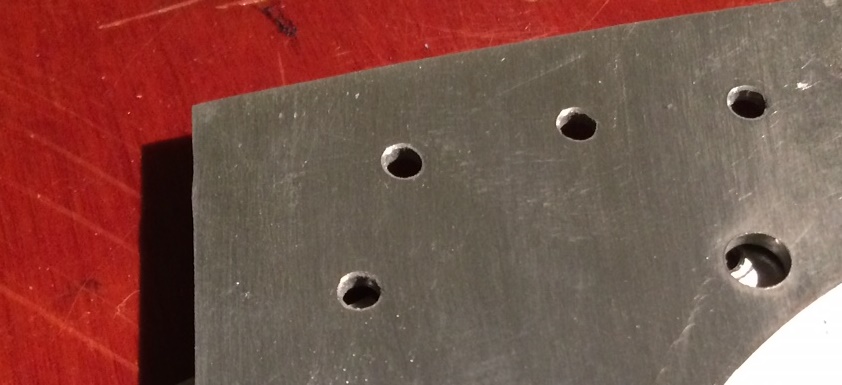
Three rivets is all I had to do. And I took my time doing them. Most of tonight's time was spent on my test pieces (which is okay with me...). Below is the finished product. Click on the photos for close-ups.
Test piece.
Good piece.
April 8, 2016 Finally...
the final prep work on the instrument panels ?
I'm finding that there are a few things still to do before I can rivet the flanges on...
Had four or five anchor nut plates that I still needed to re-rivet from when I drilled the bad bad rivets out... Needed to "cut" down about 80 rivets for all the rivets I would squeeze on the front-side panels (the ones in the back will be flush).
With all that completed, I took a look at the flanges and... a lot of the sides that would be riveted on the flanges still had the paper patterns glued to them (to protect the finish) when working on the adjacent leg of the flange. okay... so I spend a few hours (not logging this in as time, though) taking the patterns off. Long story why it took so long... but no need to tell it.
With the patterns off I see I still need to debur all those holes. Some of them so close to the anchor nut plates that I won't be able to use my debur-tool. Which means... I'll need to do something else to knock the extra metal off the holes (turns out I used a piece of the "L" flange, same size I was sanding, with sandpaper wrapped around it, to sand the metal filings off).
NOW I think I'm ready for some more riveting...
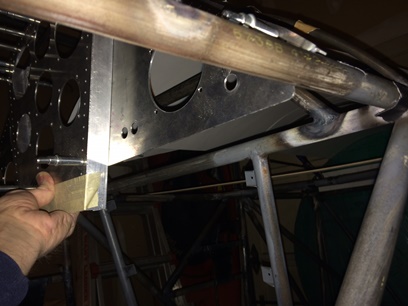
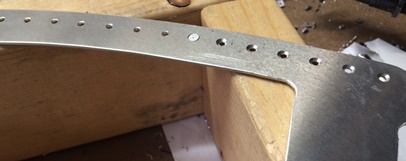
Flanges ready for the panels.
April 11, 2016 Finally...
no more prep work.
Got to the point that I've been waiting for all this time... putting it all together.
I have everything cut, drilled, deburred, sanded, punched, double-flushed, etc., that I needed to do before riveting them together to look like what I intended them to look like; instrument panels.
Now, it all comes down to this...
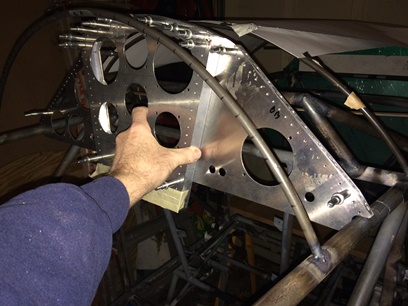
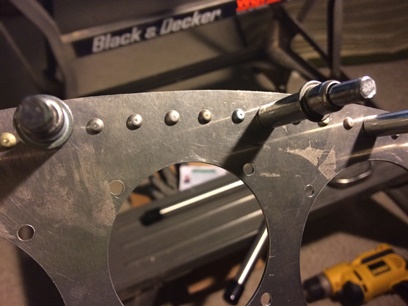
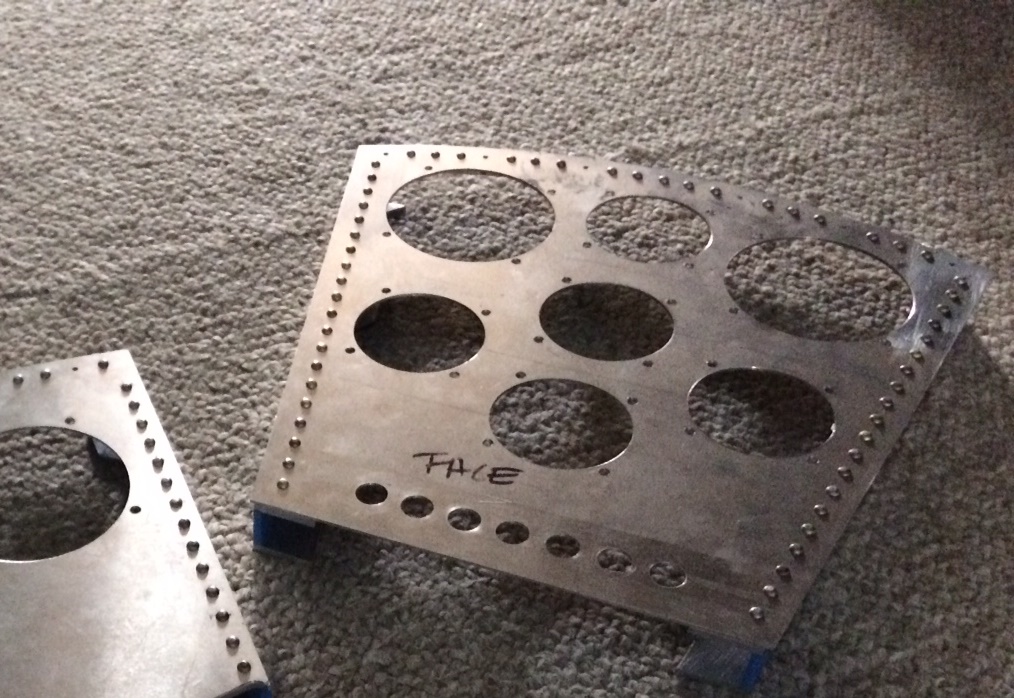
Start the long task of riveting... I worked on both top-front, curved flanges. Now they have been riveted to the face panels (at least all the ones that I can rivet). There are a lot of rivets for the panel, which is great 'cause the hole that I can't rivet will have pseudo rivets (rivets glued) to seem like they've been riveted, unless I can figure out a way to get behind them for the squeeze.
Click on above image for close-up.
April 14, 2016 It's not about me...
it's about Velasquez and the Phils.
Let me get through the necessaries of my blog.
Overthe past few days:
More riveting... and un-riveting.
Most of my rivets are beautiful... when I am able to put some side pressure on the hold, with the barrel of the rivet, when I squeeze. Or maybe it's just the hole ??? All are pretty much round and I make sure that they are all deburred and that the rivet heads are sitting flush with the piece that I'm riveting.
Something is up with the entire process... 'cause I'm going along real nice with a line of rivet squeezes and BAM ! out of the blue the f'in barrel bends... not squishes. WTF ? So I need to go back and drill those out only to have a pain in the ass time of riveting those SAME holes. WTF ? I'm getting through it though... with a lot more drilling out of bad bad rivets than I had planned on.
ok... Got all the rivets that I could squeeze, or at least the ones that I could only squeeze... Thought, what the heck... let me try one of those heads that I filed the side off of. And... damn if it didn't fit right into the place I needed it to fit. So, back to filing down rivets to use in the spaces I thought I couldn't reach. I'm real happy about having those rivets squeezed and not glued.
And more than Oh by the way...
Important date in Phillies history. When Vince Velasquez (a pitcher we received in trade for Giles going to the Astros) pitched tonight... 1. He pitched a complete game, 2. Velasquez's 16 strikeouts were the most in a shutout by a Phillies pitcher since Art Mahaffey had 17 on April 23, 1961., 3. The only other Phillies pitcher with 15-plus strikeouts and no walks in a game: Curt Schilling on Sept. 1, 1997, against the Yankees (16 strikeouts), 4. Velasquez's 25 strikeouts are the most by a pitcher in his first two Phillies starts since at least 1913. And for the Philies ball club, this game was the third shut out in a row... and they haven't done that since 1954. I wasn't able to see the actual game (saw the re-play) 'casue it was a 1:30PM start.
April
15, 2016 It's more than
minimum standards...
That's
only the beginning.
As good as the Phillies did yesterday... today was another
story. Close to being shutout by the Nationals. Other than
Howard's homerun in the 9th... the Phils didn't put anything
on the board. Ended up being a 9 - 1 loss. Howard's homerun
hit ties him for 81st, along side Joe DiMaggio. Nice !
Back to working on the biplane, as I watch the Phils...
Started off by drilling out the bad bad rivets from the night
before. Then... upstairs to watch the Phillies and begin riveting
again on the instrument panels. There's one helluva lot of
rivets for the size of these things. And all the more... when
I'm drilling them out and re-dooing them. But, I'm not here
to win any speed-build awards, I'm here to build a biplane
to the best of my abilities and to meet minimum standards
set by the FAA for building. But were trying for more than
minimum...
And so I continue to rivet... and sometimes drill out and
re-rivet.
And... of course, the picture I take has the rivet sitting
crooked.
April 16, 2016:
Uh... more riveting. Now it's flush riveting on the back panels. What more can I say...
April 17, 2016: Getting closer...
Uh repeat... more riveting. Still flush riveting on the back panels.
Finished with the flush riveting on the back side, or at least the ones I can squeeze. Glue the rest... I still figuring out how I'll be riveting on the panels to those 1inch "U" channels.
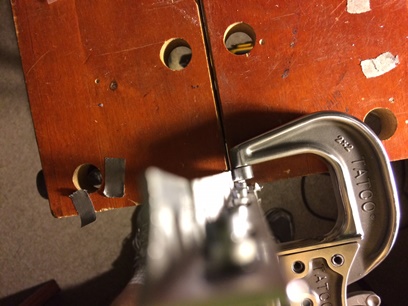
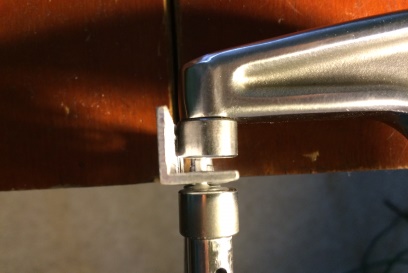
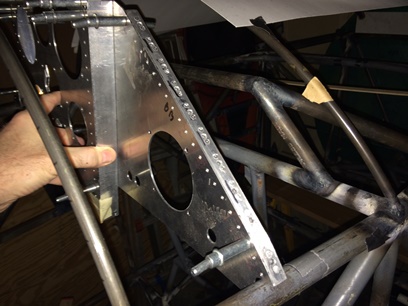
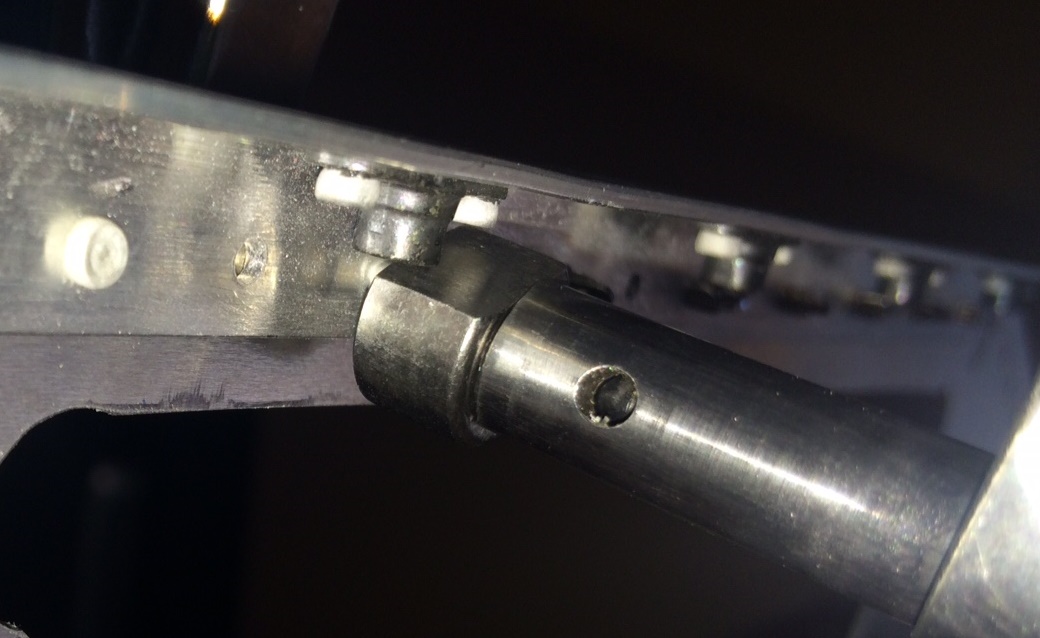
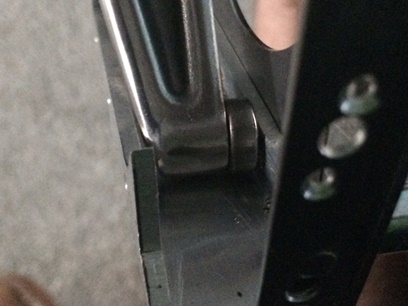
oh... I had meant to show how I got close to the anchor nut plates for a good squeeze. With a normal squeeze head I wouldn't have been able to get close enough... I used one of the heads that I had filed off one of the sides to get in there to do the job. Worked great !
Click on image for close-up.
April 18, 2016: TOO close... to squeeze
need the power tool now.
Finsihed with the rivets, that I can get to. The challenge now... riveting most of the rivets on the face panels (the ones that I have coming forward 1inch). There's no room between the "U" channel legs where I can get in there to squeeze.
Thought about it long and hard... trying to figure out a way to rivet those rivets. Apparently I was trying to avoid doing the abvious: use a bucking bar and a rivet gun.
For some reason I didn't want to rivet using a gun. Not sure why... and I know I'll be needing to do quite a few practice rivets before doing the real deal. Only thing now is to buy a rivet set for the Sioux rivet gun I own... and I'll be set to start practicing. woo hoo...
April 24, 2016: Air-powered... easy peasy...
at least some of the times.
Yesterday I pretty much cleaned up the garage workshop table. Didn't take me all day... but towards the end of the day when I was going to practice riveting with the power tool... I discovered that I needed to buy and then add oil to the tool gun. Eeeeesh !
Went out this morning to the Home Depot and picked up some air tool oil.
With the tool all oiled up, I was ready to practice some riveting. The first try I squeezed the trigger too much and the tool danced across the aluminum... lesson learned. Second and all consecutive test proved to work out nice. From what I could tell, I wasn't sure why I was so hesitant on using the air tool for riveting. Everyone of the test rivets looked MUCH better than most of my hand squeezed rivets. DAMN !
With about a dozen practices under my belt I clamped the bucking bar in the vice (which was moved from the basement workshop to the garage workshop) and started taking my time riveting the main panel of the rear cockpit onto the 1inch aluminum "C" stand-offs. Took me two hours, but when I was done it looked beautiful.
Took a break and watched some of the Philles game then came back and started working on the front pit's panel. As easy as the first one was... the second one was that much of a pain in the arse !!! The only thing I could think of was the fact that I didn't have a good view of the barrel of the rivet. I'd put it into position and square up as good as I could (without being able to see it) and start riveting... not so good on most of those rivets. Grant it, it isn't structural, but I want it to look as nice as I could (even though you won't see any of these). Decided to drill out three of them... two were good drill-outs the third wasn't; the third was a pain in the arse to drill. Decided to leave the rest alone... I didn't want to screw up these panels after all the work I had done on them already.
Although I did make a boo-boo:
With the exception of two "smiles" in the front panel (after as much precaution as I could take... it still danced on me)... all I need to do is glue on a five rivets on each panel. These are to fill the holes that I have in the face panels but unable to get a rivet squeezed into those spots.
They are pretty much done except for me adding a cover plate on the front panel (maybe a piece of birch ply).
April 28, 2016: A special tool...
for a special job.
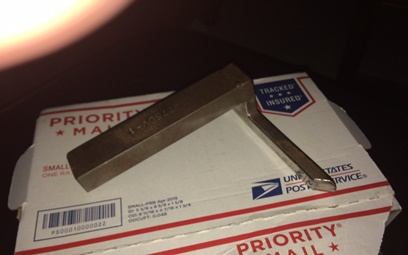
I haven't done anything on the instrument panels 'cause I needed a special shaped bucking bar: I've been waiting for this for a few days... actually showed up a day sooner than I thought it would. Now I can get to all those rivets on the back side of the front panel and get moving forward with wrapping the shell on both of the instrument panel boxes.
Story behind this... needed this odd shaped bucking bar to get where I needed to get on the back of the instrument panels. Went to my go-to-store, Aircraft Spruce. The bar I have now cost me approx. $15.00. This one... drumroll please... $76.00. I'll pay that amount if I need to... and I need to. But... let me check another source.
Thought it was a long-shot, since it was an ood shape. Went onto ebay and typed in "bucking bar". It came up with about 125 entries. Started scrolling through them and on the third page saw what I was looking for. The seller had three of them. And, get this, they were going for $10.00 each with a shipping charge of $6.95. The entry said that they were surplus and have some surface rust... No problemo when you are saving close to $65.00 for a one-time use tool. (I'll probably find other uses for it now that I have it).
Opened up the package that it was shipped in... nice looking tool. And, it does have some surface rust on it. Nothing that a little navel jelly won't take care of.