Mantua, New Jersey
Original Site:
September 2004
E-mail: usav8or@yahoo.com
The Radical Radial Driver's seat.
September 3, 2015 Repeat...
Repeat...
Repeat. Repeat. Repeat...
Tonight I bent the edges of the seat back insert and cut the seat back frame out of the .o32 5052. Same stuff I did over the past month only... I'm doing it a helluvalot faster.
If I hadn't screwed up drilling out those rivets from the first one I would have been VERY happy with the piece I made. Screwing up gives me the opportunity to make the new piece with a few changes that I discovered would make it a better seat back. Now both the back and front pits will have the benefit of me making the first one, the test piece.
September 4, 2015 More...
repeating.
It's going a whole lot faster the second time 'round. Guess the third one will be BLAZING fast !
Filed the inside edge of seat back frame for fit of seat back insert then set about match-drilling the holes in the insert to the frame. Deburred all holes. It's ready for riveting together.
Click image for larger image.
September 5, 2015 Cleaning up a few things...
done, if you don't count a little riveting to do.
It's Saturday... weather was marginal VFR, so I didn't go flying in one of those 172 rentals. Did what I needed to do around the house and then worked on the project for a few hours. Figured I'd save the riveting for envenings; rivet while watching tv.
While cleaning up a few things lying around the house earlier I saw the patterns for the heel rails and front cockpit flooring. Which made me think... work on the heel rails today.
Cut an fit the first one. Needed to modify the front edge of the heel rail with a notch to avoid hitting a bracket that holds the rudder pedal in position. Other than that one modification, the pattern I made for the Port heel rail worked great ! Flipped it and tried it on the Starboard side... fit just as nice.
Drew the pattern on the 6061 T6 alluminum for the second heel rail. Modified the pattern based on the first one I made... then cut, notched and filed it to shape.
All I need to do now is attach the L-shaped flanges onto them. Probably the 1/2inch L. The 3/4inch L-shaped flange is a little too large for this application. (Update: I just read a post in the biplane forum about the sides of the heel tray saying it should be around 1inch high. Guess I'll be using the 3/4inch L flange on the trays.)
September 8, 2015 On and off again...
heel rails to seat and maybe back again...
Should have put the mineral oil on the parts of the paper pattern that I wanted to remove before riveting the two-piece seat back together; the frame and the insert. Instead... I waited until I got home from work and create some dead time for myself.
Instead of wasting time just waiting for the mineral oil to work on the glue, I decided to work on the back heel rails; last fit before measuring up the L-channel for the sides. Measured and marked then got back on the seat back.
Thought that I'd be squeezing rivets in no time. Uhhhh, wrong.... After taking quite a bit of time peeling the pattern off the face of both pieces and cutting the plastic off the back I saw that there was a lot of deburring to do stil (apprently the paper and the plastic sort of covered over a lot of thpse rough edges. Another two hours... with clecos in place, it's ready for riveting.
September 9, 2015 Not being poetic, but...
I'm trying to make some ryme out of all it.
Not sure if there is a ryme or reason behind squeezing rivets. I'm thinking maybe it has a lot to do with the cut on the end of the barrel. And... even though I have a pretty good rivet cutter... some of the heads are slightly askew.
Anyways... I took my time squeezing rivets tonight. Took my time setting up the barrel and the squeezer to make sure it was centered. Took my time making sure that the throat of the sqeezer was parallel with the piece I was working on. Took my time to make sure that the the jaw was perpendicular to the piece also. Did all that and a lot of the squished parts were STILL off-centered. And... about a dozen and a half need to be drilled out and re-riveted.
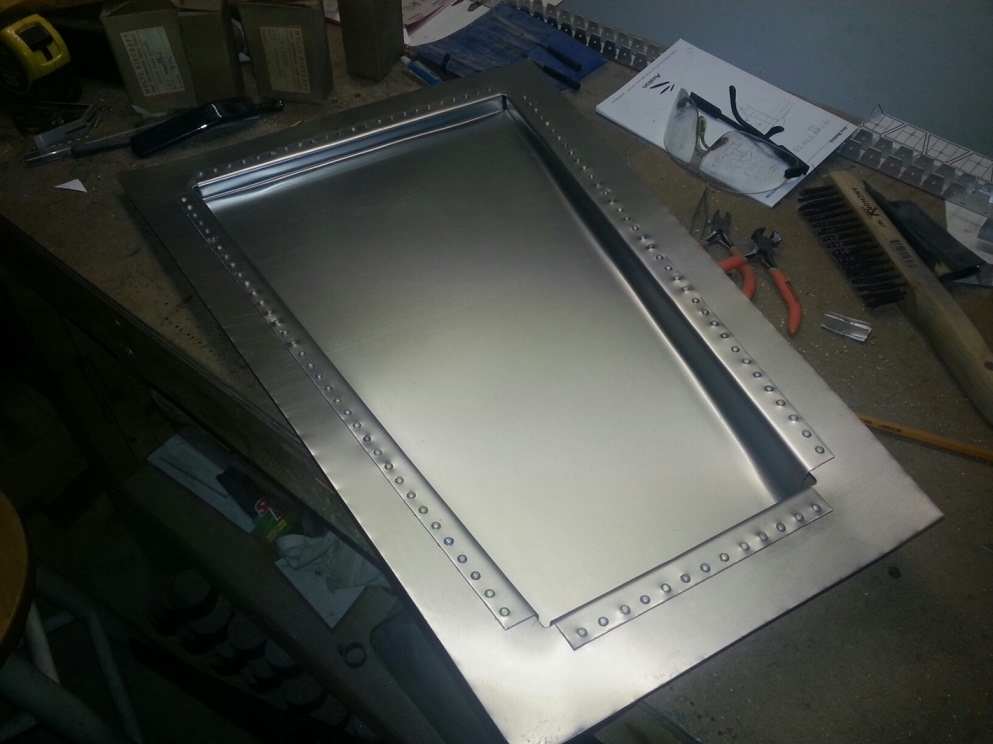
All-in-all it looks pretty damn good on the front side. I wouldn't be happy with some of those squeezes if it were to be structural. BUT... I have more than twice the amount of rivets I need for holding the two pieces together... blah blah blah.
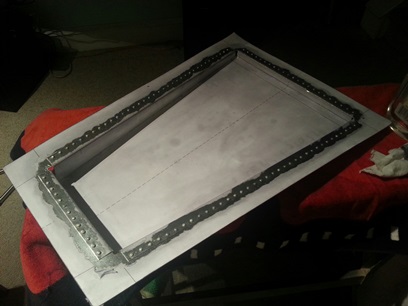
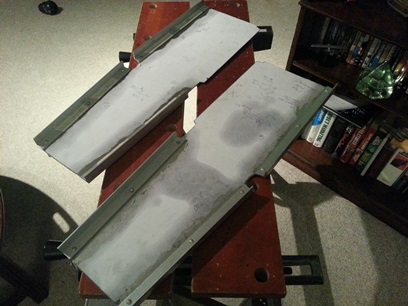
The below picture still has the paper pattern on it where I didn't rivet and it still needs cleaning up. It will probably, most likely, be painted ?
September 10 update:
Spent about 1/2hour cleaning up the glue off the seat back.
Seat back all cleaned up... well just about all. (click for larger image)
September 10, 2015 It's not always going to be...
so easy.
Before starting on the second seat back... (need to purchase the 3/32nd punch to remove the bad bad rivets from the first seat back) I decided to work on the heel rails. Still need to cut and fit up the edges/sides to them.
Not much to write home about. Other than... spending a little over two hours hacksawing the six pieces to fit. Followed that up with some filing. Still need to sand these to a fine finish. They're just about ready to be riveted on...
A few holes and rivets... and they're ready to fly.
September 12, 2015 Testing rivets...
which size and what length?
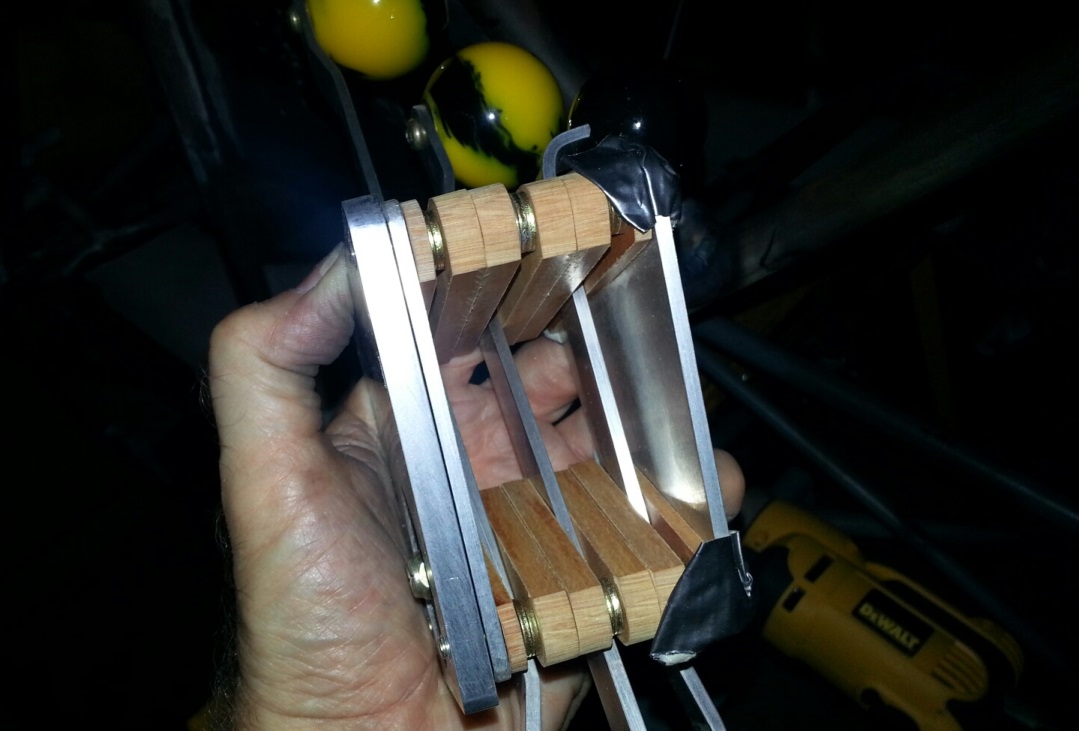
Work on the heel rails... using 1/8inch rivets to attach the flanges onto the plates. Different thickness material and different size rivets require different squeeze. The -7 when cut down just really didn't work. Found a 1/2pound of -5's and they work like a charm.
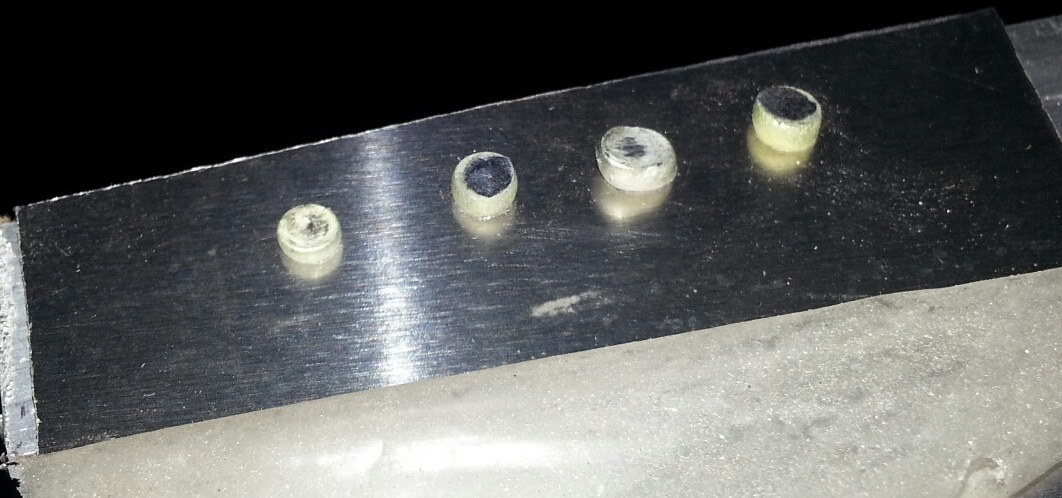
The following photo shows my trial of test two cut-down rivets, one that was a little too long (thus not having to cut it down), and one that was just shy of the required length. Going left to right; the second and forth rivets squishes are the cut-down rivets, the third is the too long rivet, and the first is the just a little shy rivet. Worked the best. I need to check the head on the squish 'cause it looks close to what's needed for a structual rivet (not needed in this application); the height of it is good it's just the head of it I need to check.
September 13, 2015 It's not always going to be...
so quick.
Work on the heel rails... again. Everything takes longer than you think it will, even if you don't screw things up. There's just so many steps in making a part... it all takes time.
Ya think you're ready to rivet the flanges onto the heel rails and.... 1. need to take off the pattern and clean off the glue, 2. take the time to make sure the flanges are in place then match drill them to the heel plates. THEN they're ready for riveting on.
The riveting went along great. Took my time with the squeezing; made the set then squeezed for the final squish. Still have four rivets to go. The squeezer couldn't reach the center ones and one of the inside end ones. Need to purchase a different 1/8inch rivet set; one with a deeper barrel on it so that the top part of the throat doesn't hit the top of the flange.
September 14, 2015 Flooring... heel rails...
whatever...
Did I say I was working on the heel rails ??? Well... not the heel rails per se but the thingies someone stands on at least; the passenger's flooring.
Trying to do the front flooring in two pieces and it's creating a little bit of a hassle cutting. Well... not a hassle, but it took some time hand cutting it; with the hacksaw AND by holding a hacksaw blade in my gloved-hand to rough cut the port-side half out of the larger sheet of 6061 T6.
Rough cut followed by a closer cut on the bandsaw. Drilled a few holes for a few relief areas to fit around the tubing; drilled the holes than cut the area out in between the holes. Got everything real close, and before spending the time to file to the lines I decided to try the piece out on both the port and starboard side.
Looks good...
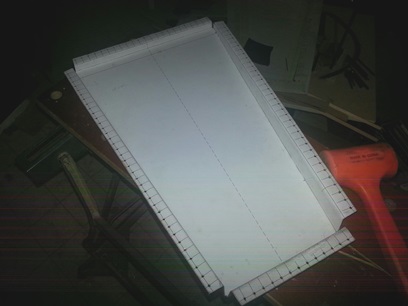
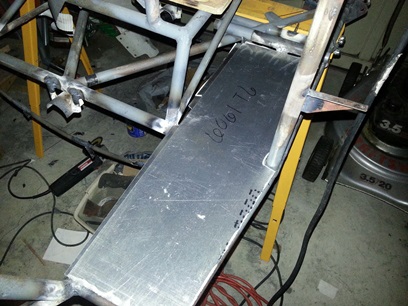
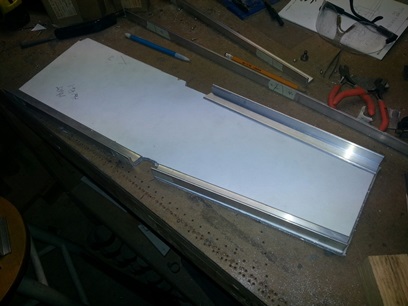
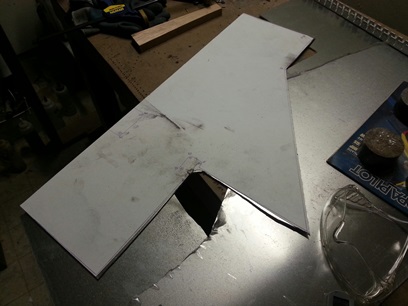
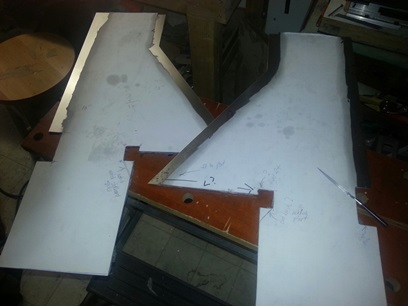
Rough cut port floor.
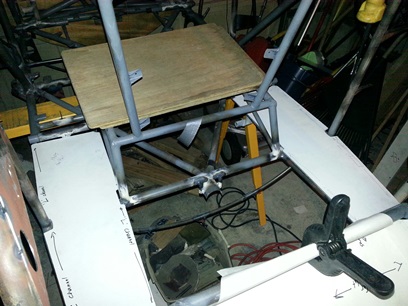
Test fit of port flooring.
Test fit of port flooring on starboard side (flipped).
September 15, 2015 Rail to Rail...
starboard tonight.
Starboard side heel rail tonight... match-drilled the flange to the plate, deburred, the squeezed a few rivets. Need to wait on the new lengths of rivet sets and new jaw for the squeezer (2" x 2") to reach the inner rivets and the two hard to reach inside-end rivets as mentioned in an earlier post.
Still a few more rivets to squeeze and paper pattern to
clean off.
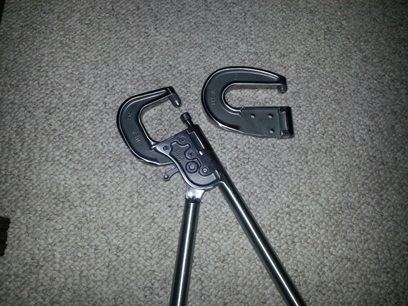
September 16, 2015 Jaws...
arrived today.
Above shark from flickr.
(click on image for photo credit)
Recieved the new squeezer jaw in the mail today; a 2" x 2" which should be the ticket to getting those hard to reach rivets squished.
Off the clock I changed out the jaws... was pretty easy. All I needed to do was knock out a few bushings, replace with new jaw then tap them back in. Tried the new jaw on the heel rails and they fit without a problem. Only had six rivets to squeeze so it went pretty quickly.
New jaw in place; 2" x 2".
Plenty of time to left tonight to work on the front floor. Traced the pattern on a piece of display board for the starboard side. Glued it on a piece of .o65 6061 T6 aluminum and rough cut to size.
Next work session I'll file to size, sand the edges smooth and start fitting up the flanges. I better get those anchor nuts ordered up for the firewall flange, or... I'll be left sitting without anything to do ???
Still need to clean paper pattern off of the flooring after I file to size.
Got to say, rivets that are the correct length out of the box squeeze uniform a lot easier than the skewed cut of a rivet cutter. These 1/8inch rivets squeezed so much easier than the 3/32nd rivets I had cut to size.
September 18, 2015 Thinking...
behind ?
Working towards finishing up the flooring and heel rails. A lot of work is going into something so simple looking as what I'll be sitting my feet on.
Finished up cutting the second front half out last session... tonight it was a matter of filing to the line. Took a little over an hour to do. Did a test fit on the fuselage again... and it's still tight getting in there; well, it's the vertical leg on the front seat that it needs to be twisted around. I may just trim that opening to open it up a bit more for easier installation.
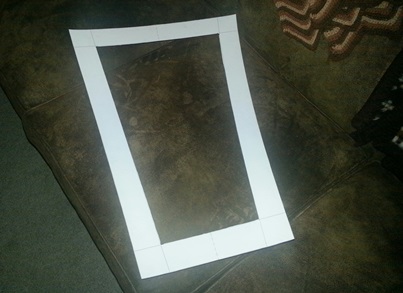
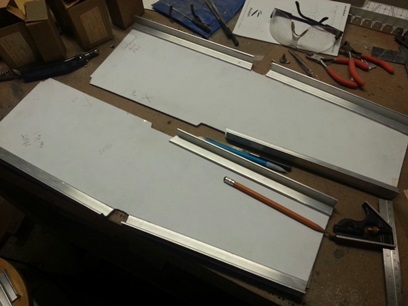
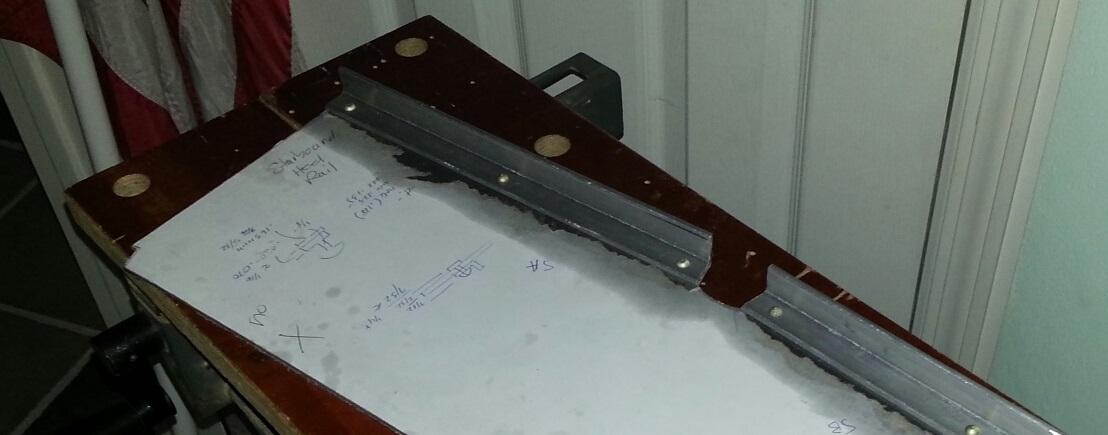
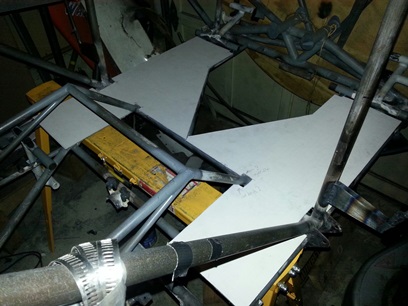
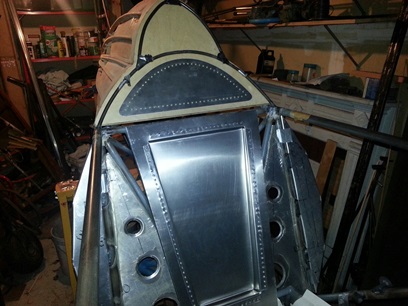
You need to look close at the photo below to see the heel rails and front flooring. The heel rails have just about all the pattern off of them (just about). The front flooring is white; they still have the paper pattern on them.
Heel rails and front flooring.
Click on image for close up.
I'm still learning... how far ahead does one need to thing ? Am I think ahead far enogh and just blowing it off saying... "I'll take care of that when the time come." Or... am I just not thinking it ALL the way through ???
Test fitting the heel rails and the front flooring in the cockpits... they fit real nice. AND, I'm happy with how they look. Still need to fit and attach the L flange on the front flooring, but I'm happy with the way they look so far. Only one problem... the bottom squish of the rivet hits the fuselage tubing. No way to avoid this unless I brought the L flange in an inch on either side. Is it really a problem or just something I need to deal with ? Small spacers between where they are bolted onto the tabs ? Maybe ?
First session - cleaned up the heel rails of paper pattern and glue then sealed them with that thin plastic carpet protection film. Brought them out to the project to put them in place and saw the two outer enclosures kinda hanging in place... but not exactly. For some reason I had to open up a notch on each one to hang correctly (not sure why I didn't do it back when). Decided to take care of those two enclosures before moving forward with anything else.
Spent the next two hours cutting the notches out of those pieces and then deburring them. Didn't realize how much slage was hanging on the ends of them until I looked closer. When I went to put them back in place I felt the edge of a few of the other enclosure pieces and felt the same metal lip on them. Looks like I have some work cut out for me on just cleaning them up.
Cleaned up heel rails are in place.
Just can't see them.
There's the heel rails. Well, at least a better picture.
Next...
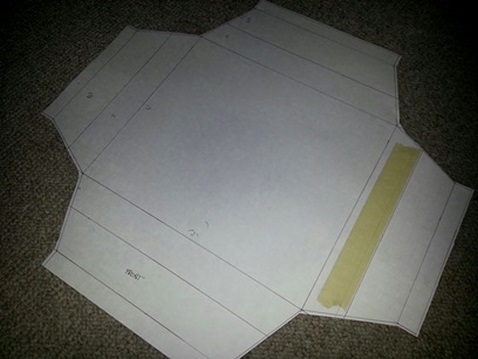
Had stuff to do... since it is a Saturday. Got it done and decided to prep for my next aluminum piece; one of the seat pans.
Wanted to just use the pattern that I made and tried on the fuselage to make the pattern I would glue to the aluminum... didn't really work out so great. Didn't work out so great 'cause I wrapped it around the tubing on the seats. Instead of pressing on regardless I decided to mark it all out on a piece of display board again and go from there. Looks good BUT... now looking at it (Sunday morning) I'm thinking that I should just draw the pattern on the pieces of aluminum. Still up in the air whether I'll do that or not.
I'm still learning... how far ahead does one need to thing ? Am I think ahead far enogh and just blowing it off saying... "I'll take care of that when the time come." Or... am I just not thinking it ALL the way through ???
Test fitting the heel rails and the front flooring in the cockpits... they fit real nice. AND, I'm happy with how they look. Still need to fit and attach the L flange on the front flooring, but I'm happy with the way they look so far. Only one problem... the bottom squish of the rivet hits the fuselage tubing. No way to avoid this unless I brought the L flange in an inch on either side. Is it really a problem or just something I need to deal with ? Small spacers between where they are bolted onto the tabs ? Maybe ?
September 20, 2015 Things...
you can and can not see...
Juggled a few different tasks today...
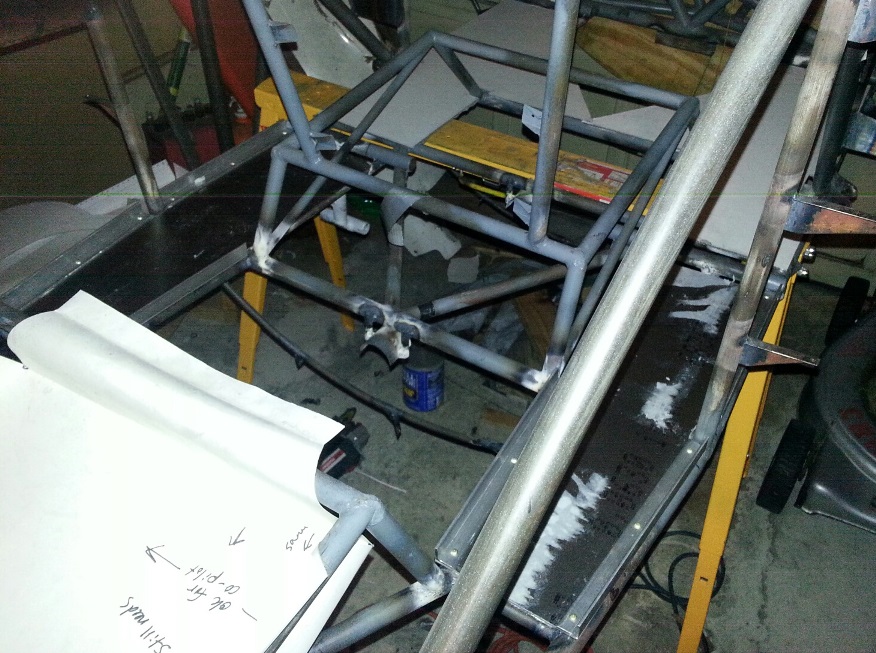
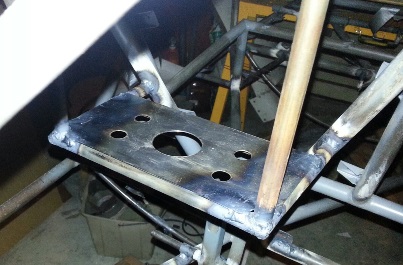
Started out cleaning off the patterns and the glue from the edges of the front flooring. Prepping it for the installation of the flanges. From there I went out to the garage work shop to weld on the two throttle brackets and the shelf for the battery tray. Had one helluva time with the shelf... I tacked the same corner a little high twice and had to cut it off and grind it down so that it would lay flat (took more time than I would have liked to have taken on it). Finished off today with deburring and notching the two front floors; notched both sides so that they would slide into place easier (notched around where they slid around the forward legs on the seat), and then made the notch where both points meet right in front of the seats.
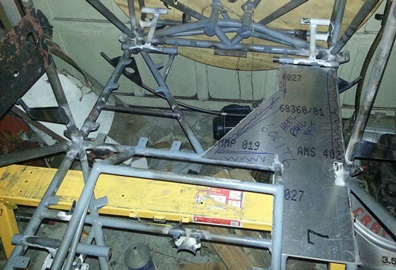
Cleaned and ready for flanges. (see)
Battery shelf welded up. (can not see)
Notched the points on the front flooring. (see)
Click for close up.
I'm still learning... how far ahead does one need to thing ? Am I think ahead far enogh and just blowing it off saying... "I'll take care of that when the time come." Or... am I just not thinking it ALL the way through ???
Test fitting the heel rails and the front flooring in the cockpits... they fit real nice. AND, I'm happy with how they look. Still need to fit and attach the L flange on the front flooring, but I'm happy with the way they look so far. Only one problem... the bottom squish of the rivet hits the fuselage tubing. No way to avoid this unless I brought the L flange in an inch on either side. Is it really a problem or just something I need to deal with ? Small spacers between where they are bolted onto the tabs ? Maybe ?
September 21, 2015 Workin' on stuff...
thats not workin' so much...
Spent a lot of time looking at and not liking how the throttle quad mounts are looking. Kinda not as flat as I had hopeed and the holes, although match-drilled... the bottoms (or the tops) were off centered ??? WTH ?
Before starting all that looking I needed to put together one of the throttle quads I had. Had taken it apart so that I could use it for match-drilling the mounts. It's been so long... I'm forgetting what goes where and how many washer? Another... WTH ?
Getting back to the mounts...
Tried fixing it with enlarged lower holes... not really happy with that. Worked great... but is it the right thing to do? The upper two holes fit perfect. (I'm still thinking what the hell???) And it comes down to "What the hell would someone think when they go to restore this bird later on down the road?" It keeps me on the straight and narrow. I don't WANT to grind this off but I know I need to. So, tonight, while it was a waste of time to some degree... wasn't.
AGAIN... I'm thinking all that time I've put into it thus far and now I'm backing out of it... "throwing away" all that time. Shit happens.
Here's what it looks like... but won't be looking like. But now that I'm looking at it... maybe ? naaaaaaa....
Click on image for close up.
September 22, 2015 Makin'...
the throttles work...
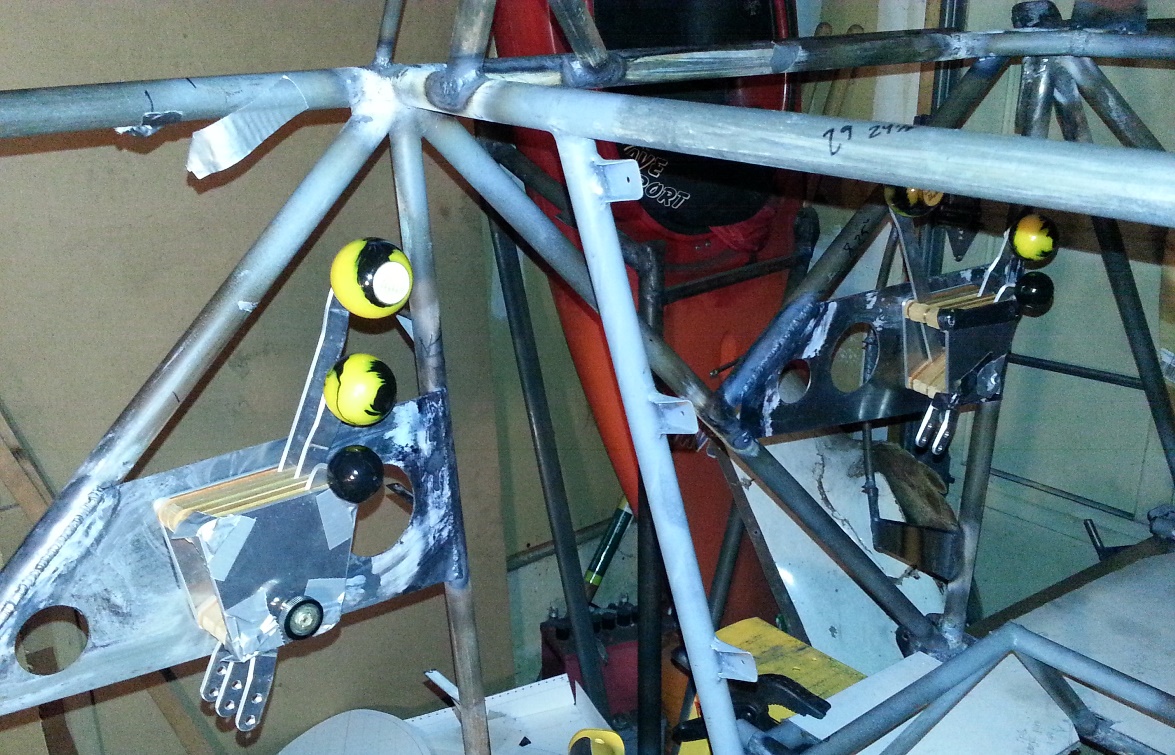
Playing with the throttles yesterday I confirmed that I need to make spacers to get the throttles away from the fuselage sides. As they are now... because of how they are made, the levers are bent slightly towards the port side. And because of that fact... they're hitting the upper, port longeron. I thought of this possibility a while back and ordered a length of aluminum bar for that purpose.
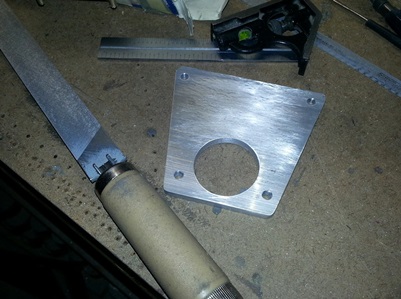
Was just a matter of making sure that the throttle's back plate is facing the correct way before tracing it on the aluminum. Clamped it to the drill press... drilled the four holes for mounting the plate (I think that's one thing that messed me up with the skewed mounting holes... the holes in the throttle's plates and hardware are slightly larger than 3/16inch, I made the mounting holes in the mounting plates 3/16inch... if I'm drilling each of the 3/16inch holes a little to the outside of each of those alignment holes I wouldn't be able to align the bolts into the mounting plate. YEAH... didn't think you followed that.)
Anyways... used the larger drill bit to drill the holes into the aluminum plate and used a hole saw to cut the hole where the center friction screw goes (the one on the pilot's throttle has an anchor nut that needed a larger opening so I decided to make them identical). The larger hole from the hole saw only gave about 1/8inch of metal along the bottom edge so I extended the bottom another 1/4inch.
Made the cuts to make the outer shape, and filed and sanded the first one to size.
September 23, 2015 BACK (get it???) to makin'...
more seat parts...
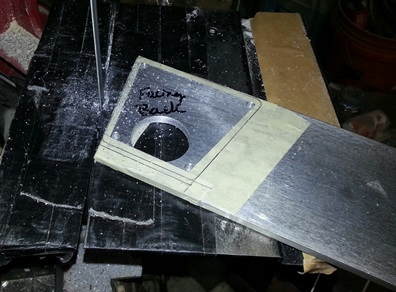
What's this.... ? The forth seat back insert that I've cut out ? Hopefully the last one for a while.
Andrea brought over the CAD print she had printed out at their place (thankyouverymuch) and tonight I cut it out and glued it up and snipped it out of the aluminum sheet. Still needs to be filed to the line and drilled and bent and riveted.